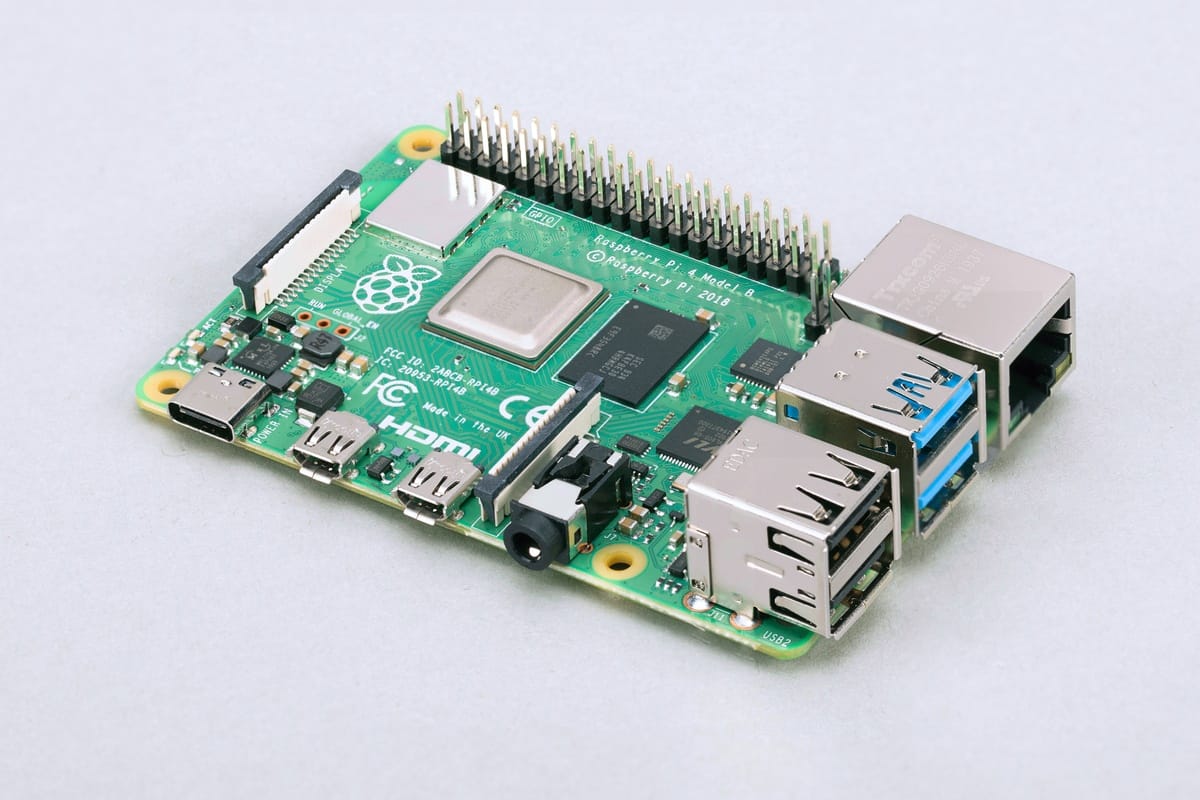
The Raspberry Pi is a single board computer that numbers 4 revisions and a minimalistic zero variant. It is a popular choice for different projects because of its small size, efficient power consumption, processing speed and it being a full Linux based computer.
When I started my project to create a robot, I had only a vague idea of the required computer hardware. Reading about other robot projects, Arduino and Raspberry Pi are mentioned. Both are important computers, but for very different purposes. In my microcontroller blog series, I want to investigate Arduino, Raspberry PI, their hardware functions and connection options.
When I started my project to create a robot, I had only a vague idea of the required computer hardware. Reading about other robot projects, Arduino and Raspberry Pi are mentioned. Both are important computers, but for very different purposes.
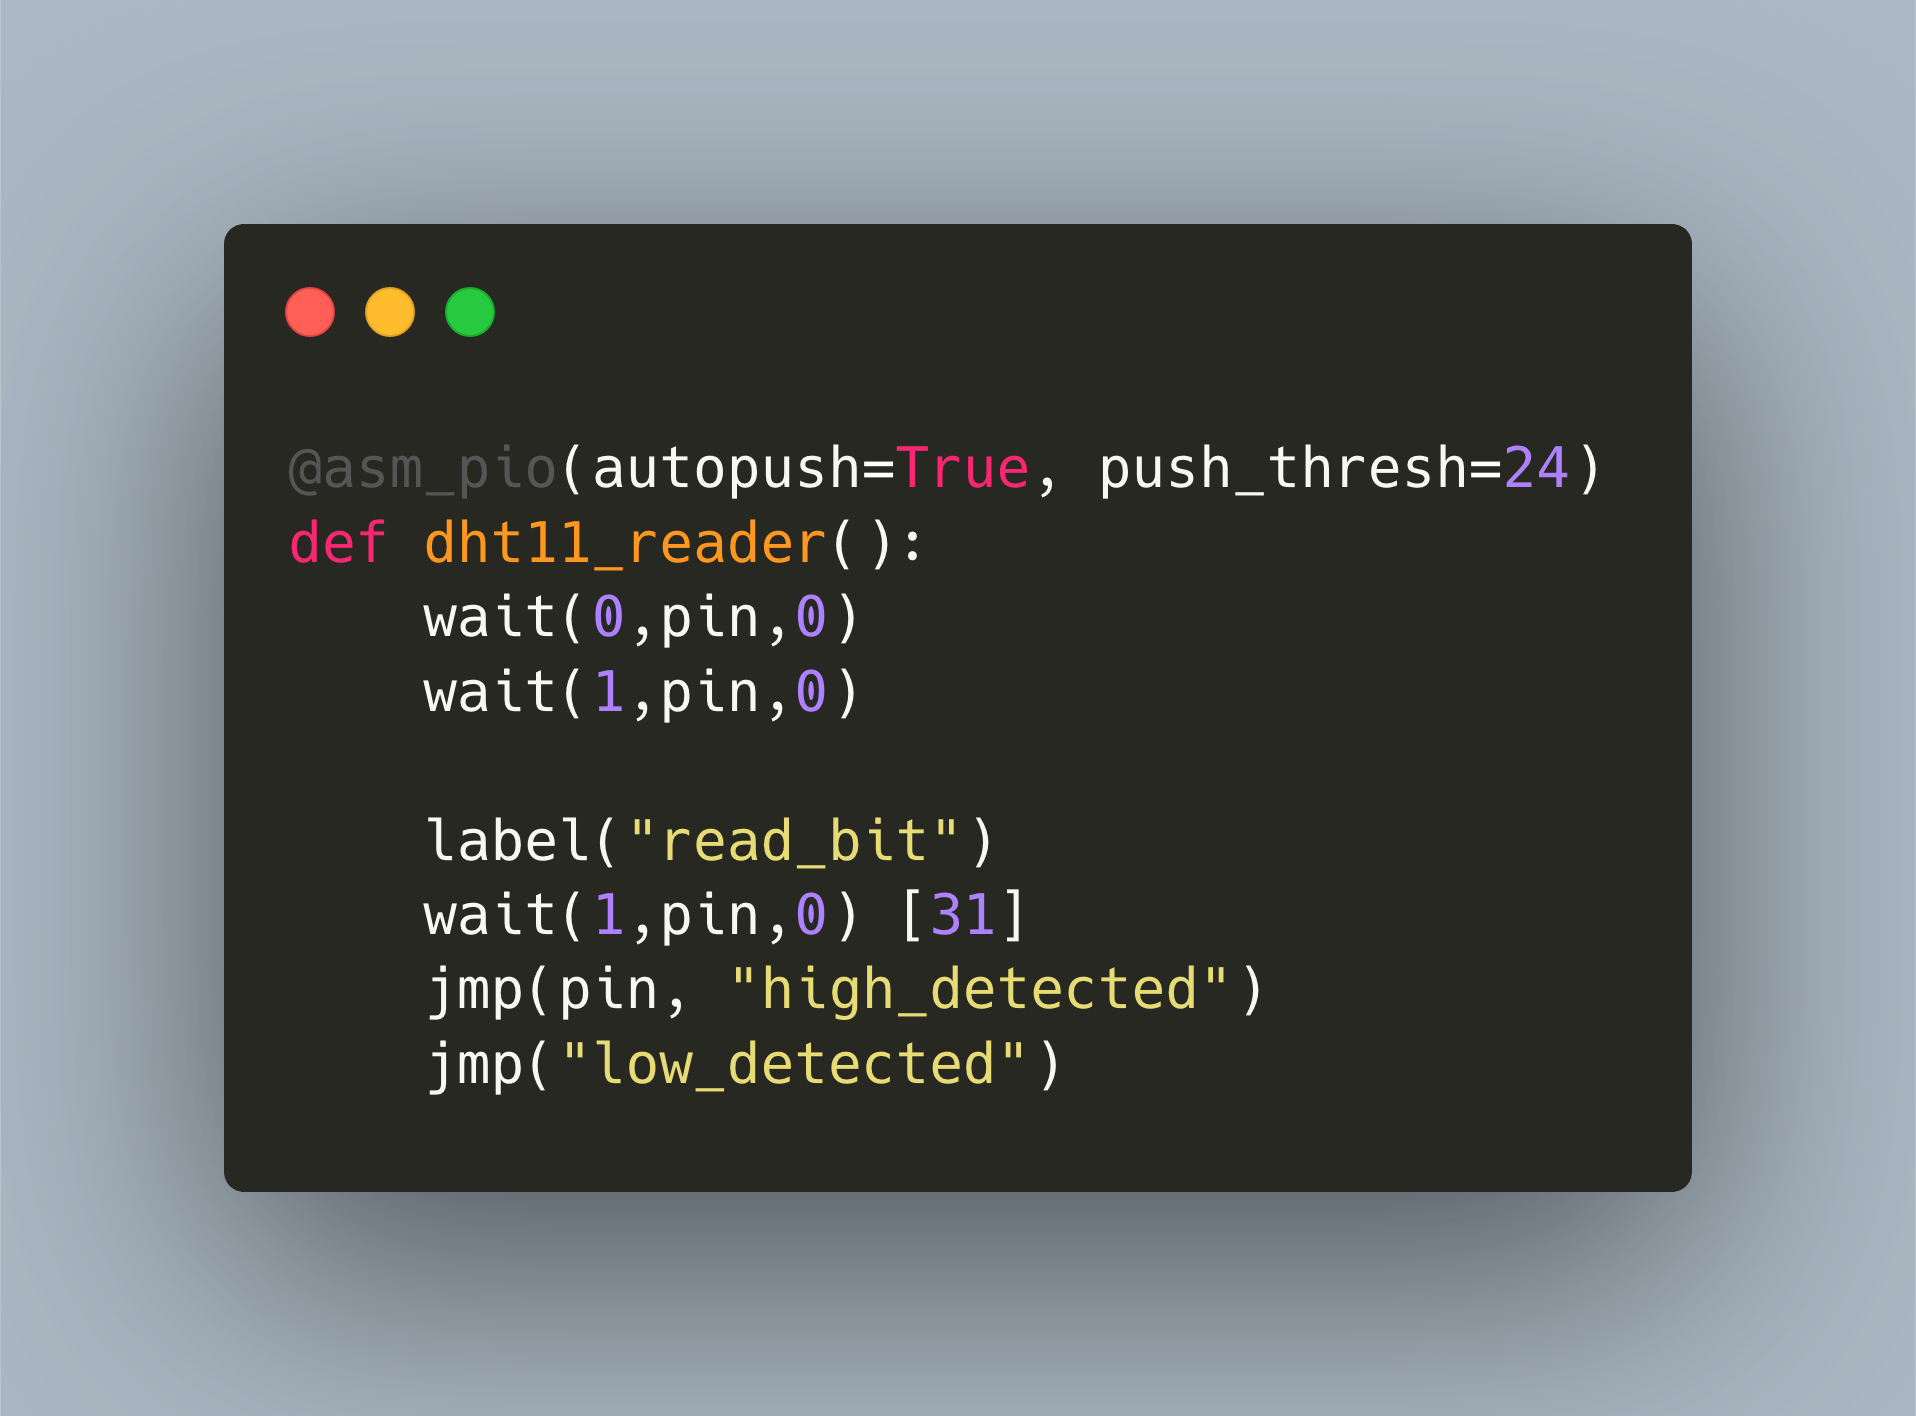
The Raspberry Pico, or shorthand Pico, is a new microcontroller from the Raspberry Pi foundation. It provides a dual core ARM processor, 2MB of flash memory, and 26 GPIO pins. You can program the Pico with either a C/C++ SDK or MicroPython. I became fascinated by this device and started to develop a library for reading the DHT11 temperature sensor. However, to get the exact timing requirements of the proprietary, 1-wire requirement right, we need to use the PIO subsystem.
The Raspberry Pico, or shorthand Pico, is a new microcontroller from the Raspberry Pi foundation. When released early 2021, two frameworks were offered: native C/C++ SDK, and a MicroPython port. About half a year later, two additions became stable: The Arduino framework, a wrapper of the C-SDK in which you work with Arduino commands, and CircuitPython, another embedded version of Python. This article is a comprehensive summary of all available frameworks. You will learn about installation, features, supporting editors and see a blinking LED example for each framework.
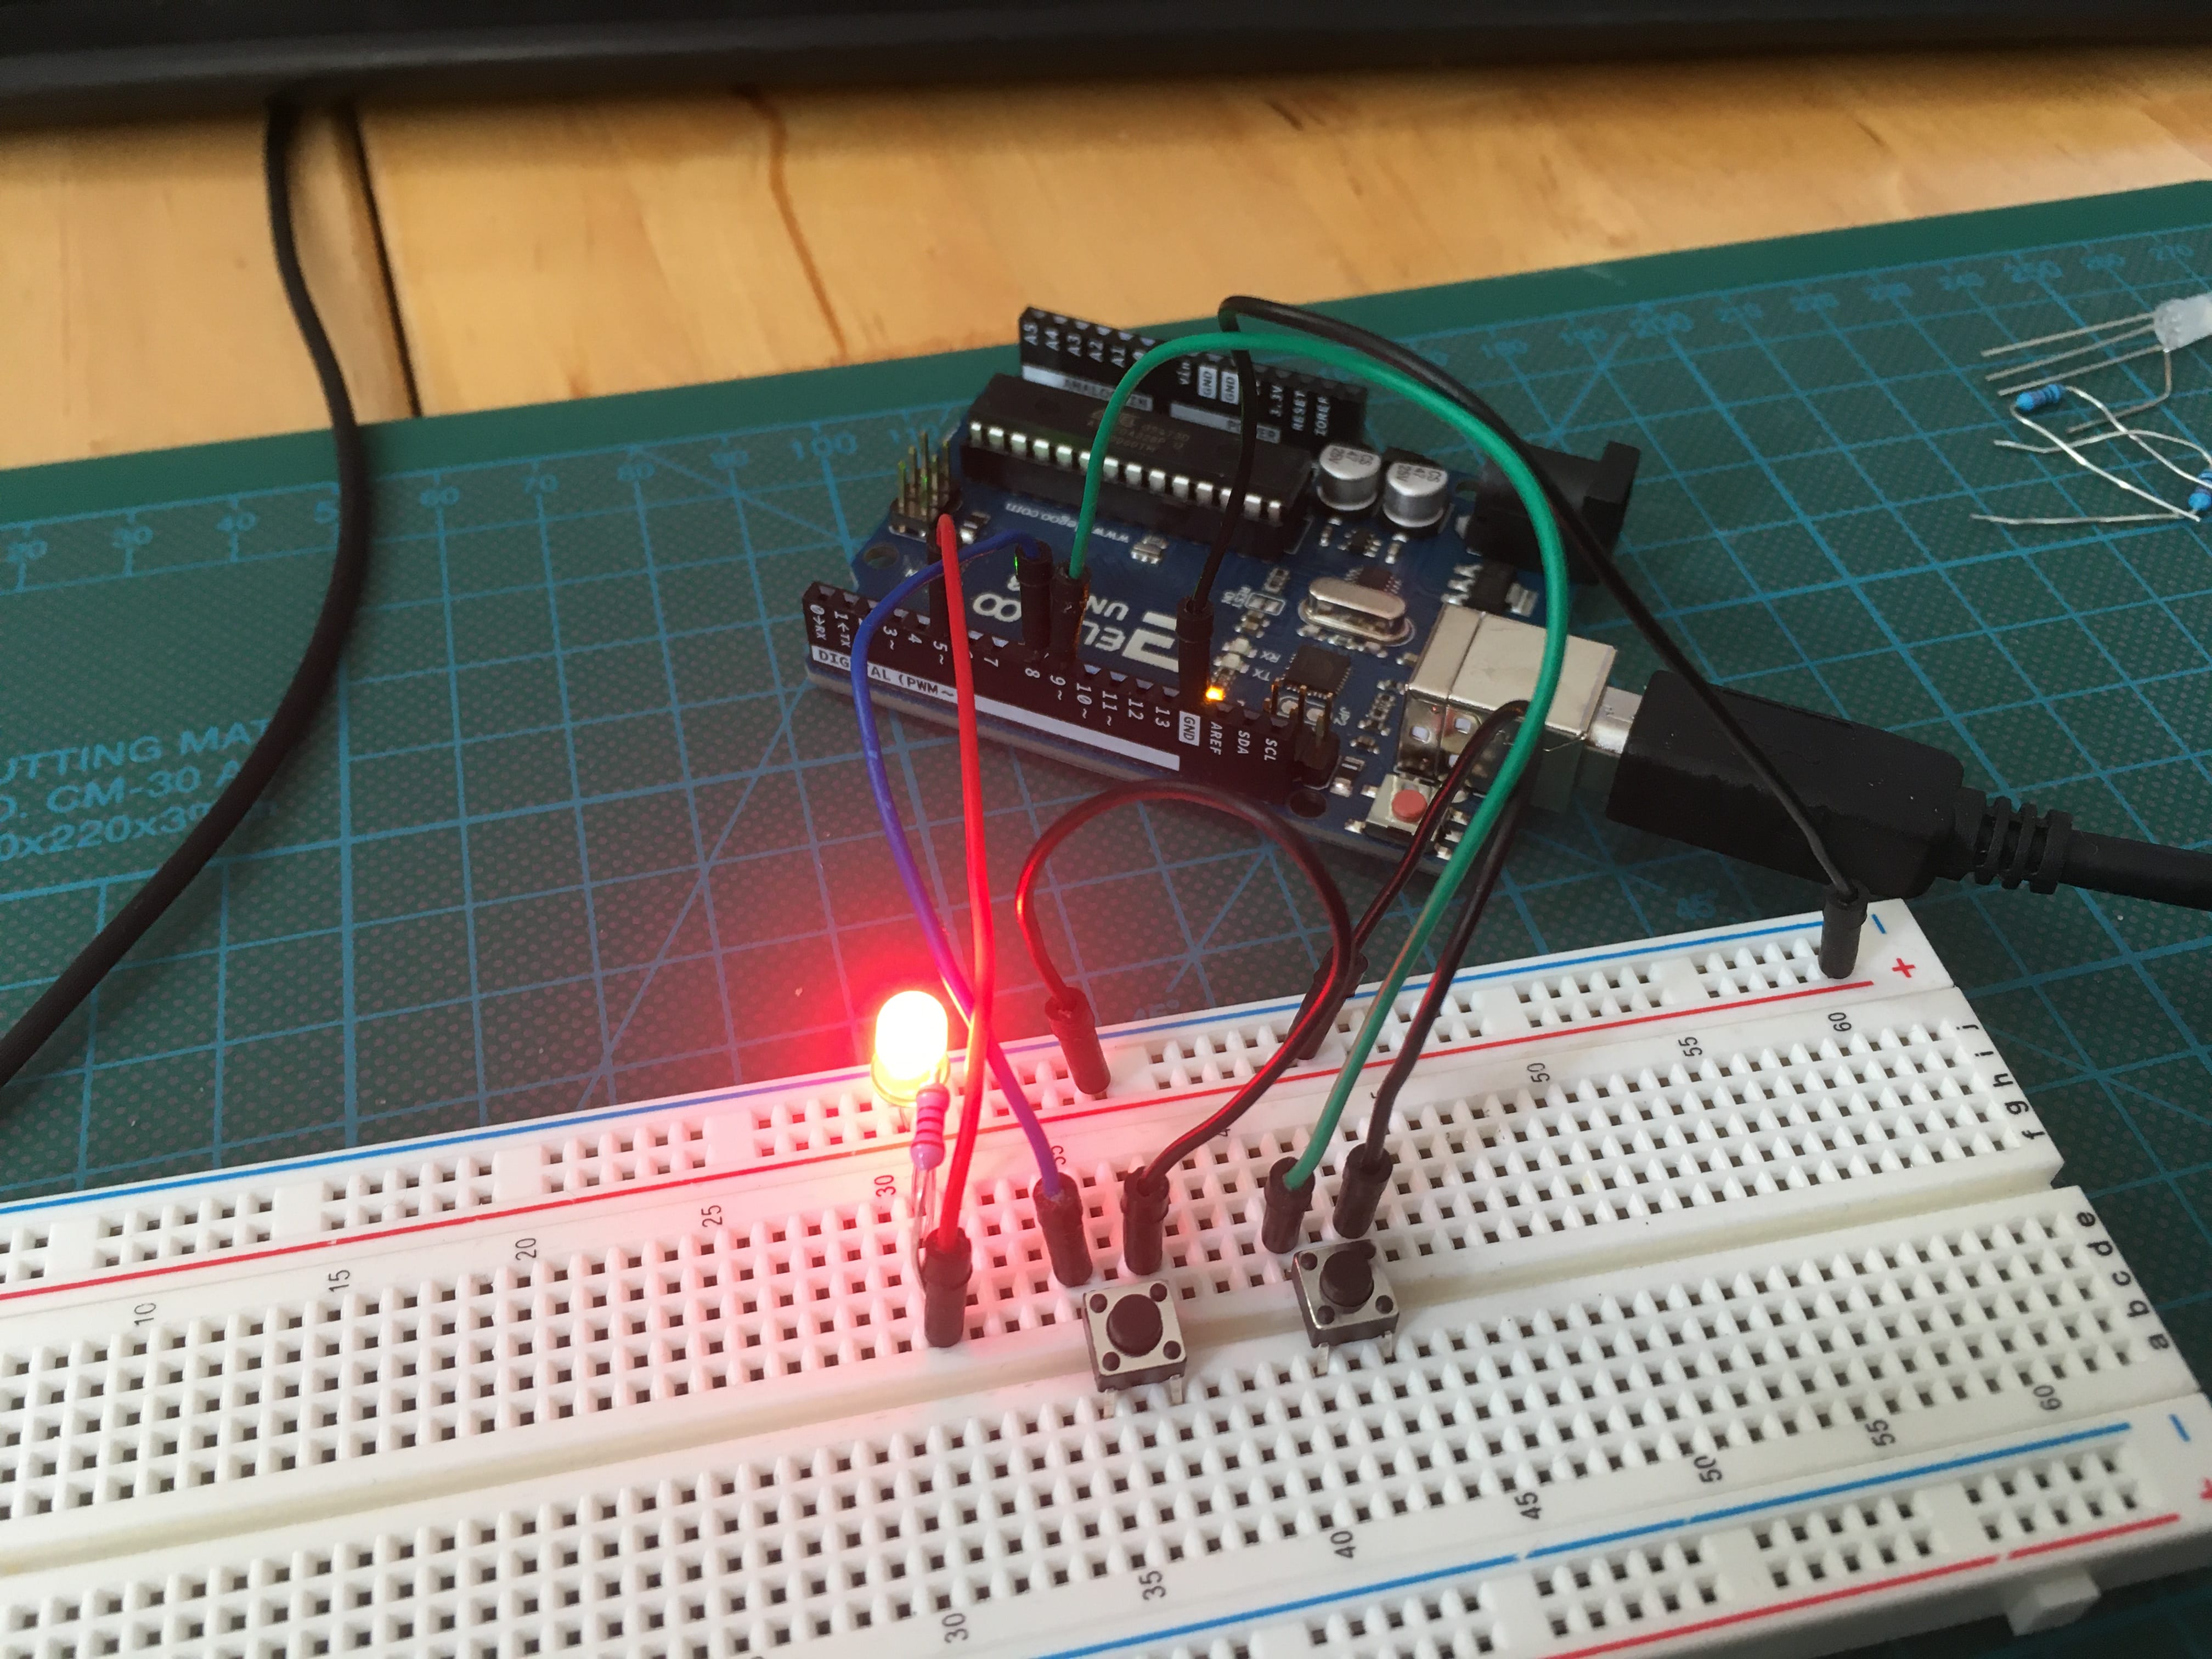
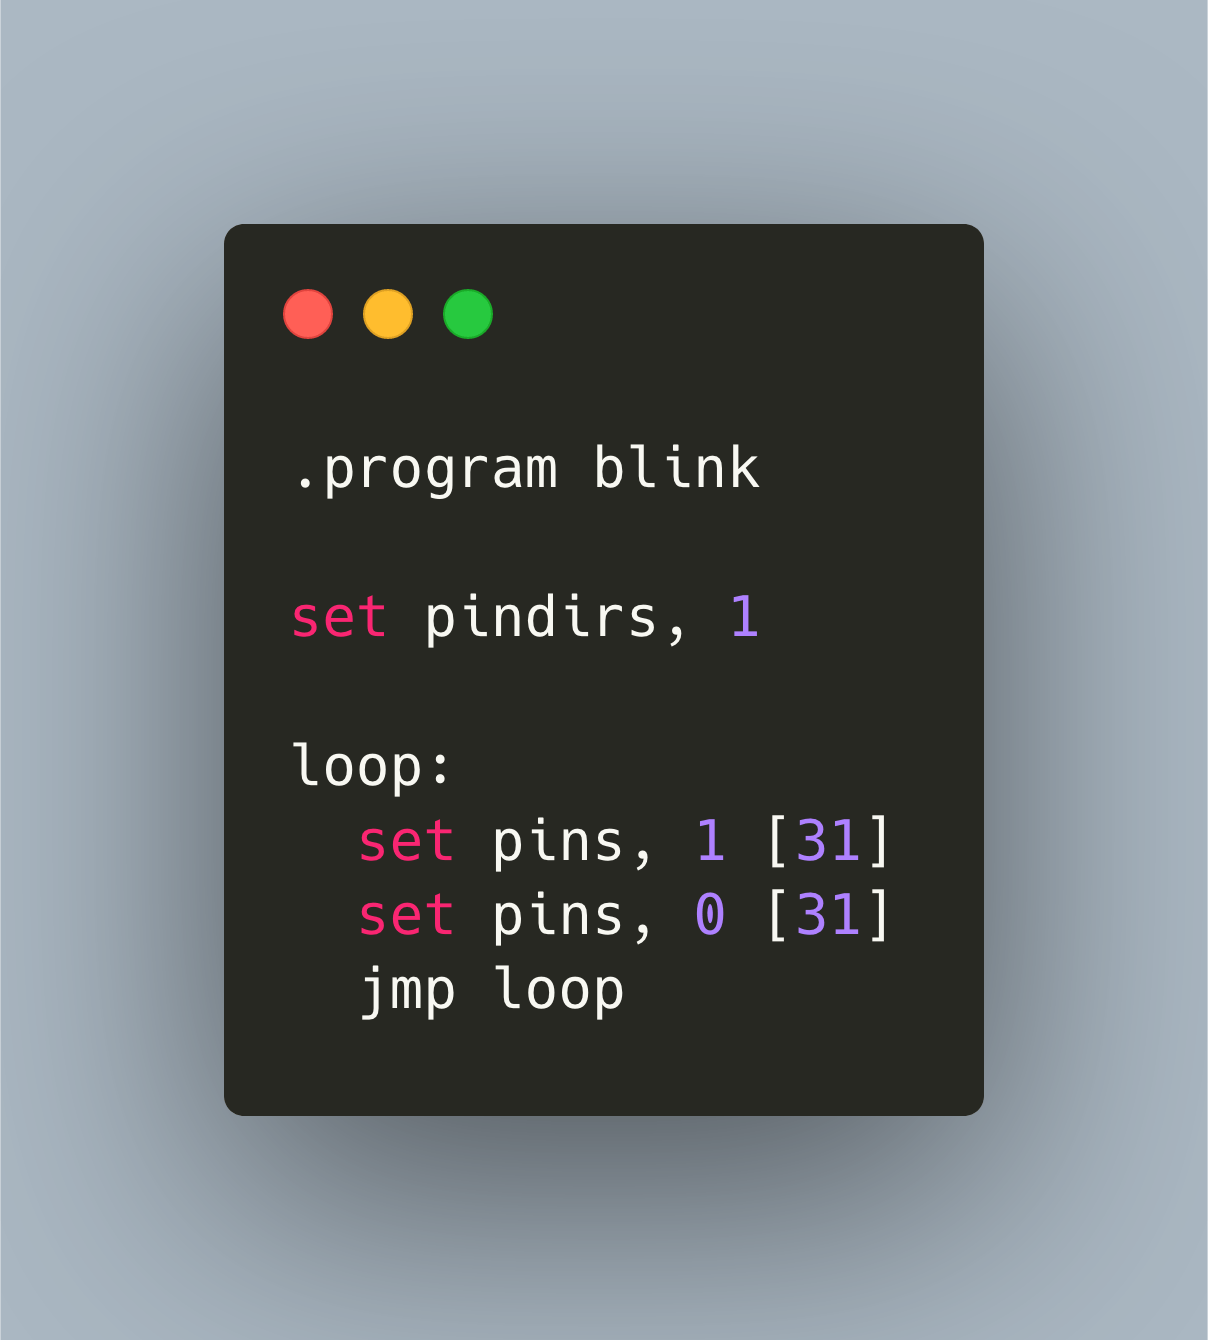
In Microcontroller programming, interfacing with other hardware can be either very simple or very challenging. If the other hardware, e.g. a sensor, supports standard bus systems like I2C, SPI or UART, you just wire them up and read/write data via the implemented bus system. If you need to connect other hardware, you are forced to implement precise timing signals, sending and receiving data with multiple pins, and interpret the signals.
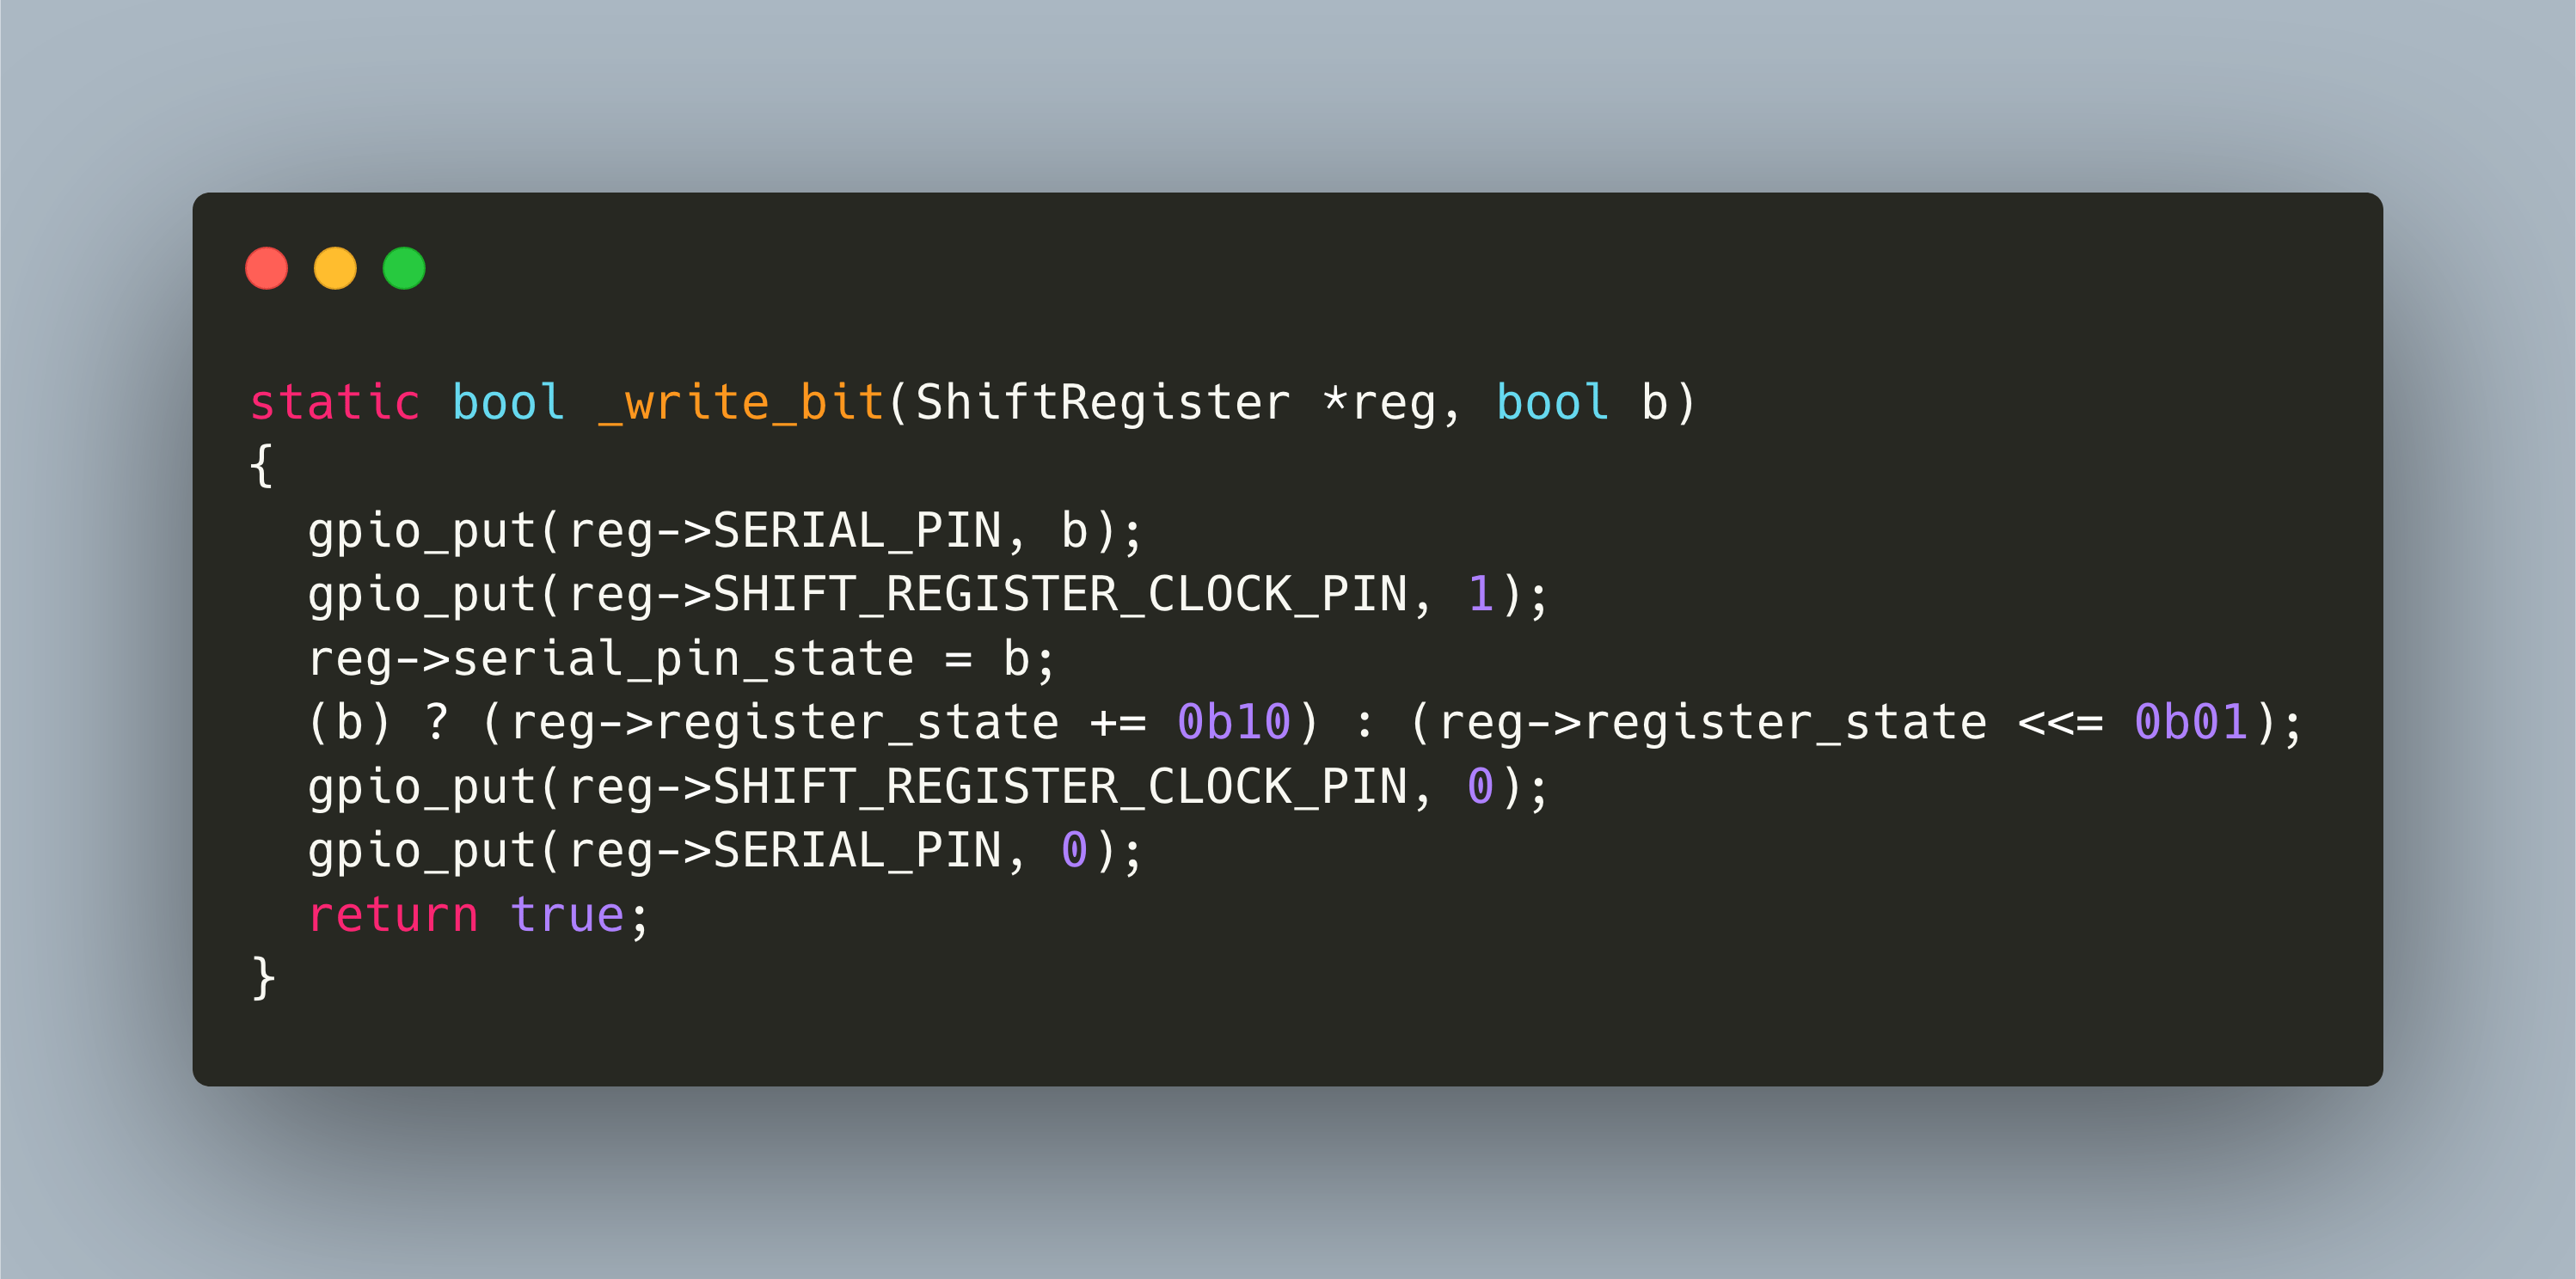
The Raspberry Pico, or shorthand Pico, is a new microcontroller from the Raspberry Pi foundation. It provides a dual core ARM processor, 2MB of flash memory, and 26 GPIO pins. You can program the Pico with either a C/C++ SDK or MicroPython. I became fascinated by this device and started to develop a library for controlling a shift register, specifically the HC595N shift register. To get a better grip on the Pico C SDK, I looked for another sensor for which I could develop a library, and found the DHT11 temperature sensor.
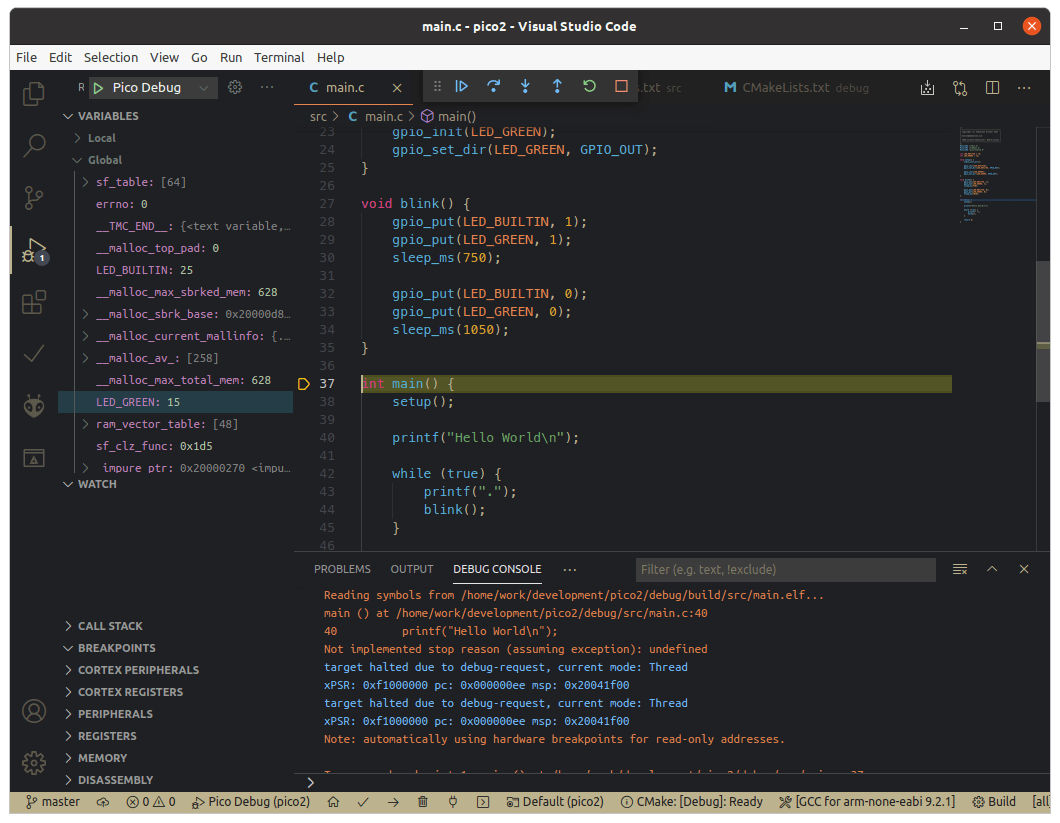
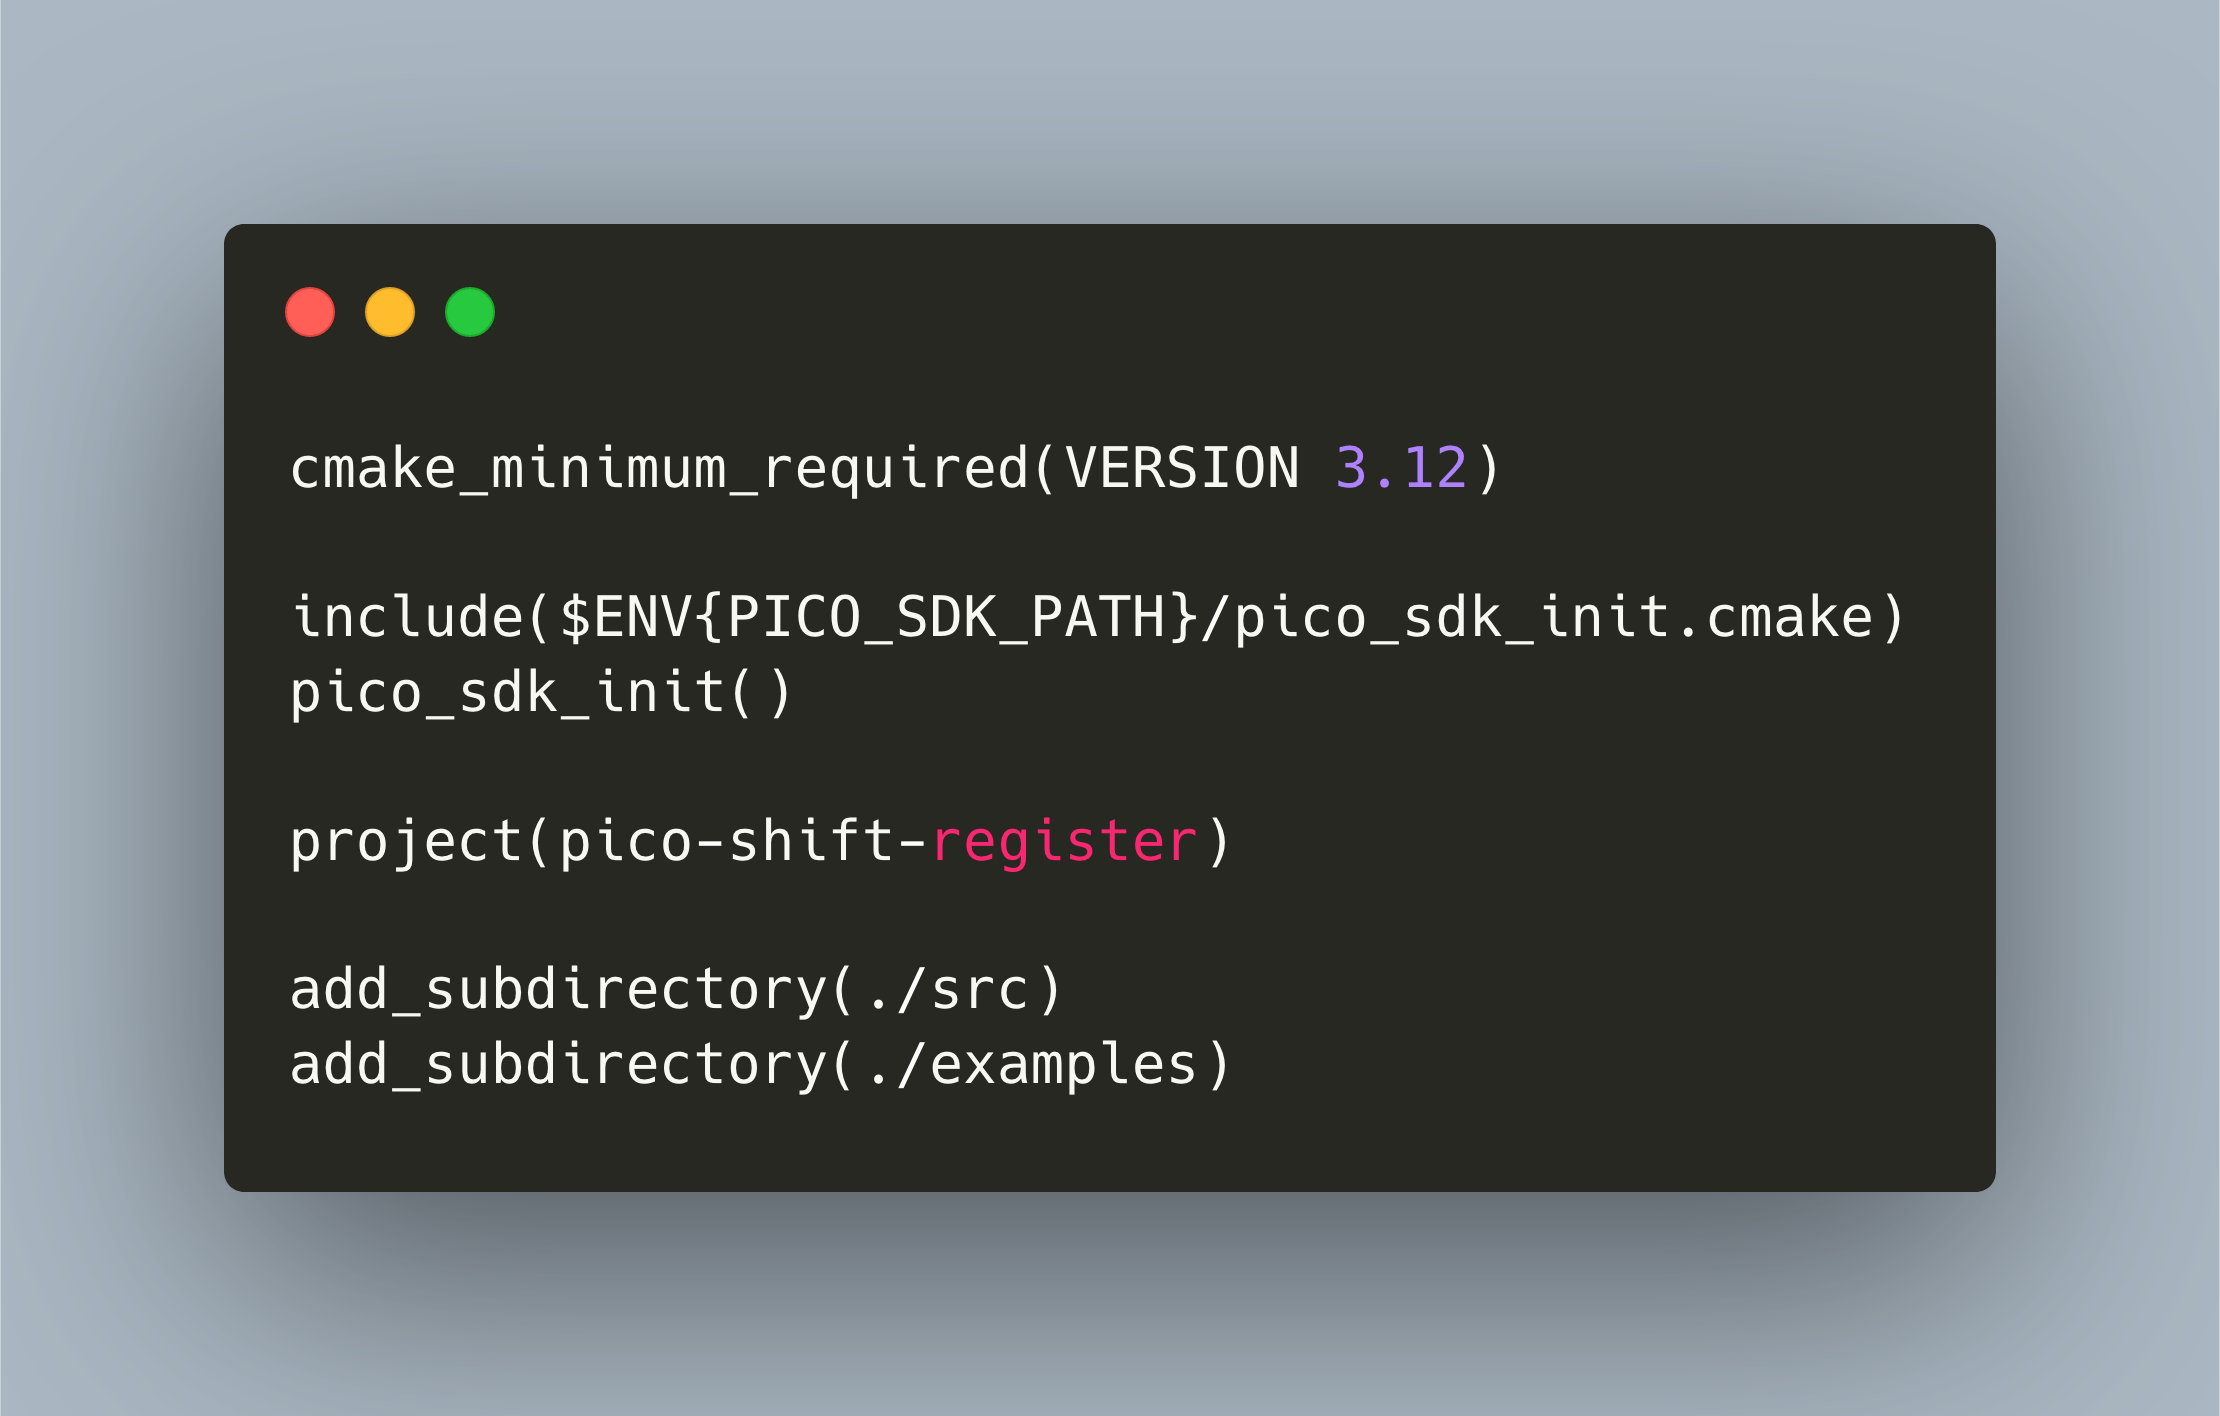
CMake is the build system of the Raspberry Pico ecosystem. In the last article, I explained the CMake essentials from the perspective of a developer that is new to C. If you followed along, you should now feel comfortable to structure your programs with CMake.
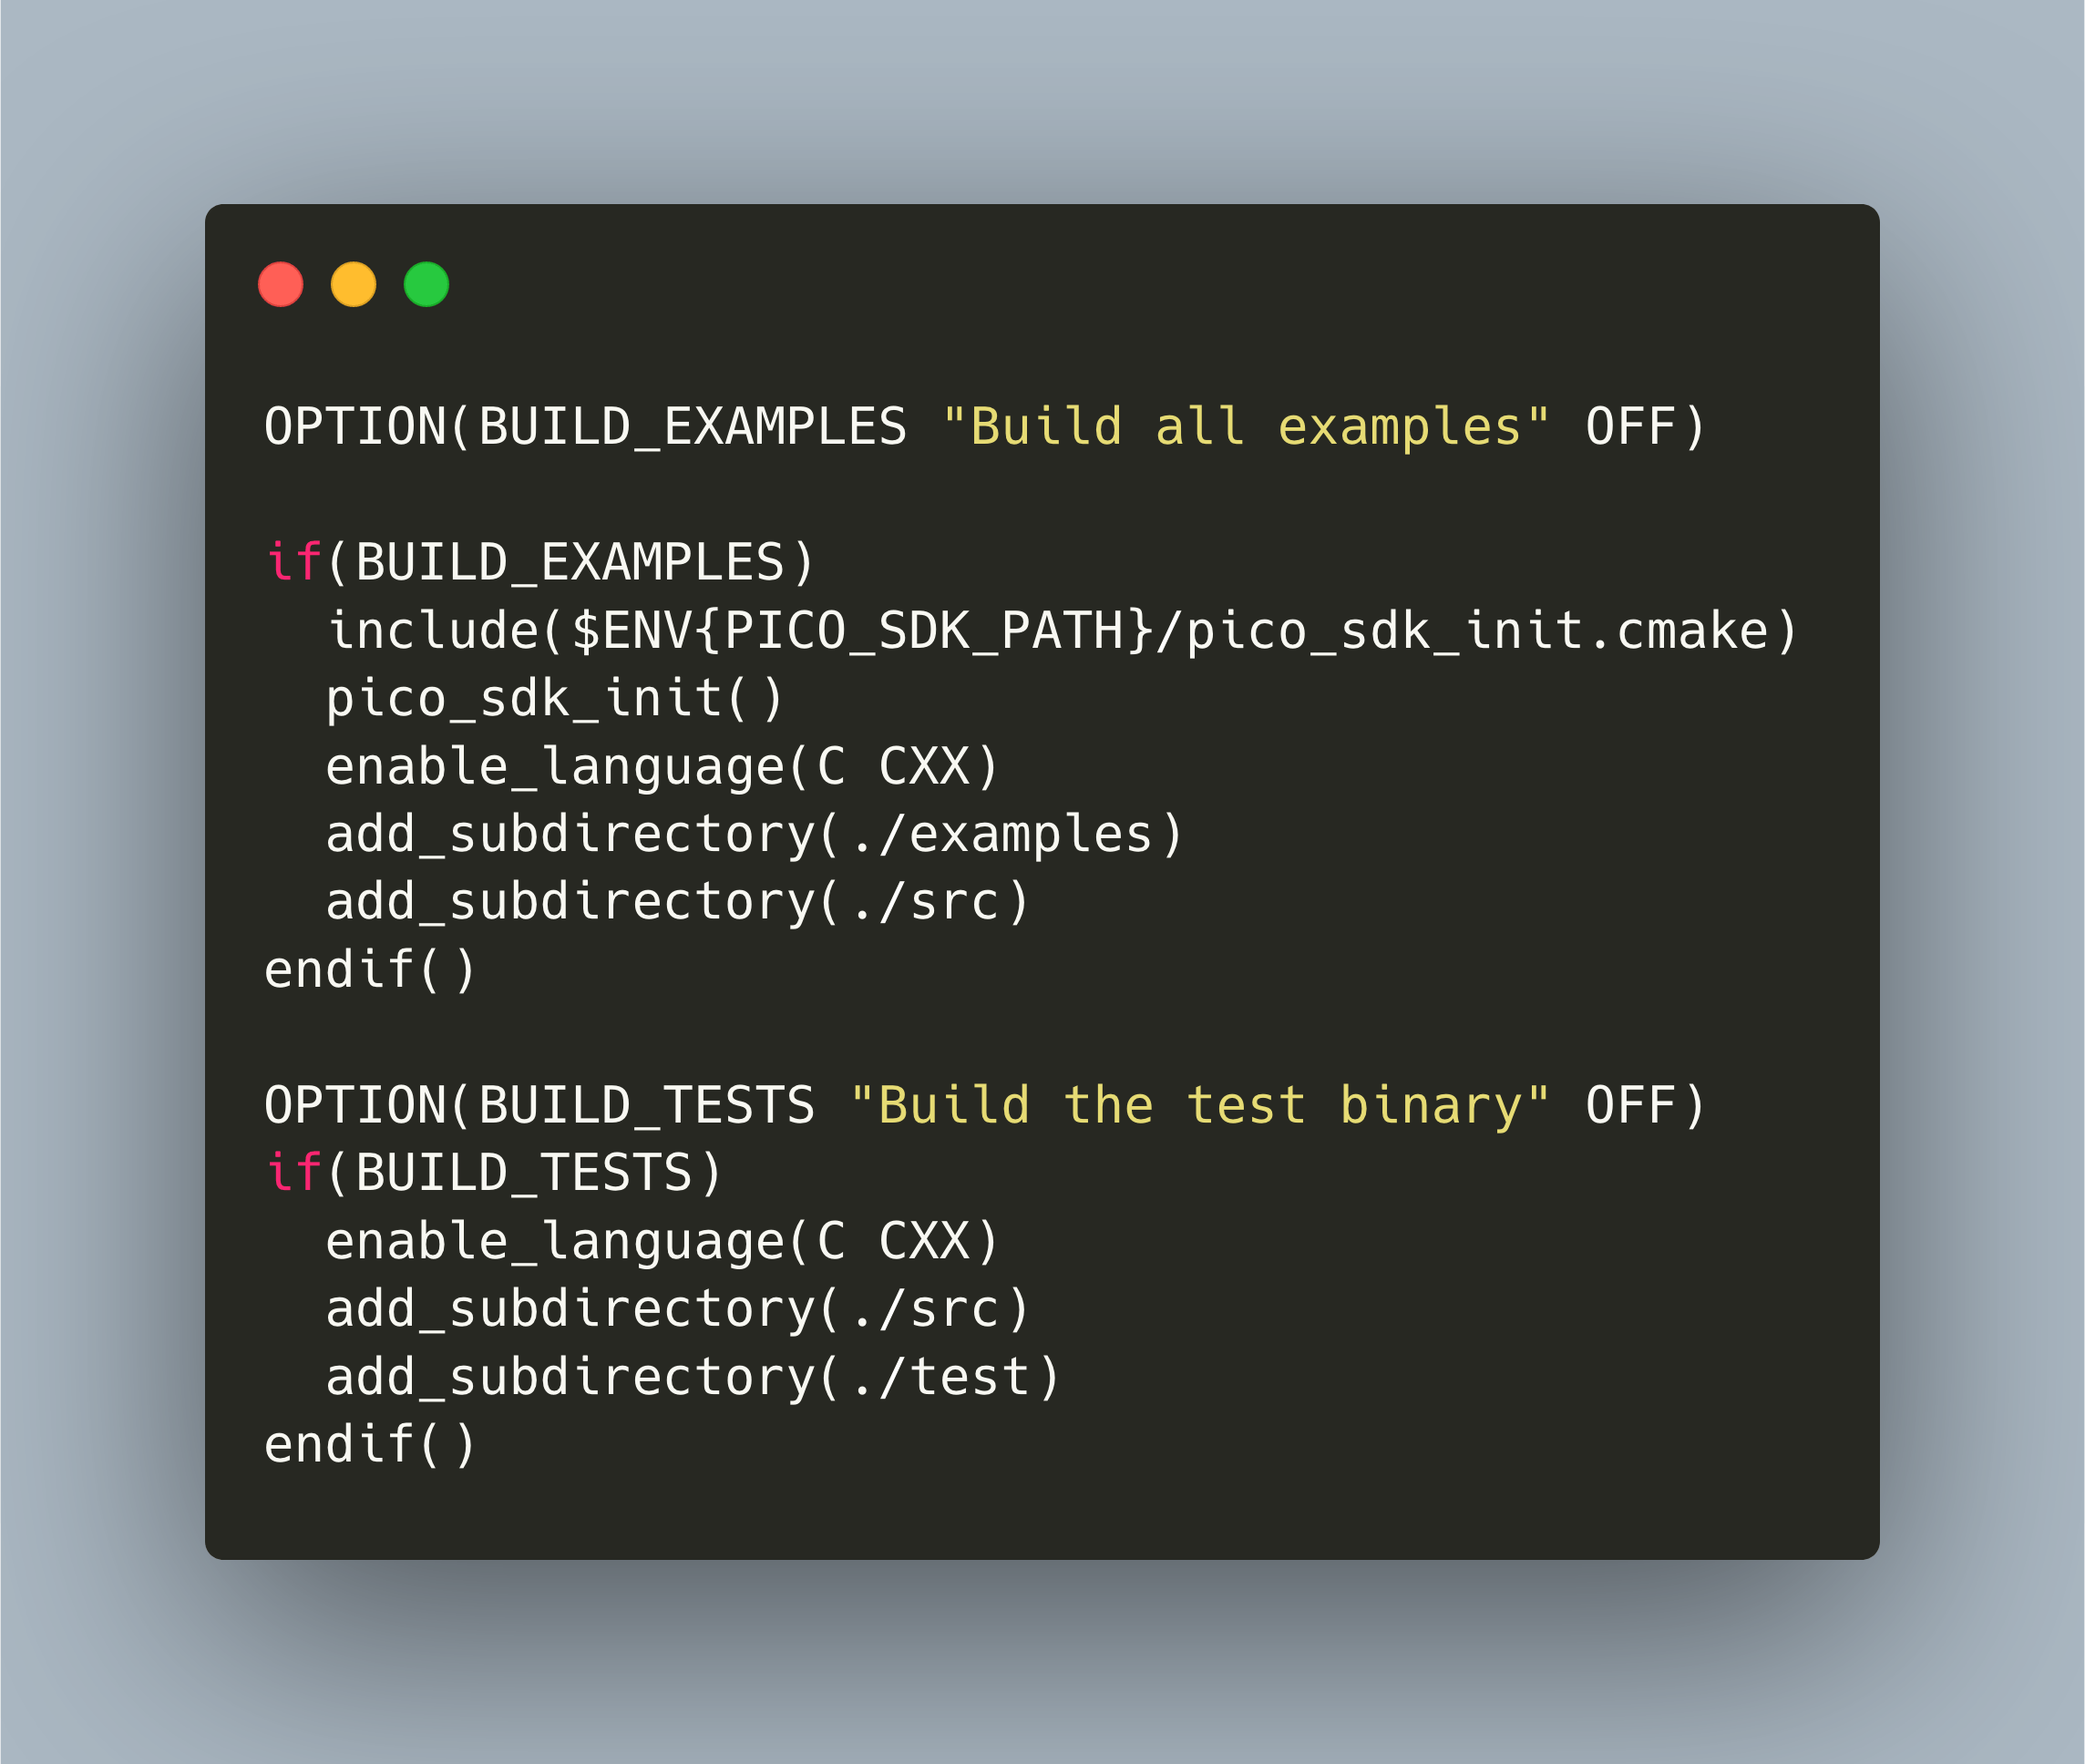
When you work with the Raspberry Pi Pico C/C++ SDK, you also need to understand the CMake build system that is used. In my first projects, I was happy to copy and paste the example files and tweak them. Yet, when developing my libraries, new features were required. First, I wanted to have different types of build, like example and test. The example build should compile all examples, and link them with the Pico SDK and my library. The test build should compile the library, link to the unit testing framework, and provide an executable that runs all test files with injected mock files.
_Download the shift register library from Github: <https://github.com/admantium-sg/rp2040-shift-register-74HC595>_