CMake is the build system of the Raspberry Pico ecosystem. In the last article, I explained the CMake essentials from the perspective of a developer that is new to C. If you followed along, you should now feel comfortable to structure your programs with CMake.
Building on this foundation, this article covers additional techniques: Conditional configuration, preprocessor symbols, including third party libraries, and how to add tests.
Example: Pico DHT11 library
This article explains the setup that I use in my libraries. A good and not too complex example is my library for reading temperature data from the DHT11 sensor: pico-dht11-lib.
The project has the following directory structure to which I will relate in the article. Also, check out the repo to see all techniques explained in this article.
├── CMakeLists.txt
├── cmake
│   └── cmocka.cmake
├── include
│   └── admantium
│       └── pico-dht11.h
├── src
│   ├── CMakeLists.txt
│   └── pico-dht11.c
└── test
    ├── CMakeLists.txt
    ├── mocks.h
    └── test.c
Conditional Configuration
In some projects, you need to build a project with a specific case: Library only, example code, or tests. These cases have also different requirements, like which parts of your project they will use, to which other libraries you are linking, or even the use of a specific compiler or compiler options.
Conditional configuration can be achieved with CMake options: Defined in the root config file, they triple down you project to other config files and source code.
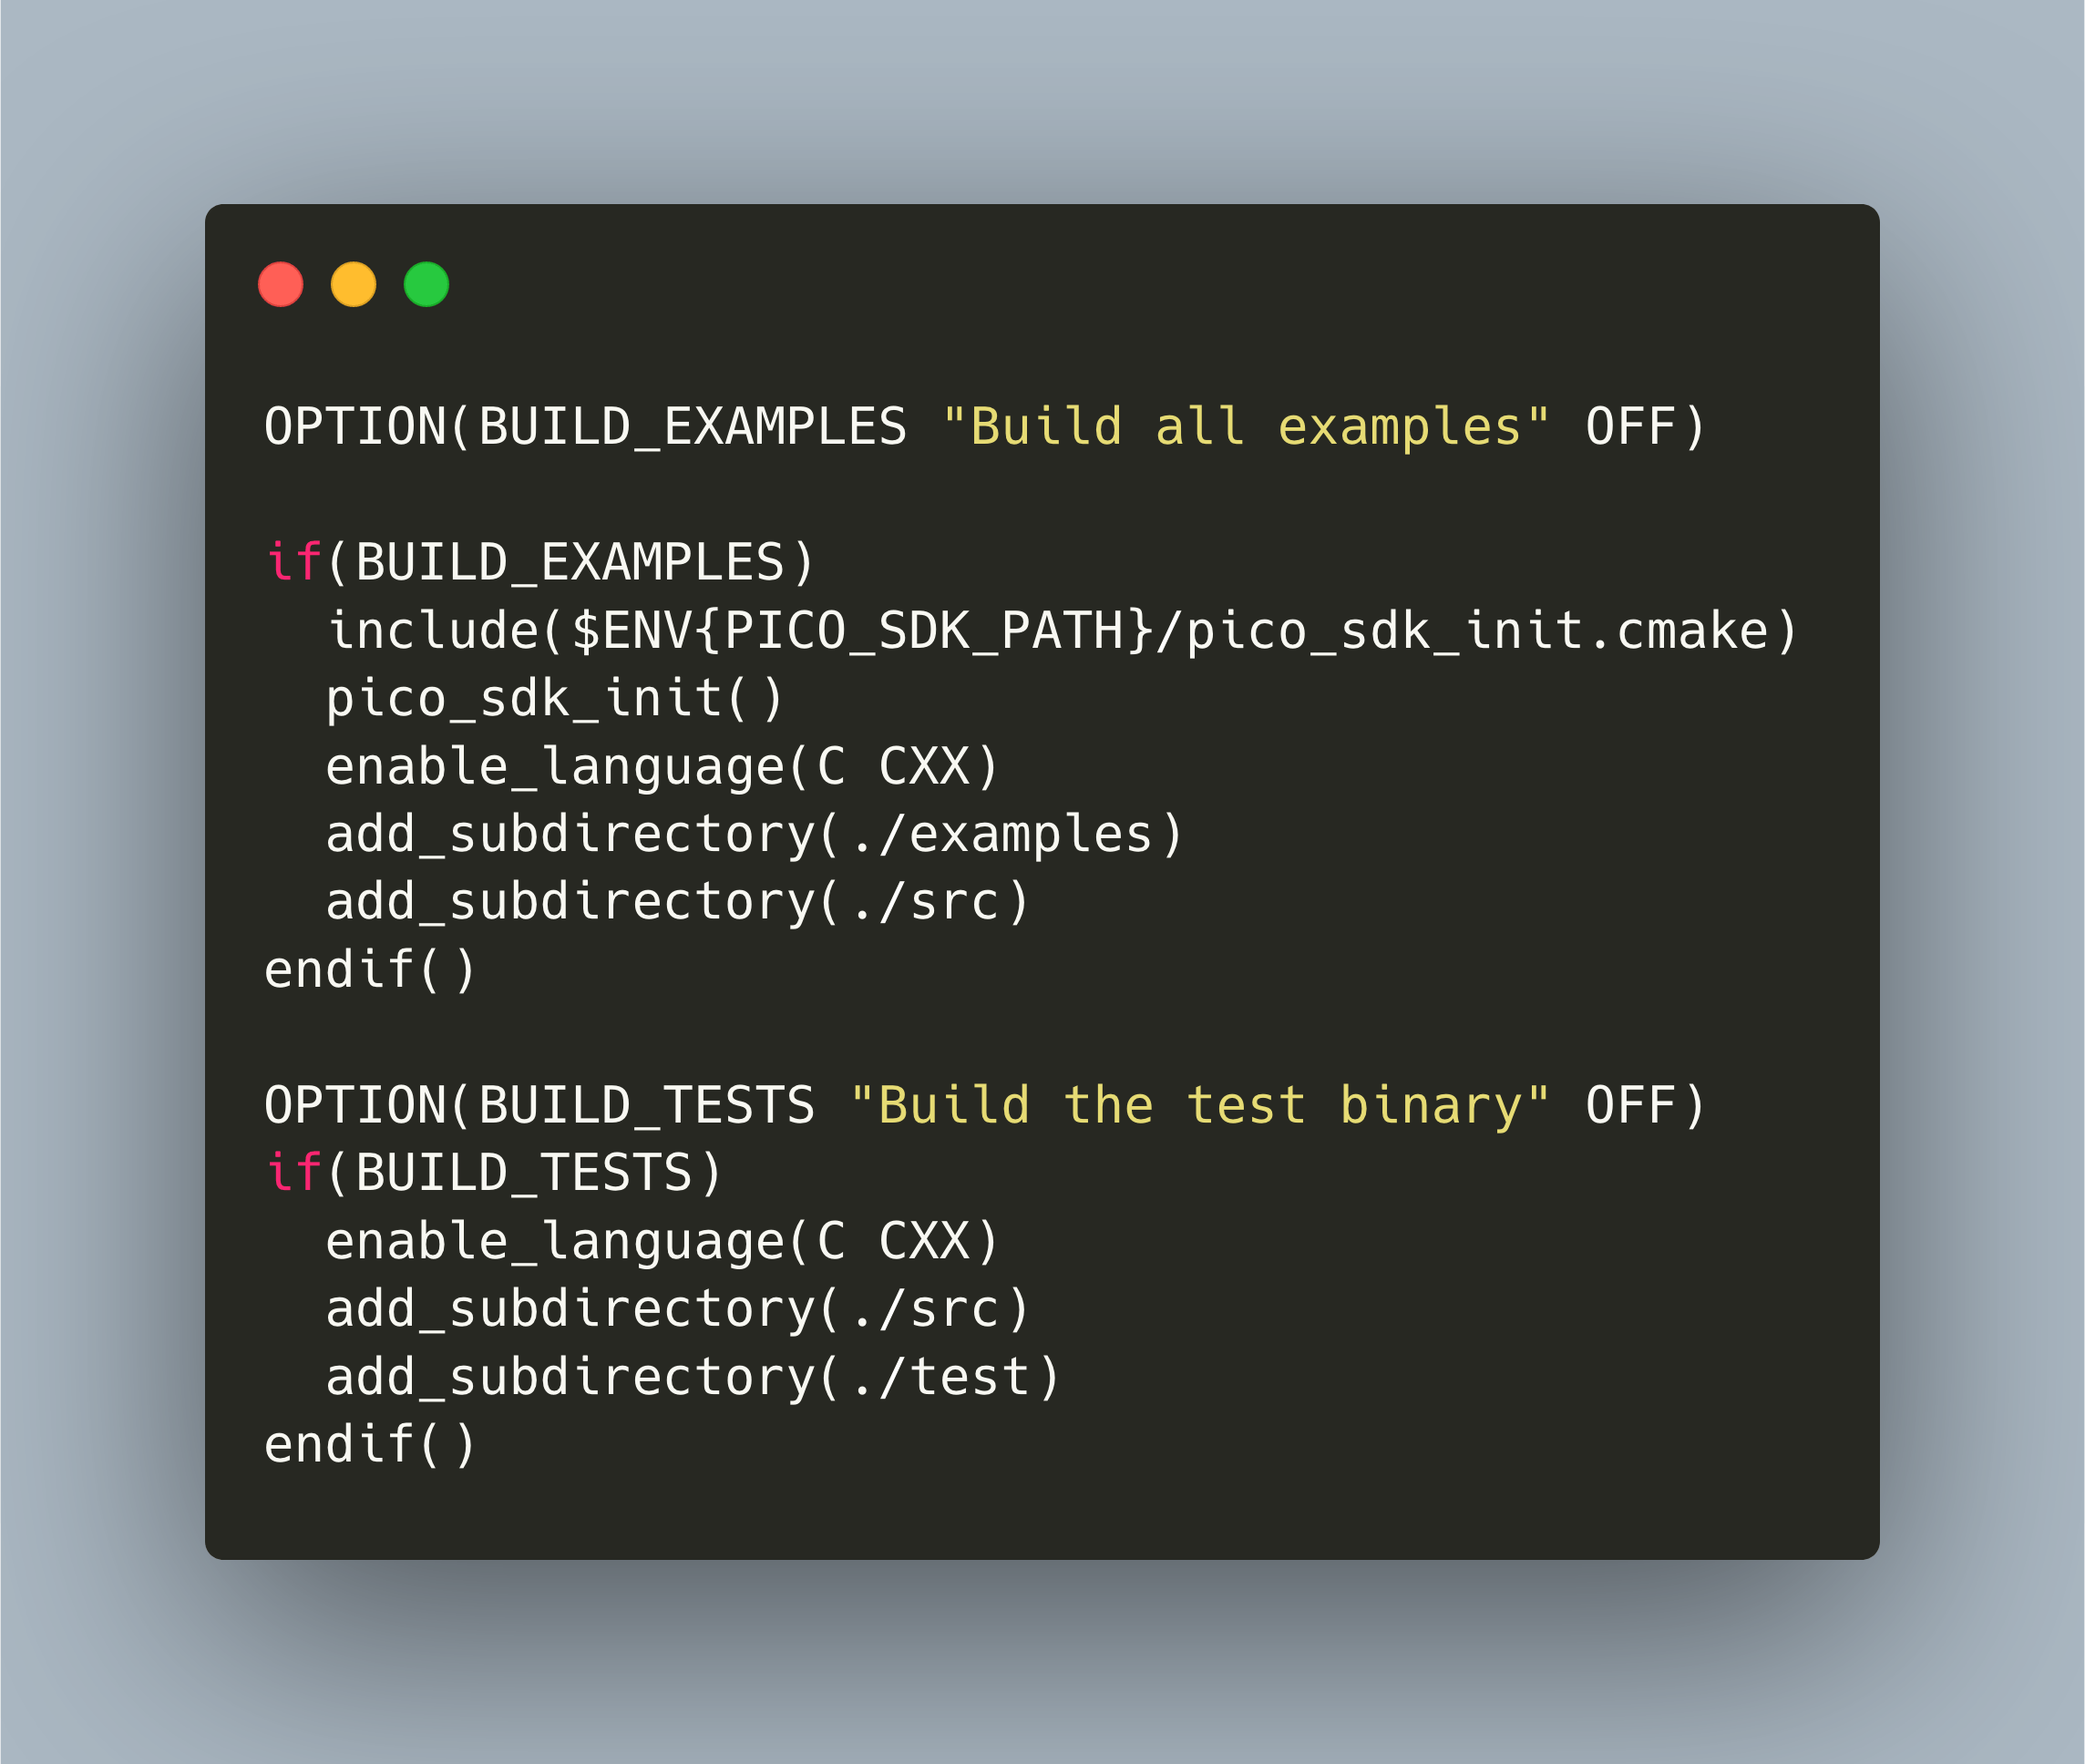
In the pico-dht11-lib, the conditional configuration BUILD_EXAMPLES and BUILD_TESTS are expressed as follows:
OPTION(BUILD_EXAMPLES "Build all examples" OFF)

if(BUILD_EXAMPLES)
  include($ENV{PICO_SDK_PATH}/pico_sdk_init.cmake)
  pico_sdk_init()
  enable_language(C CXX)
  add_subdirectory(./examples)
  add_subdirectory(./src)
endif()

OPTION(BUILD_TESTS "Build the test binary" OFF)
if(BUILD_TESTS)
  enable_language(C CXX)
  add_subdirectory(./src)
  add_subdirectory(./test)
endif()
The keyword OPTIONS is followed by a symbol, a descriptive String, and a boolean value. Then, anywhere in your other CMake files, you can refer to this option name, and use expressions like if and elseif for branching the build options.
How do you invoke options? When calling cmake from the root directory, add the options and their boolean value:
cmake -B build -S . -DBUILD_TESTS=ON
Defining Preprocessor Symbols
Options are also helpful for passing preprocessor symbols to the source code files: Simple use the very same names.
In the pico-dht11-lib, the presence of either BUILD_TESTS or BUILD_EXAMPLES will determine if the Raspberry Pico SDK or a mock file will be included.
// src/pico-dht11.c
#include <admantium/pico-dht11.h>
#ifndef BUILD_TESTS
#include <pico/stdlib.h>
#endif

#ifdef BUILD_TESTS
#include <../test/mocks.h>
#endif
To pass options to the source code files, you need to modify the executable/library config file of the same folder by adding the directive target_compile_definitions. Check if a CMake option is active, and if yes, pass this to your library or executable file.
# src/CMakeLists.txt

if(TEST_BUILD)
  # pass -D TEST_BUILD when compiling
  target_compile_definitions(pico-dht11 PUBLIC -D TEST_BUILD)
  target_link_libraries(pico-dht11 test)
else()
  # normal build, link with pico_stdlib
  target_link_libraries(pico-dht11 pico_stdlib)
endif(TEST_BUILD)
Include Third Party Libraries
CMake has a long history, and so it has a long list of commands that you can use to include other libraries. The Pico SDK uses git submodules. A very recent alternative, and the one that worked for me out of the box, is FetchContent. With a CMake file, you point to any other CMake project on Github, add options, and can then use it in your other CMake files.
The pico-dht11-lib uses the cmocka test framework. To include it in the project, the following file is used.
# cmake/cmocka.cmake

include(FetchContent)

FetchContent_Declare(
  cmocka
  GIT_REPOSITORY https://gitlab.com/cmocka/cmocka.git
  GIT_TAG        cmocka-1.1.5
  GIT_SHALLOW    1
)

set(BUILD_SHARED_LIBS ON)
set(WITH_STATIC_LIB ON)
set(WITH_EXAMPLES OFF)

FetchContent_MakeAvailable(cmocka)
Then the test executable can be linked with the cmocka symbol.
# test/CMakeLists.txt

file(GLOB FILES *.c *.h)
add_executable(test ${FILES})

include(../cmake/cmocka.cmake)
target_link_libraries(test PRIVATE cmocka-static pico-dht11)
Including Tests
The inclusion of tests is the sum of all the above step: Define a CMake option to conditionally configure & build your project, use the option name as a preprocessor symbol, and link your test code to the test library.
A simple test case in pico-dh11-lib is the configuration of the an DHT11 struct.
#include <stdarg.h>
#include <stddef.h>
#include <setjmp.h>
#include <stdint.h>
#include <stdio.h>

#include <cmocka.h>

#include <admantium/pico-dht11.h>

DHT11 *dht;

void test_dht_config(void **state)
{
  dht = dht11_new((PinConfig){
      .DATA_PIN = 16
  });

  assert_int_equal(dht->DATA_PIN, 16);
}

int main(int argc, char *argv[])
{
  printf("Runing Tests\n");

  void *state;

  const struct CMUnitTest tests[] = {
      cmocka_unit_test(test_dht_config),
  };

  return cmocka_run_group_tests(tests, NULL, NULL);
}
See my cmocka article to learn more about testing.
Conclusion
This article showed you advanced CMake techniques. First, we learned how to define CMake options in the root CMake file and how to use them for conditional configuration & building. Second, we saw how the CMake options, invoked with the cmake command, can be passed down to the source files as preprocessor symbols. Third, we saw how to use FetchContent command to include any other CMake project. Finally, we saw how all these techniques come together to include and build tests.