When you work with the Raspberry Pi Pico C/C++ SDK, you also need to understand the CMake build system that is used. In my first projects, I was happy to copy and paste the example files and tweak them. Yet, when developing my libraries, new features were required. First, I wanted to have different types of build, like example and test. The example build should compile all examples, and link them with the Pico SDK and my library. The test build should compile the library, link to the unit testing framework, and provide an executable that runs all test files with injected mock files.
Turns out that this is quite a challenge! I could not find a good documentation of CMake essentials from the perspective of a new to C, new to Pico SDK developer. This article explains all you need to know about basic CMake, and after reading you should feel comfortable with configuring, compiling and building your projects. This article is structured into essential “how to” questions, so you can easily skip to the part that you like to do.
What is CMake about?
CMake is the entry tool to configuring, compiling and building your project. Considering these steps, CMake has a distinguished role:
- Configuring: CMake is the tool to configure your project. You call it from the top-level directory with
cmake -B build -S ., wherebuildis the output directory, and./the directory with the root level cmake file. - Compiling: You will build your project using the
makecommand, and this command uses Makefiles that were generated by CMake. - Building: You will also build executable files that link to your library code and/or external libraries. This is also done with the
makecommand, and the Makefiles will include all the defined build options of your CMake configuration.
What appears confusing at first, but becomes clearer with experience, is that you need to place a file called CMakeLists.txt in your project root directory and in all subdirectories that contain source code.
Depending on where you define them, these files have different roles, which I separate as follows:
main config: The top-level directory includes the root CMake file. This file needs to set essential config options, and it will list all additional directories that will be included when you execute CMake.library config: Directories in which you just build a library, you will put a config file that includes theadd_librarydirective. During the compilation process, you will product library files, which are typically namedlib.a.executable config: In directories in which you have executable code, you will put a config file that contains the directiveadd executable. During building, you will have one and only one C file with amain()method, and the result will be namedfile.out
In the remainder of this article, I will show a concise example for each type. If you want to see a complete example, check out my pico-dht11-lib project on Github.
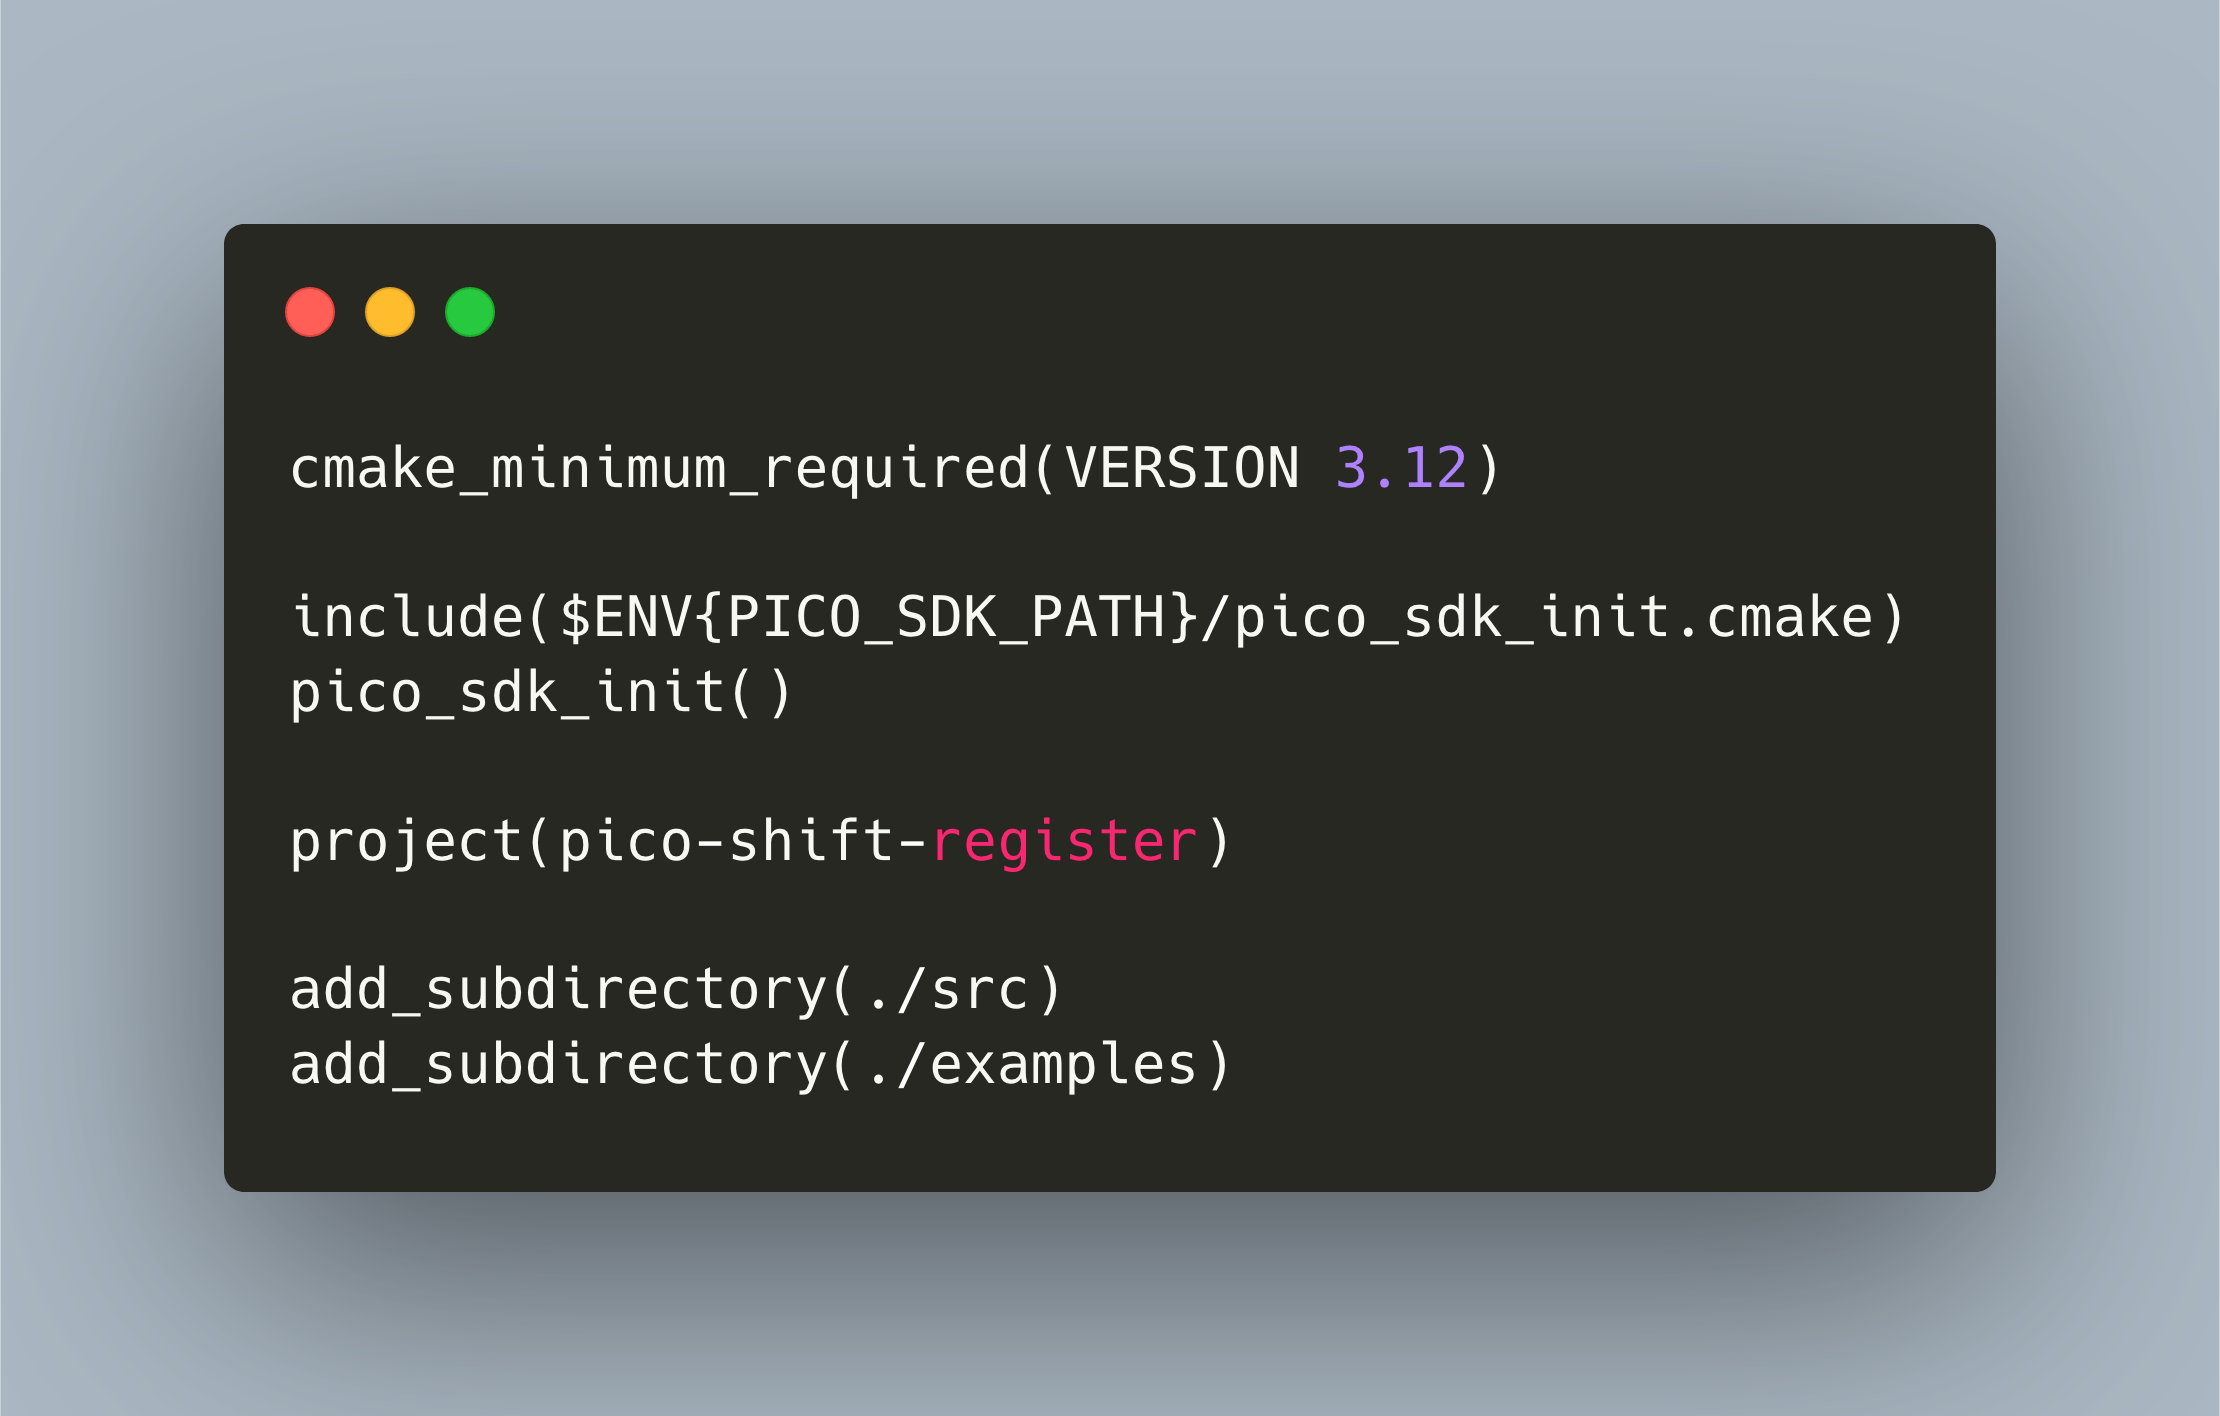
Main CMake Config File
The main config file needs to contain the following:
cmake_minimum_required(VERSION 3.12)

include($ENV{PICO_SDK_PATH}/pico_sdk_init.cmake)
pico_sdk_init()

project(pico-shift-register)

add_subdirectory(./src)
add_subdirectory(./examples)
Essential commands are:
cmake_minimum_versionA flag that controls the compatibility of your CMake files with a specific versionprojectThe name of this CMake file, its used throughout the build chainadd_subdirectoryList any other directories that contain aCMakeLists.txtfile
Specific for the Raspberry Pico is the include statement to load the Pico SDK, and the custom CMake function pico_sdk_init. It is imperative that you place this at the top of the root config!
Library CMake Config File
If you just need to compile code and build a library, use this template:
file(GLOB FILES *.c *.h)

add_library(pico-shift-register ${FILES})

target_link_libraries(pico-shift-register pico_stdlib)

target_include_directories(pico-shift-register PUBLIC ../include/)
In this file, we see the following statements:
file: Collect all files that need to be compiled. You can use aGLOBfunction as shown here, or explicitly mention the specific filesadd_library: With this declaration, you express the intent to build a library. The first argument, here itspico-shift-register, is the name of the library, the second argument are the files that will be compiled to create your library.target_link_librariesIf you link with other libraries, list them heretarget_include_directoriesLibraries need to publish their header files so that you can import them in source code. This statement expresses where to find the files - typically in anincludedirectory of your projects.
Executable CMake Config File
When building an executable, use this:
add_executable(8_led_blink 8_led_blink.c)

target_link_libraries(8_led_blink pico_stdlib pico-shift-register)

pico_add_extra_outputs(8_led_blink)
Here, the meaning of these declarations is:
add_executableDefines the intent to create an executable file (.bin, .uf2 etc.), the first argument is the name, the second argument are the source files.target_link_librariesAs before, the names of all additional libraries that you want to link with your executable.
The statement pico_add_extra_outputs is again a custom CMake function from the Pico SDK, it will produce additional files for the executable.
Build Commands
With all your CMake files in place - which is the root directory, and in each lib subfolder or folder with executables - now execute the following commands from the root directory:
# Configure
cmake -B build -S .

# Build the library / produces libpico-shift-register.a.
make -C build/src

# Build the examples / produces 8_led_blink.elf, .uf2 etc.
make -C build/examples
Conclusion
This article showed you the essentials of CMake when working with the Raspberry Pico. I explained the essential CMake file setup as well as the differences between compiling libraries and building executables. Then, I showed and explained an example for the three types of CMake files: main, library, and executable. Putting it all together, you can then execute the build commands from the root-directory to build your library or examples. In the next post, we will extend this knowledge with more advanced CMake configurations.