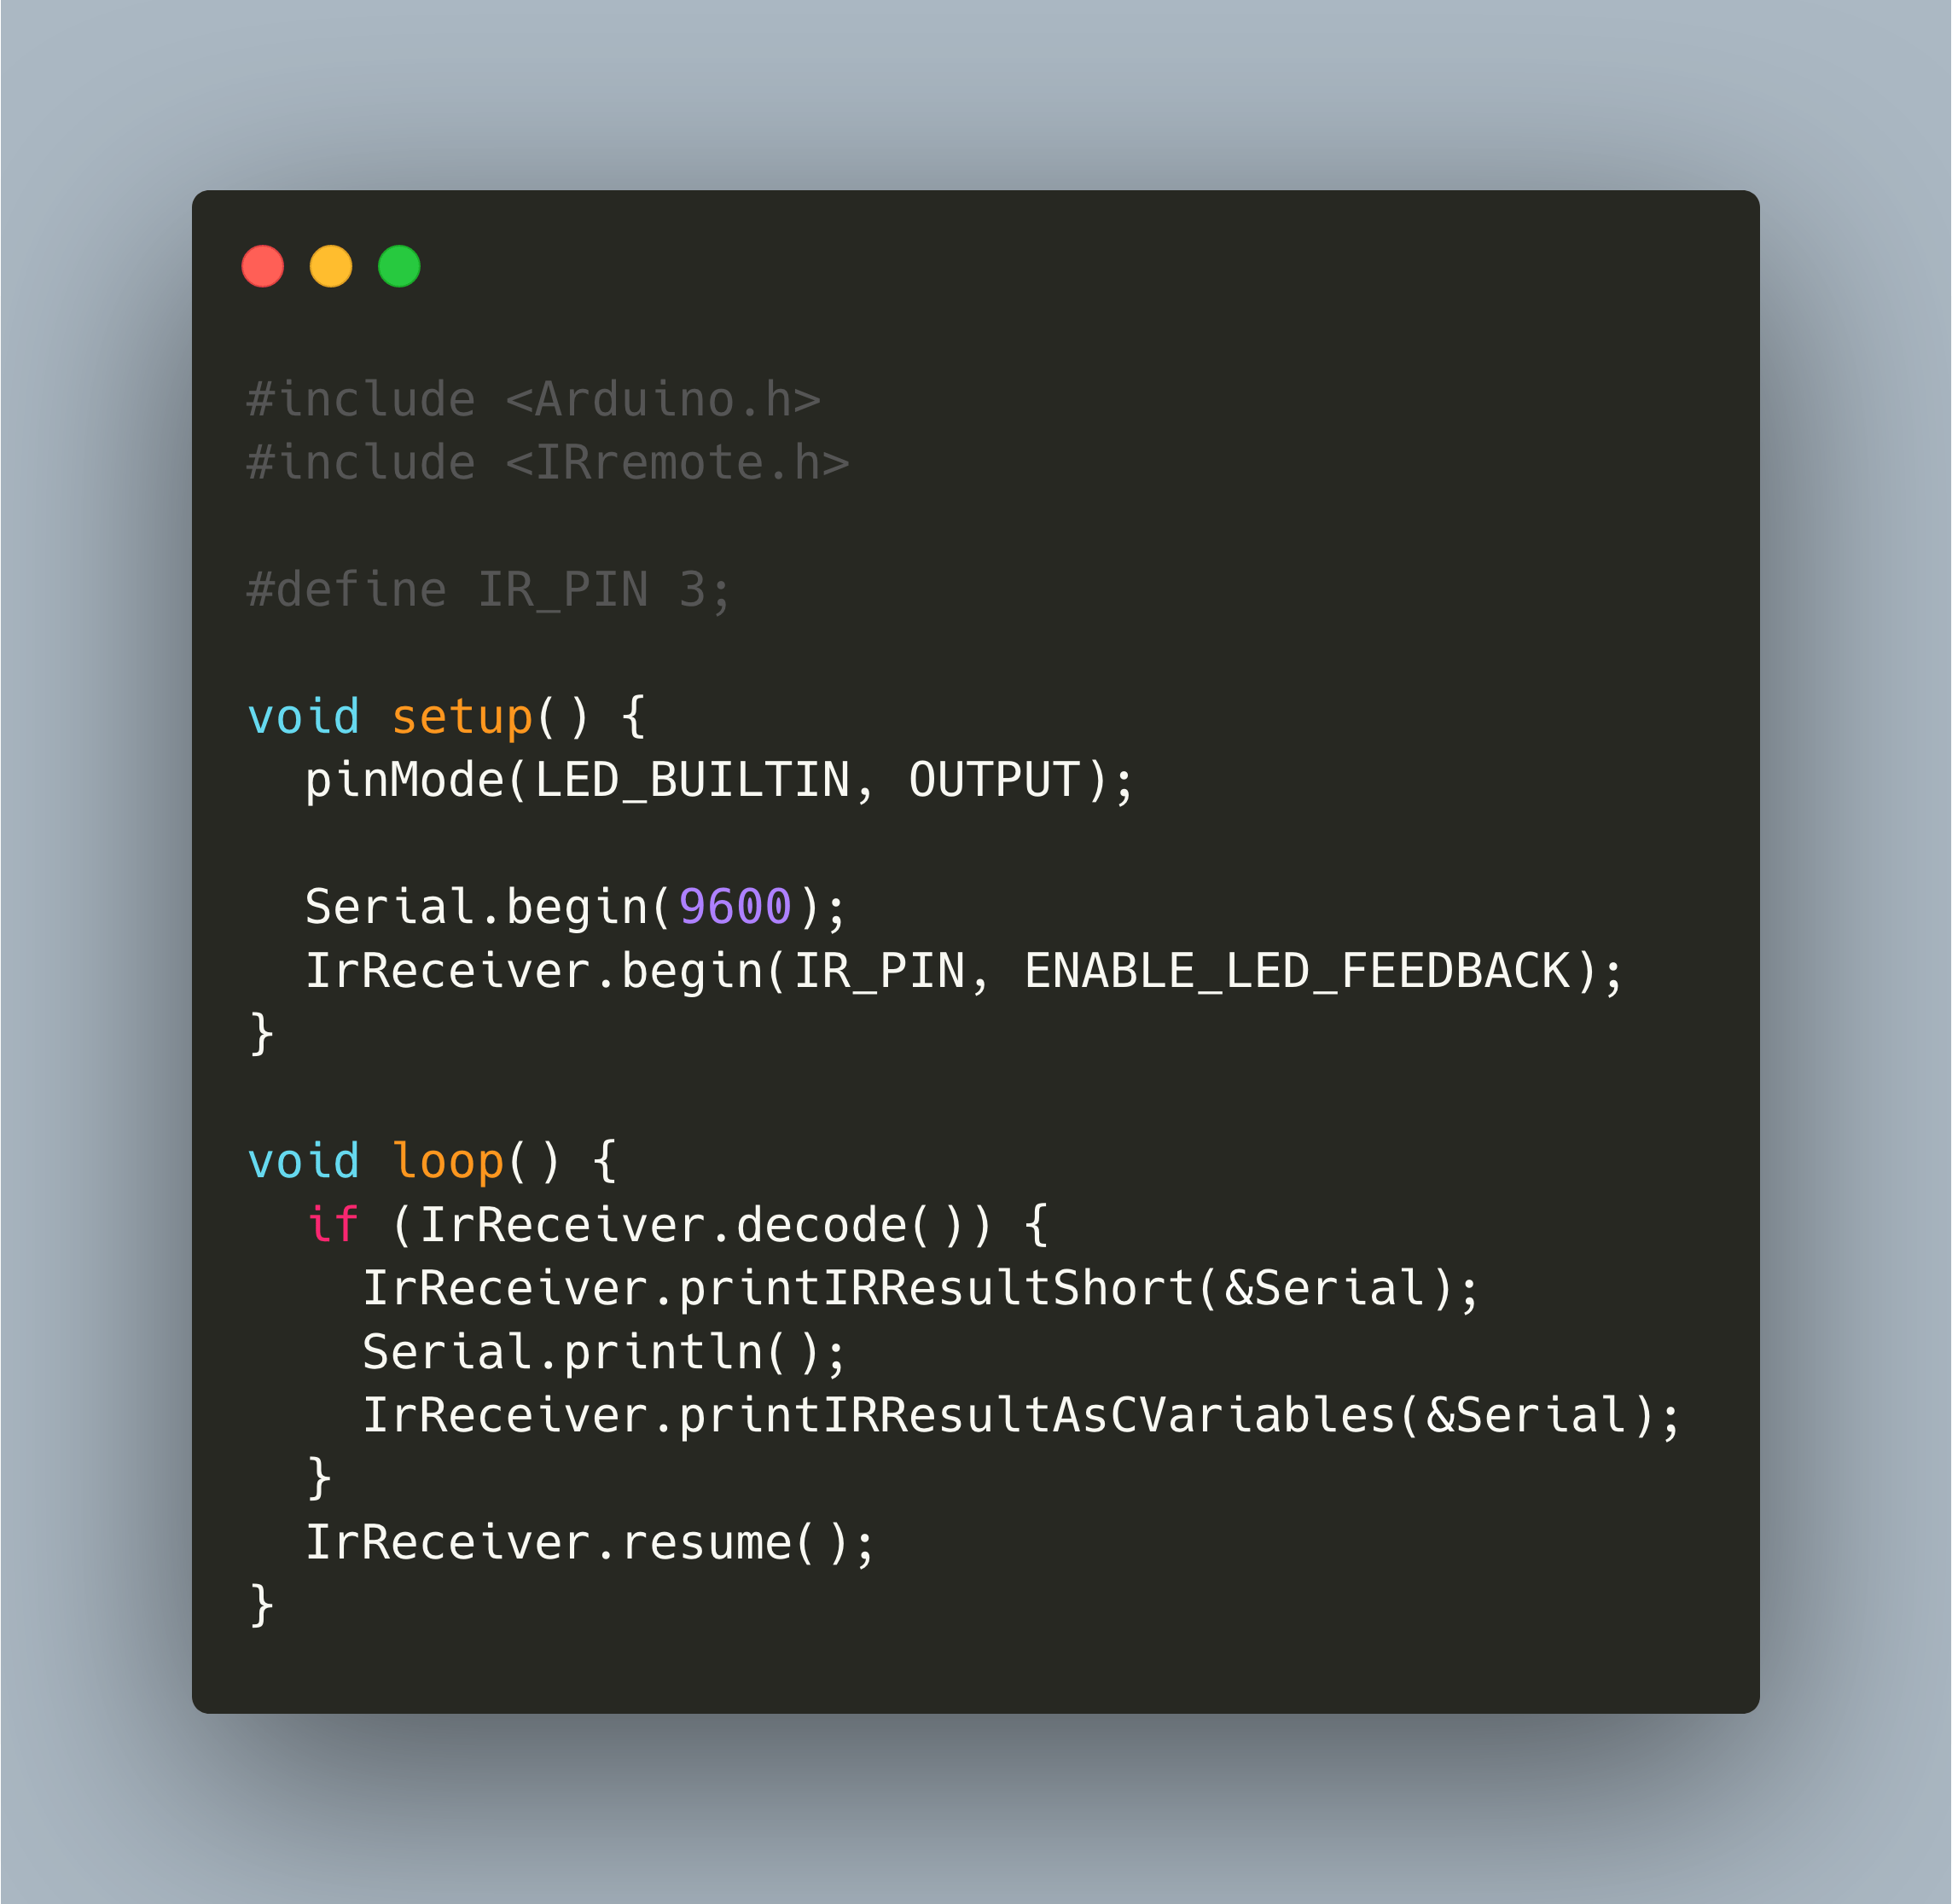
Infrared remote controls are ubiquitous: TVs, IOT devices, toys. With an Arduino and an IR receiver, it is a matter of minutes to setup receiving IR commands and process them to control your Arduino application.
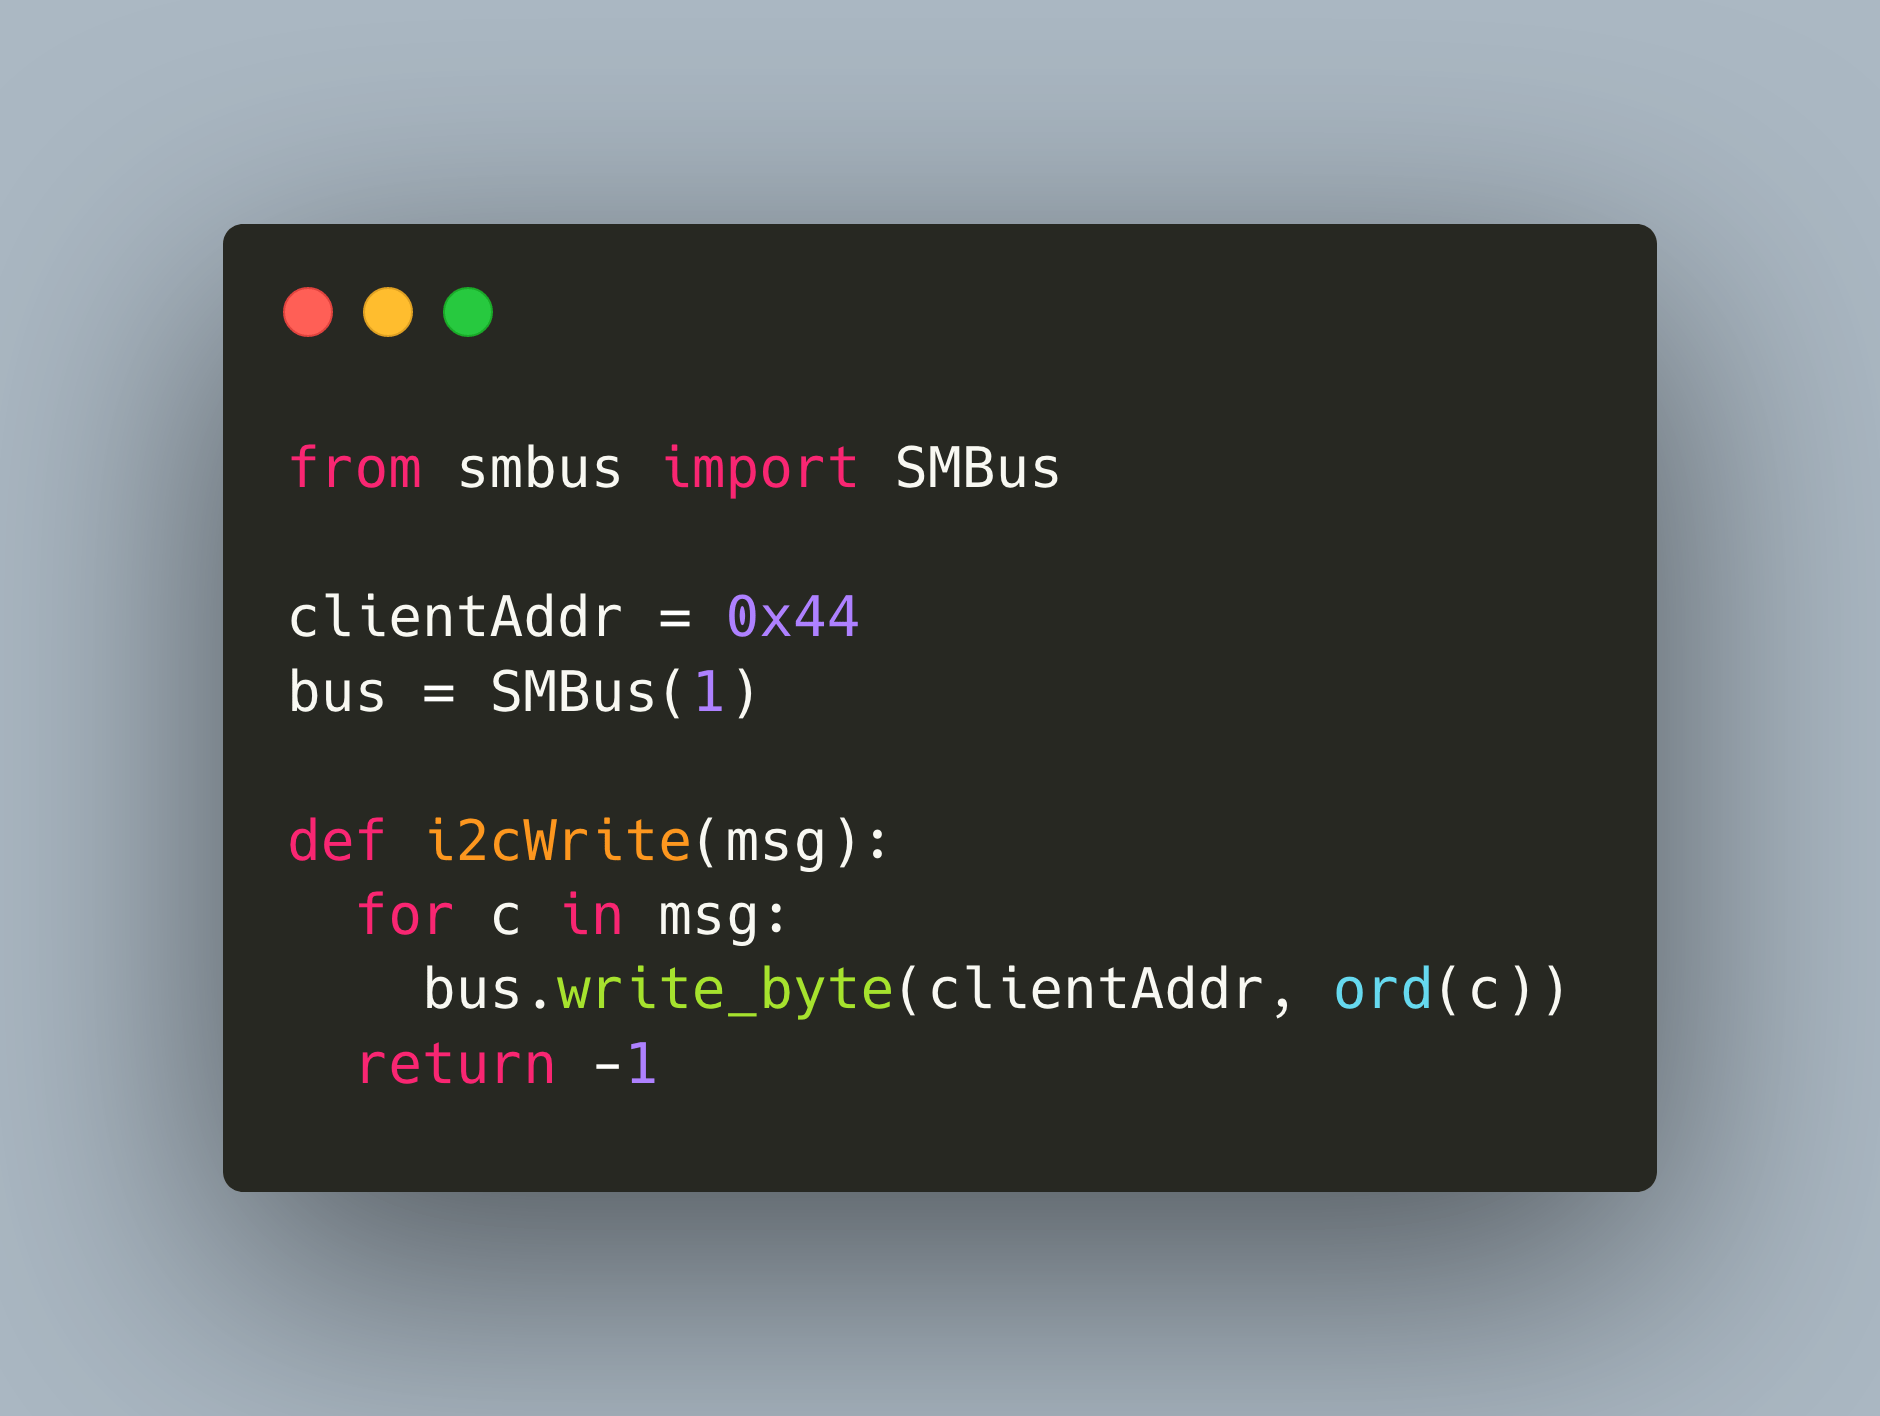
When you want to build complex microcontroller projects in which data needs to be exchanged between different devices, you need a fast and reliable way to exchange data. In the last article, we investigated serial UART connection, a direct one-to-one interface. This article continues the series with the I2C protocol, a half-duplex, bidirectional communication system with many-to-many servers and clients. We will see how to wire a Raspberry Pi and an Arduino Uno to form an I2C connection and exchange data between the two systems.
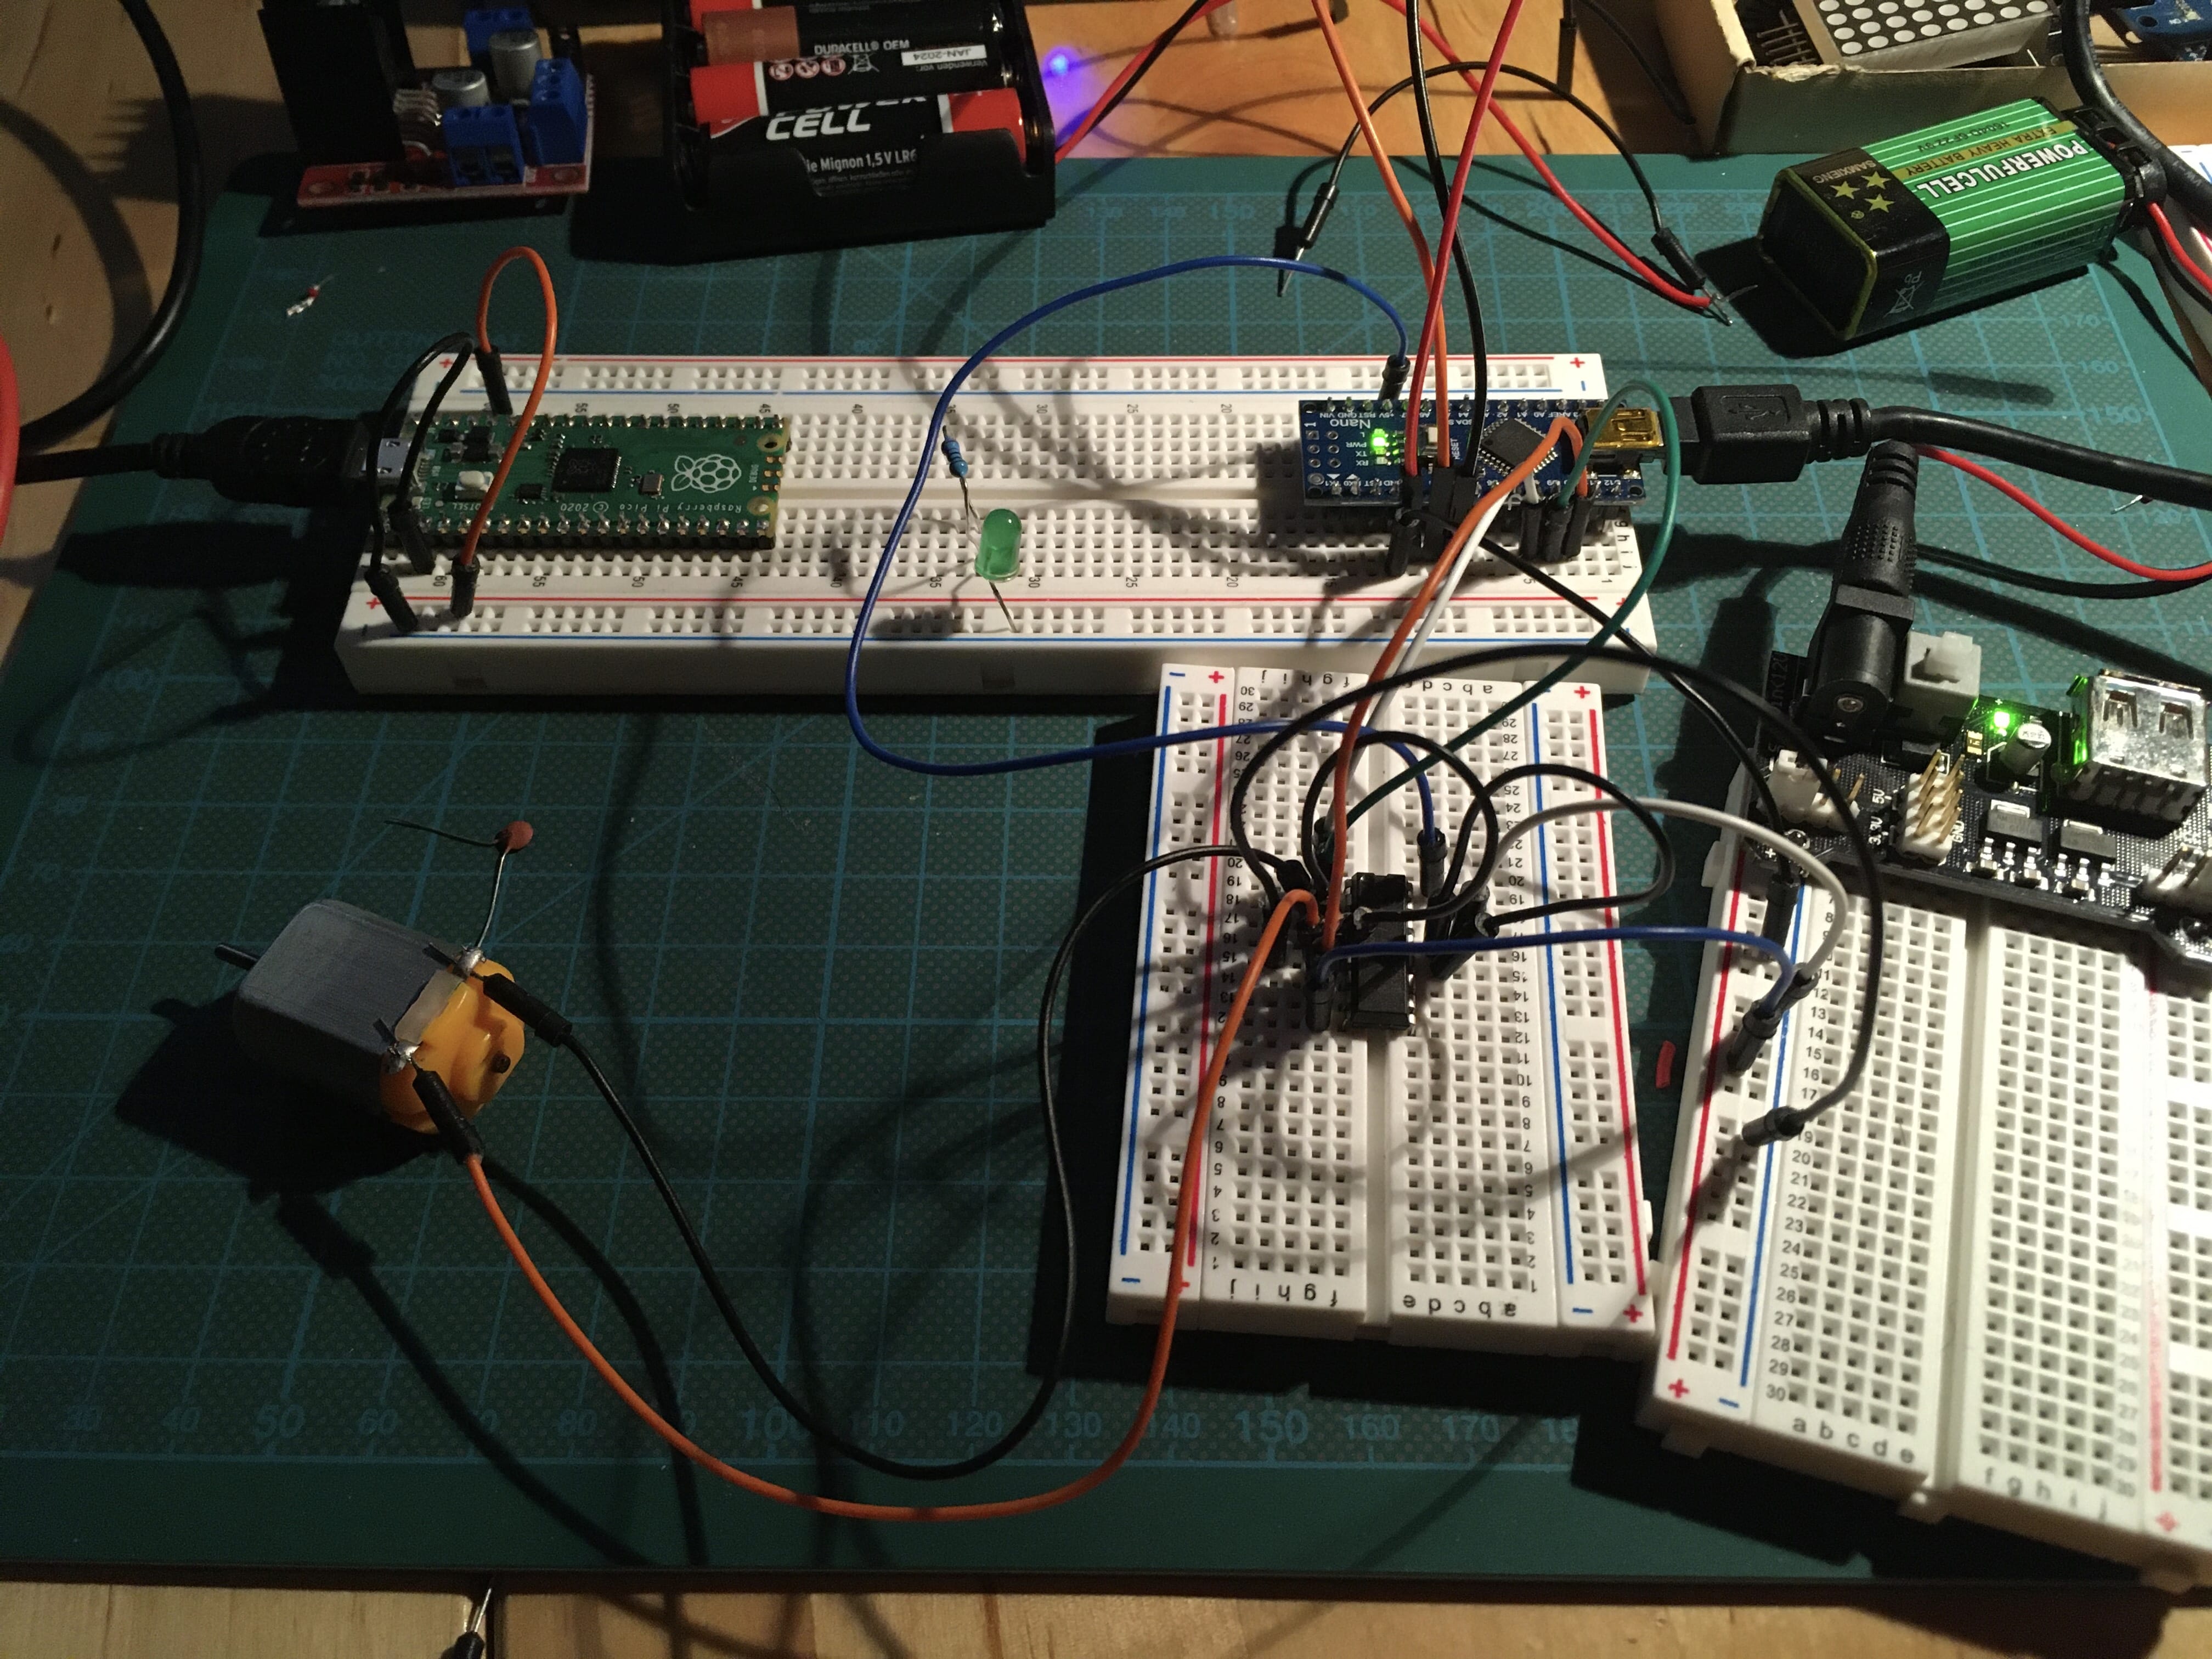
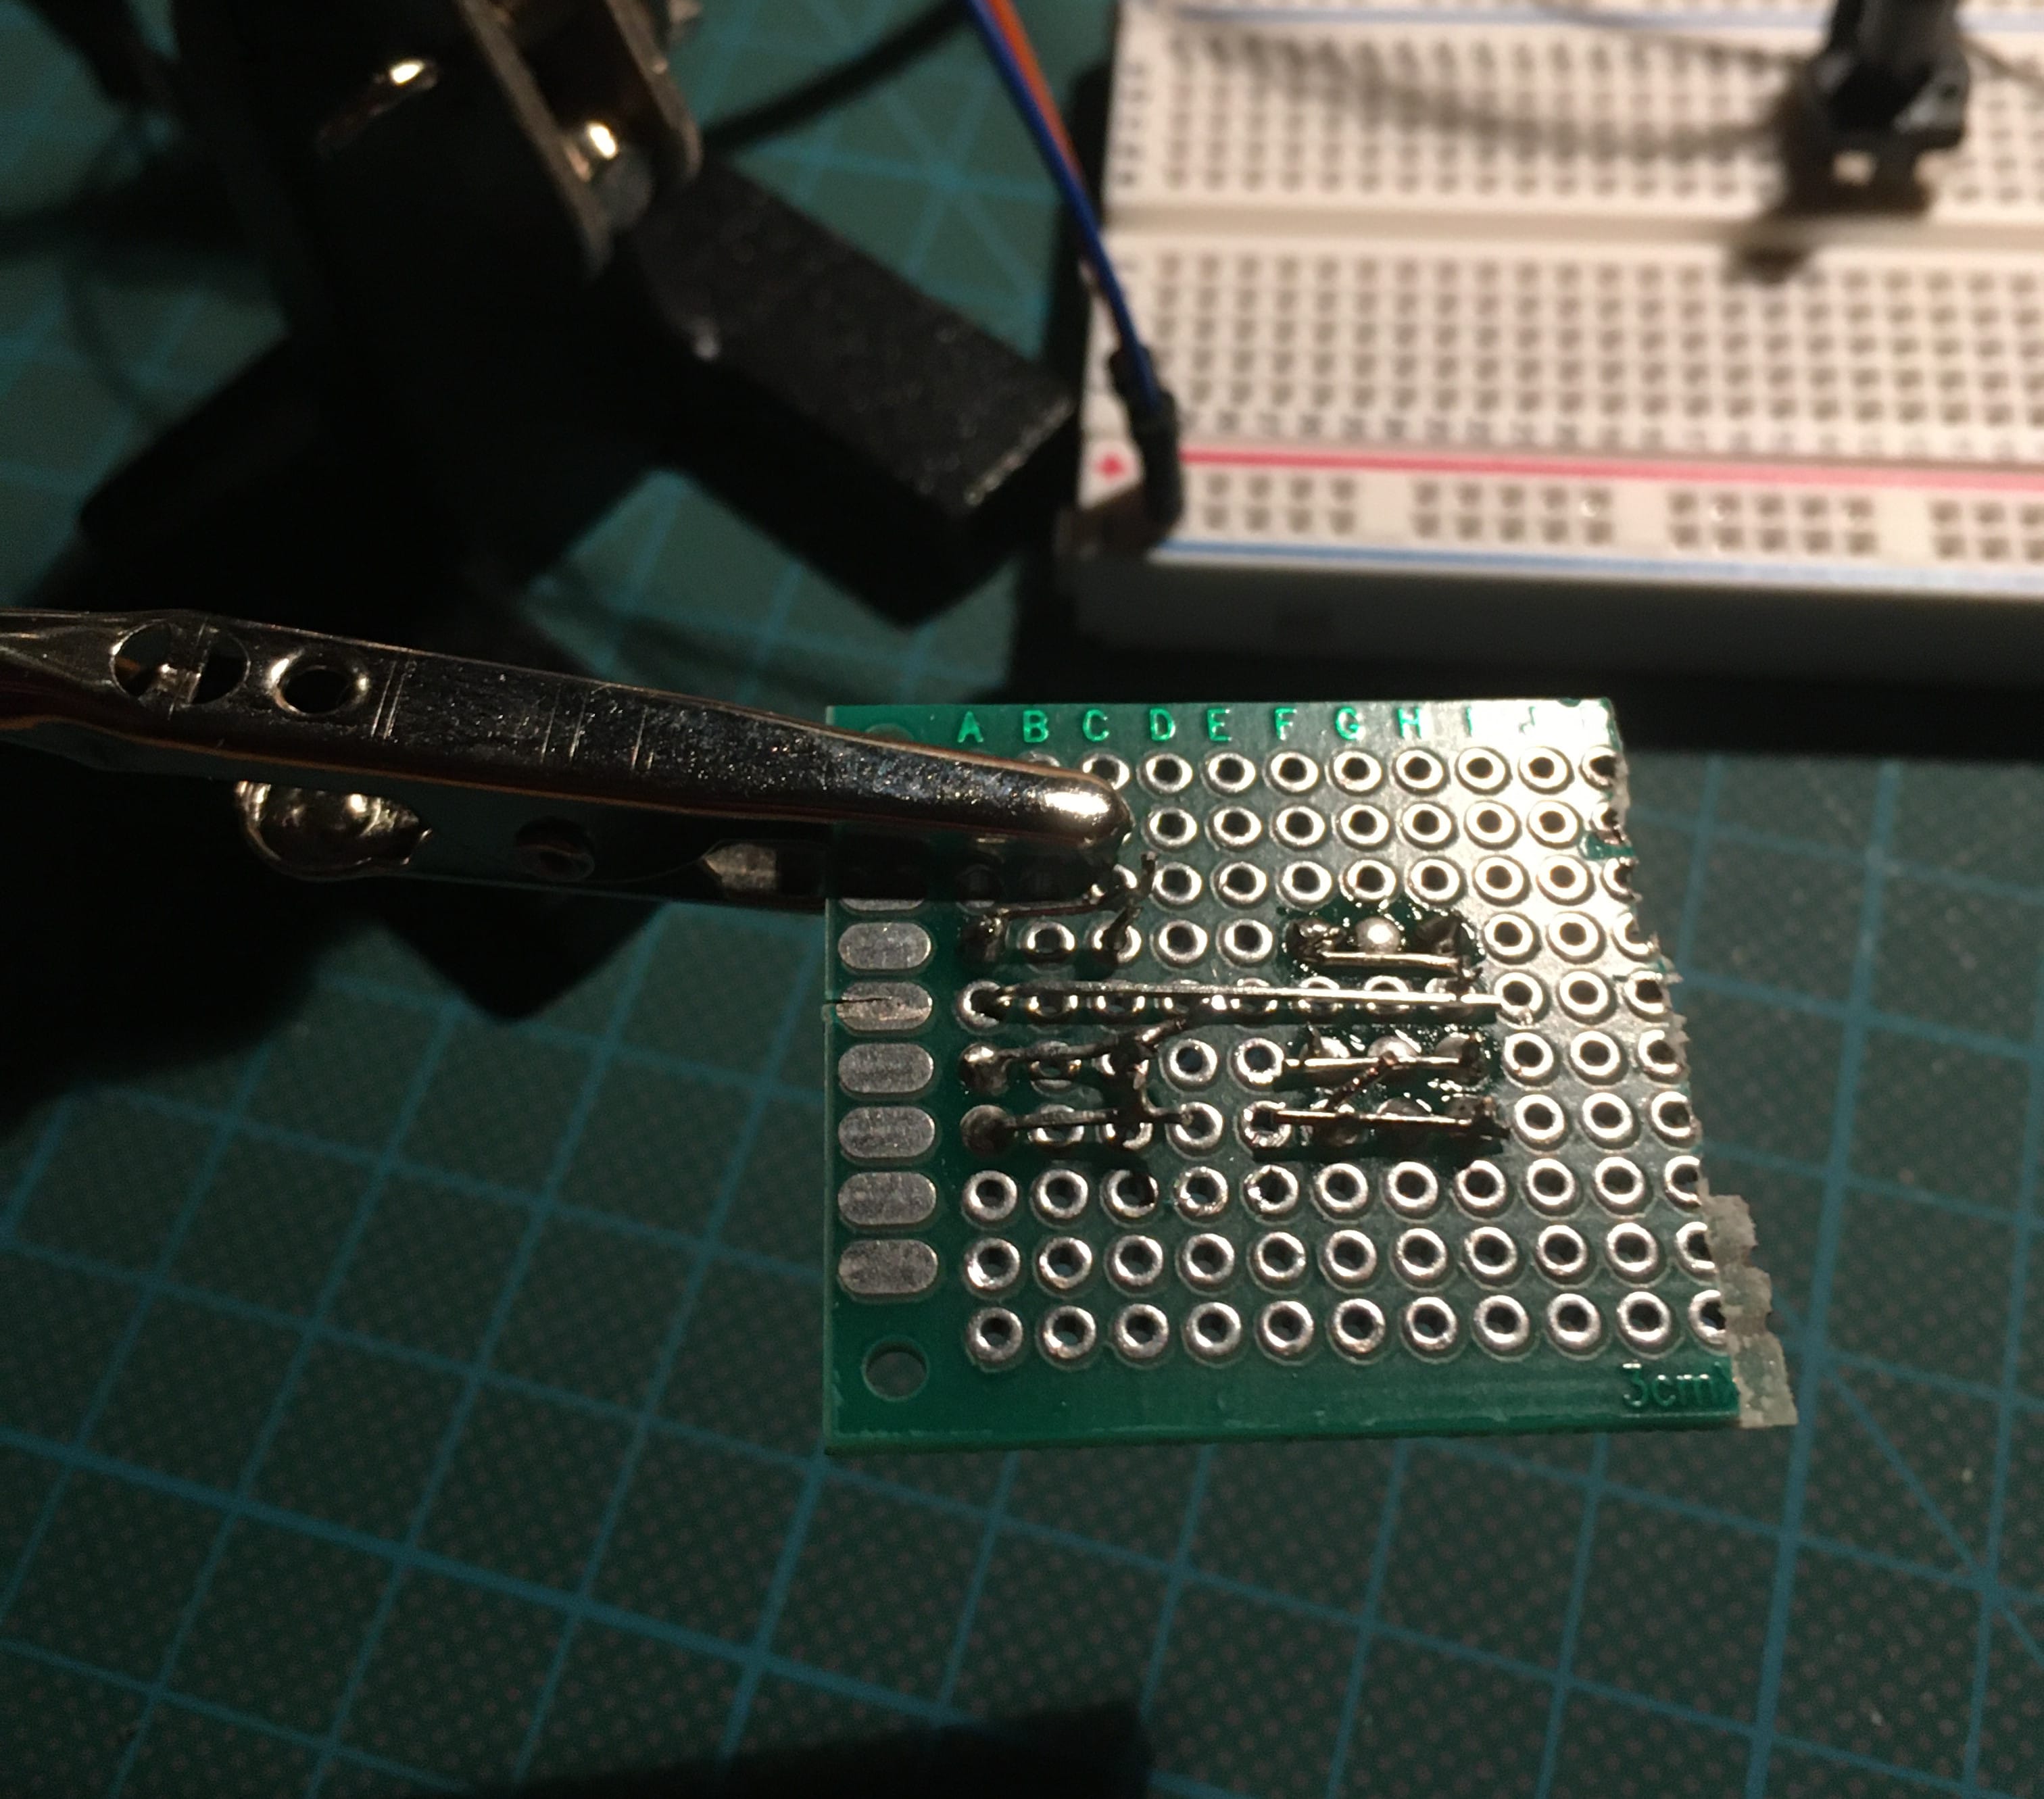
In complex projects, you will need to connect multiple microcontrollers with each other. This connection can be made with different protocols and libraries. This article explores available options and presents easy to follow code examples.
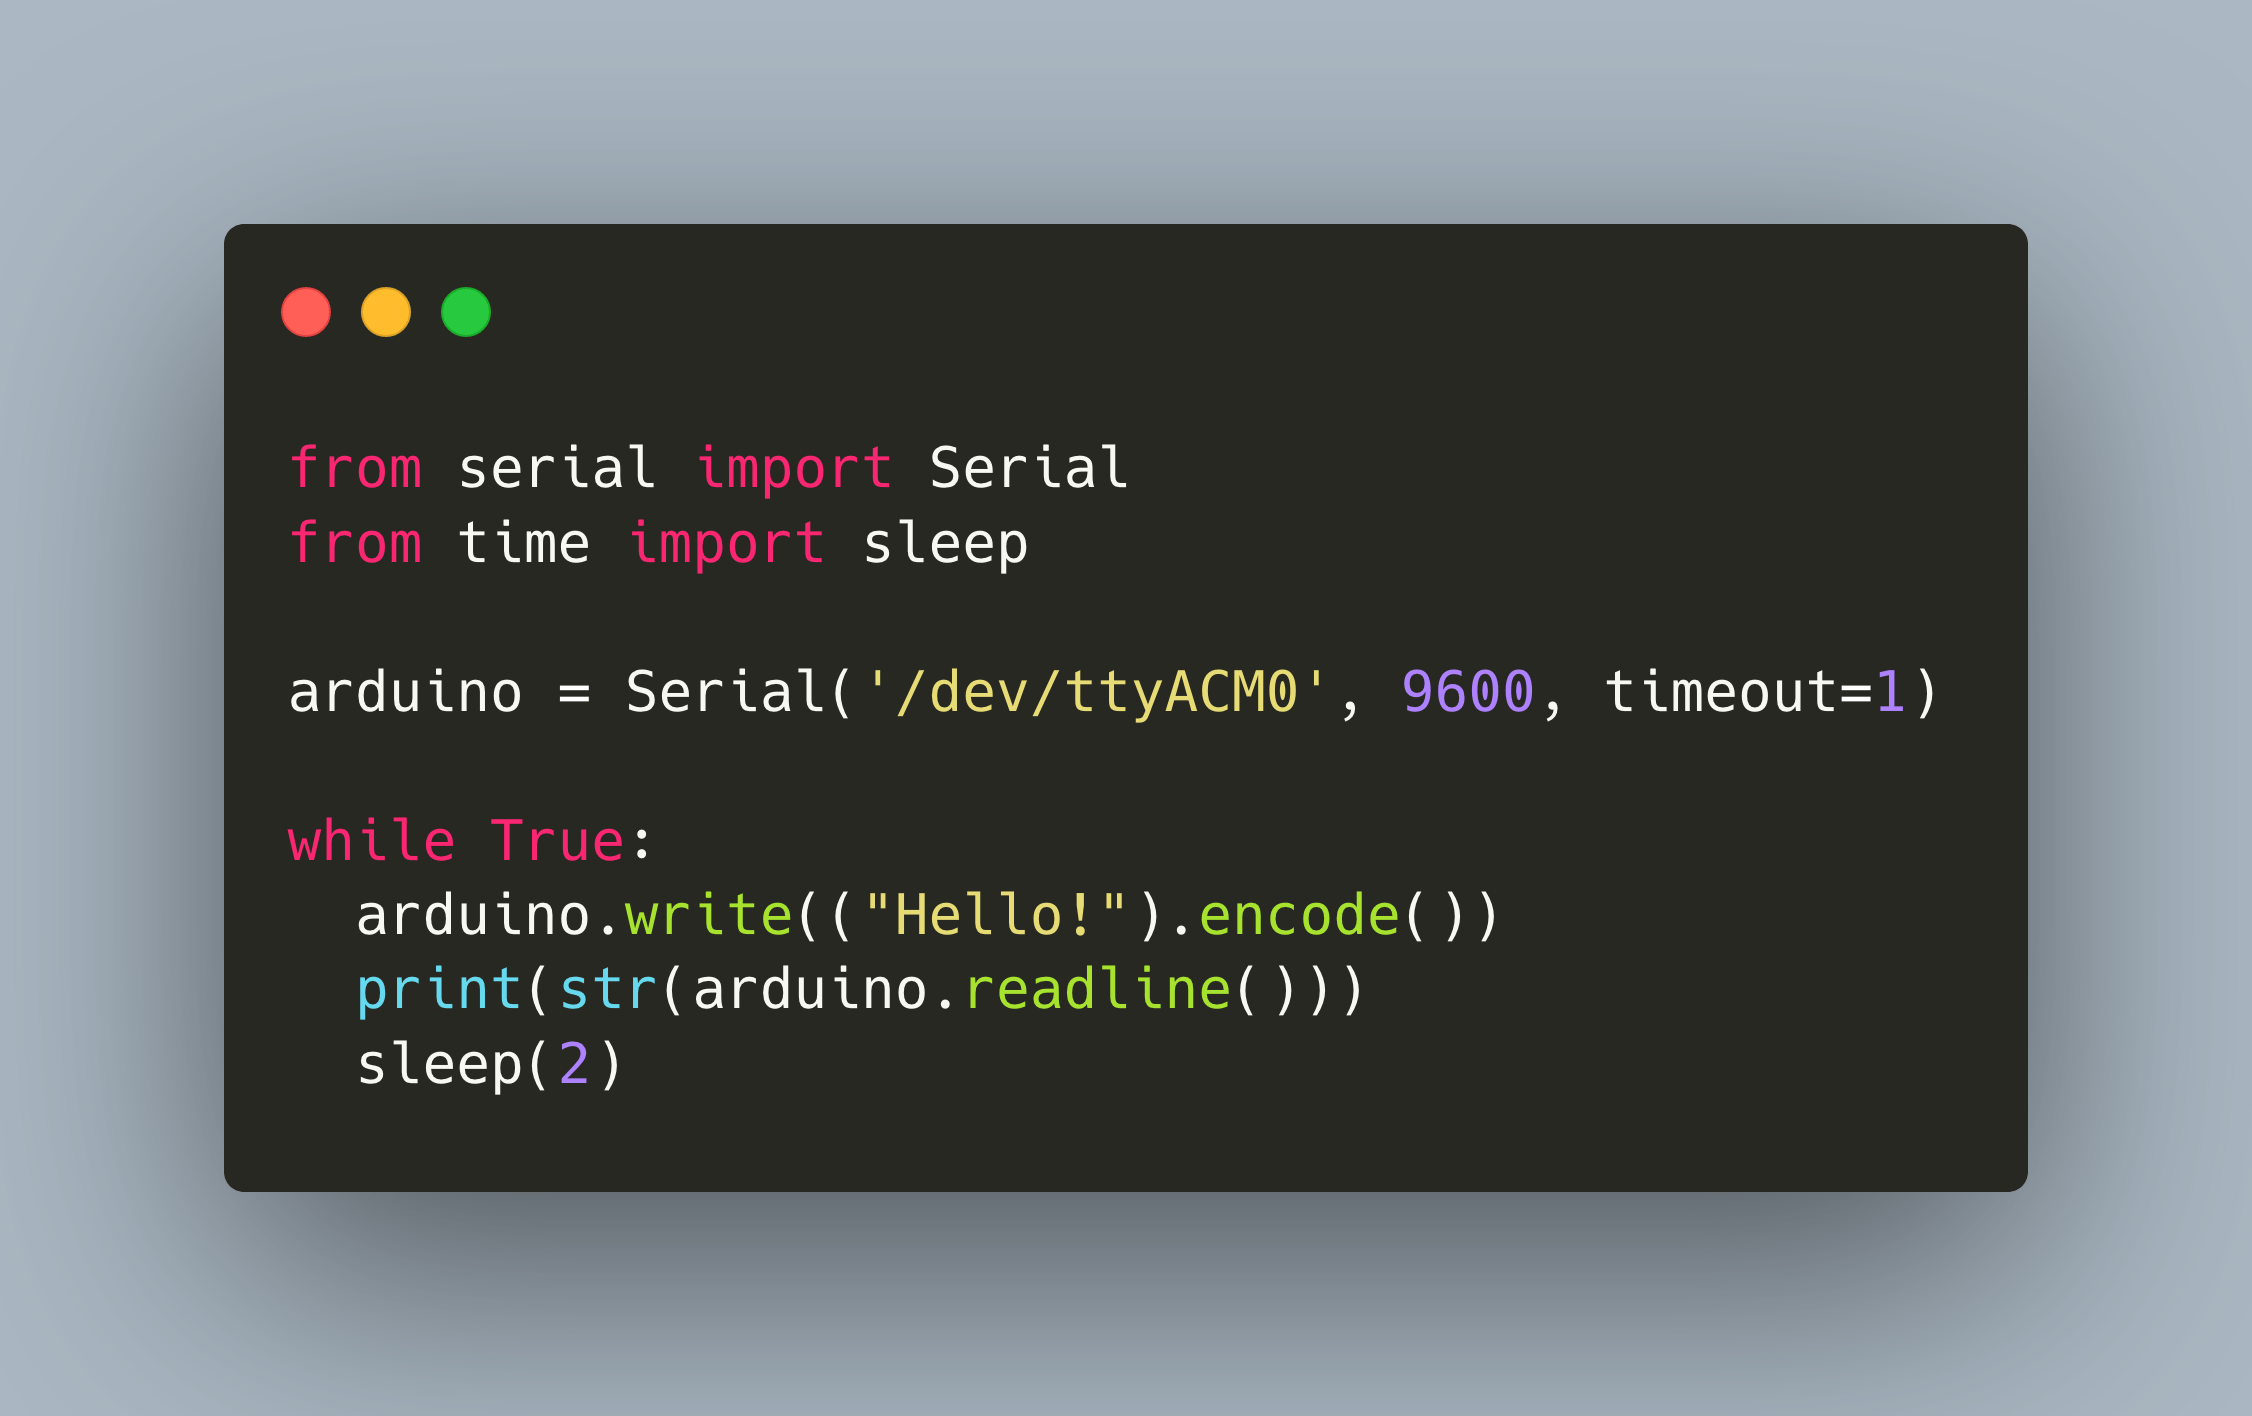
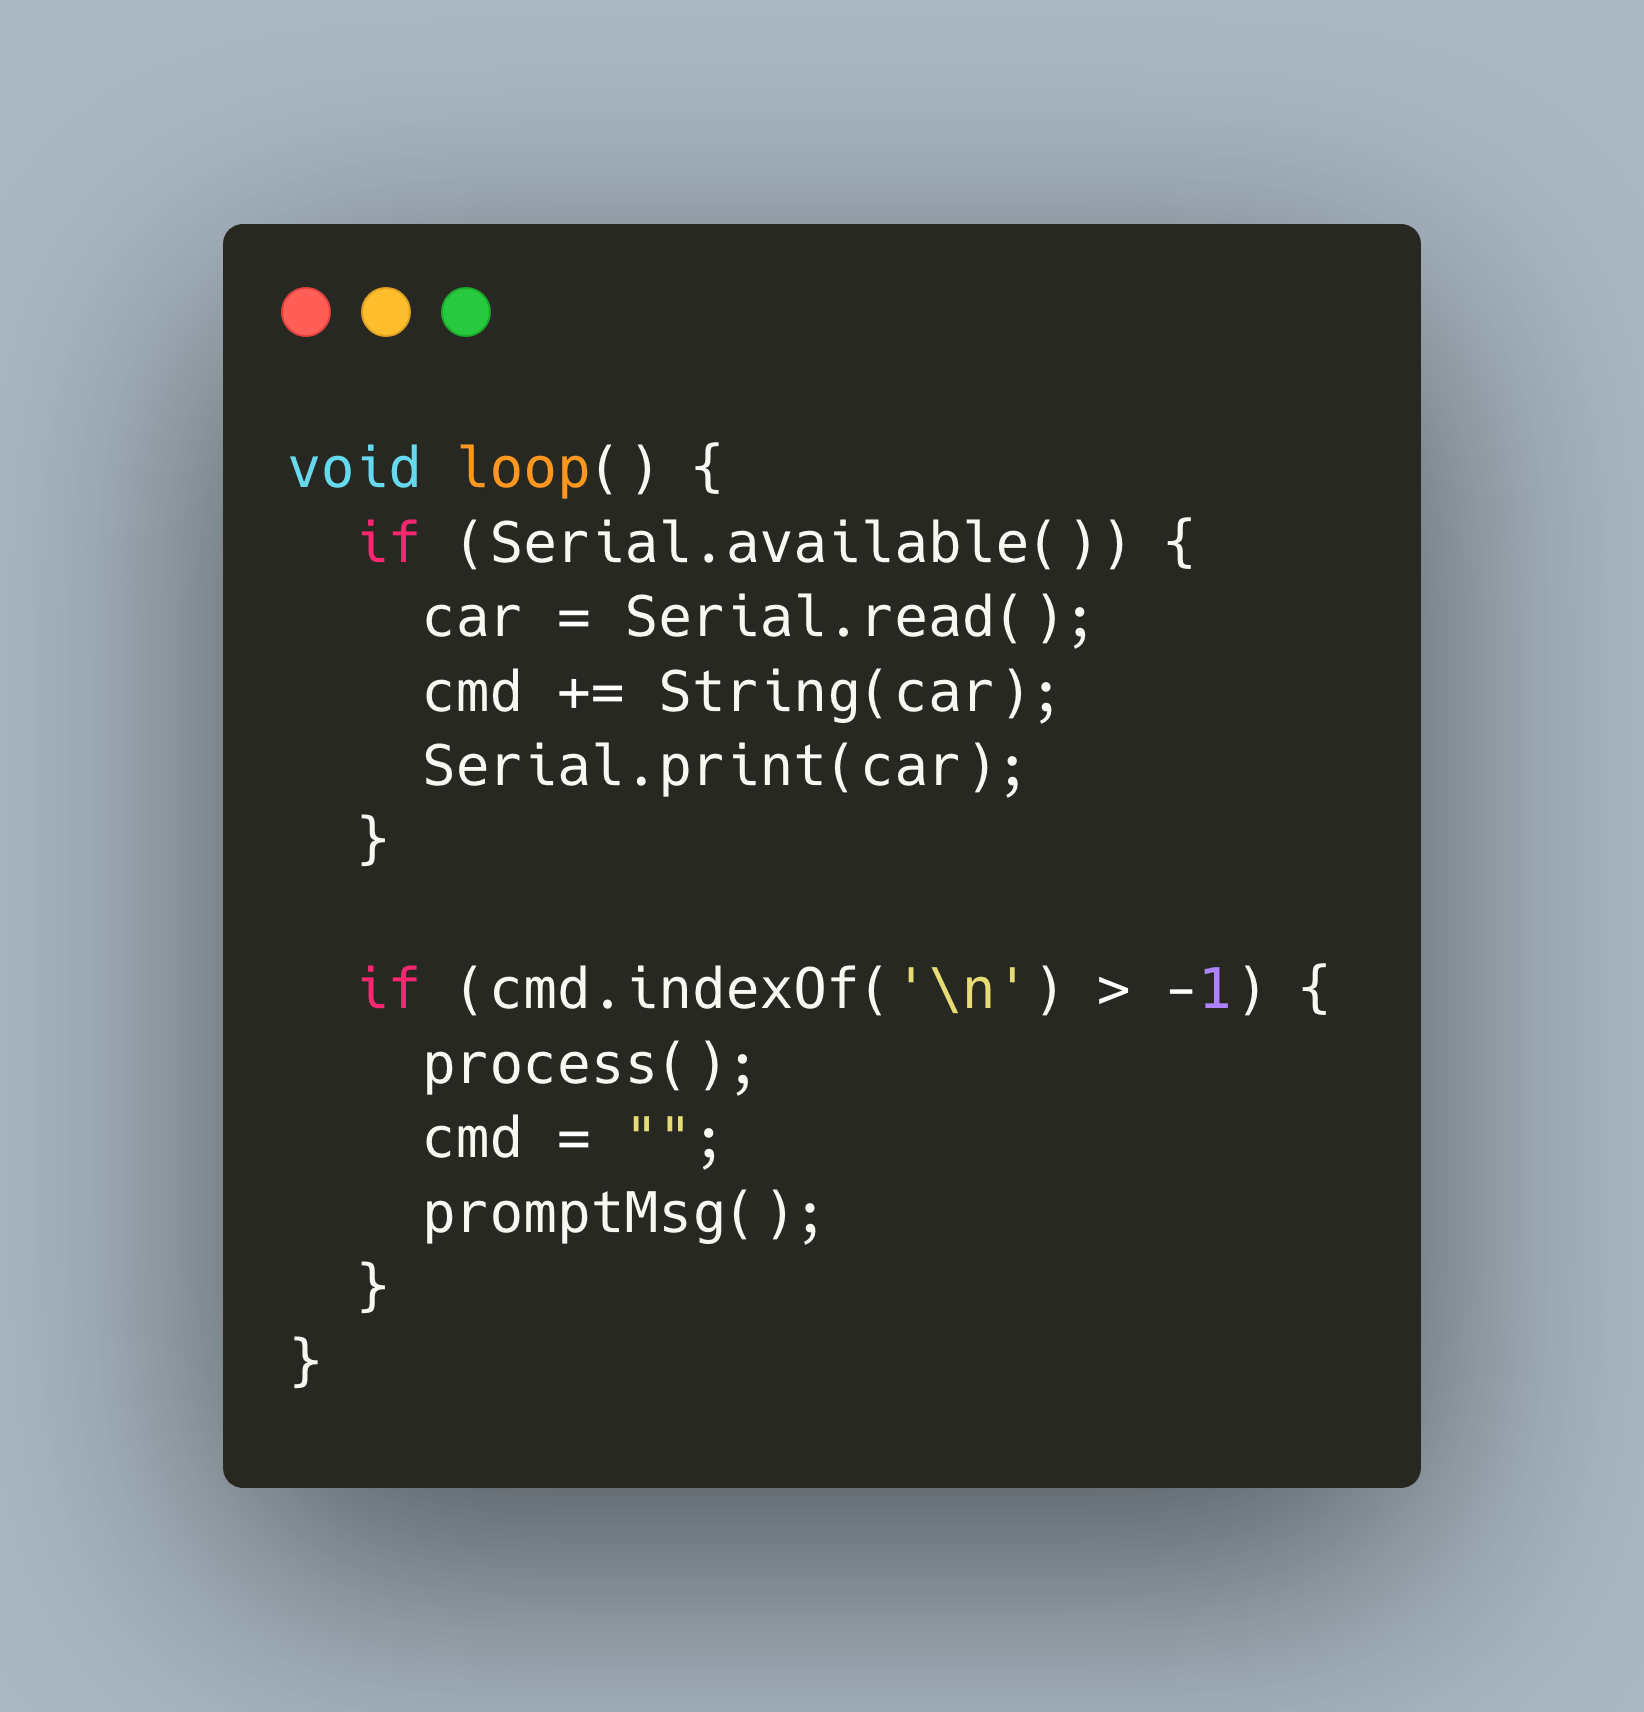
Arduinos are great microcontroller for your embedded projects. During one of my projects, I wanted to have a simple command prompt to trigger commands at the Arduino, for example to print a message on a LCD display, or to move a servo motor with attached ultrasonic sensor. It is easy enough to listen to a single char and take this as a command, but if you come from Linux or Mac, you are used to have rich CLI tools.
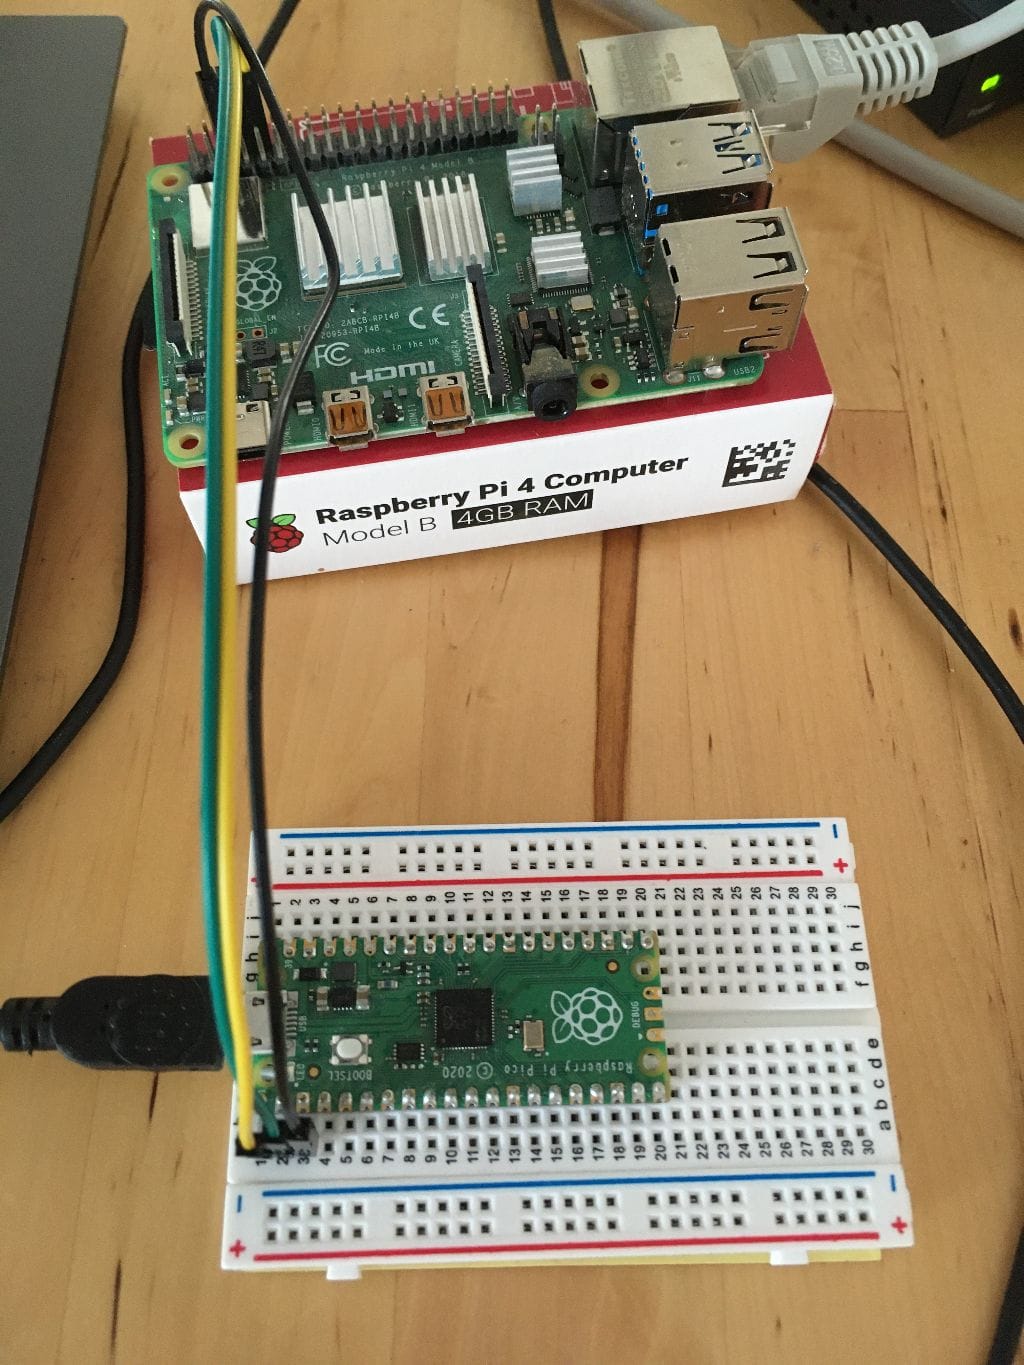
The Raspberry Pi is one of the most popular single board computers for hobbyists. Its 40 Pins support the protocols I2C, SPI, and UART. If you followed the series, you are familiar with those protocols. But how can you use them with your Raspberry Pi?
The Raspberry Pi is single board computer with now four revisions and a minimalistic zero variant. It is a popular choice for different projects because of its small size, efficient power consumption, processing speed and by being a full Linux based computer.
The Raspberry Pi is a single board computer with now 4 revisions and a minimalistic zero variant. It is a popular choice for different projects because of its small size, efficient power consumption, processing speed and by being a full Linux based computer.
The Arduino microcontroller is a versatile microcontroller, a true workhorse for many do it yourself projects. It has enough pins to connect several sensors and actuators. When building more complex system, you need to have a means for communicating with other microcontrollers or even single board computers.
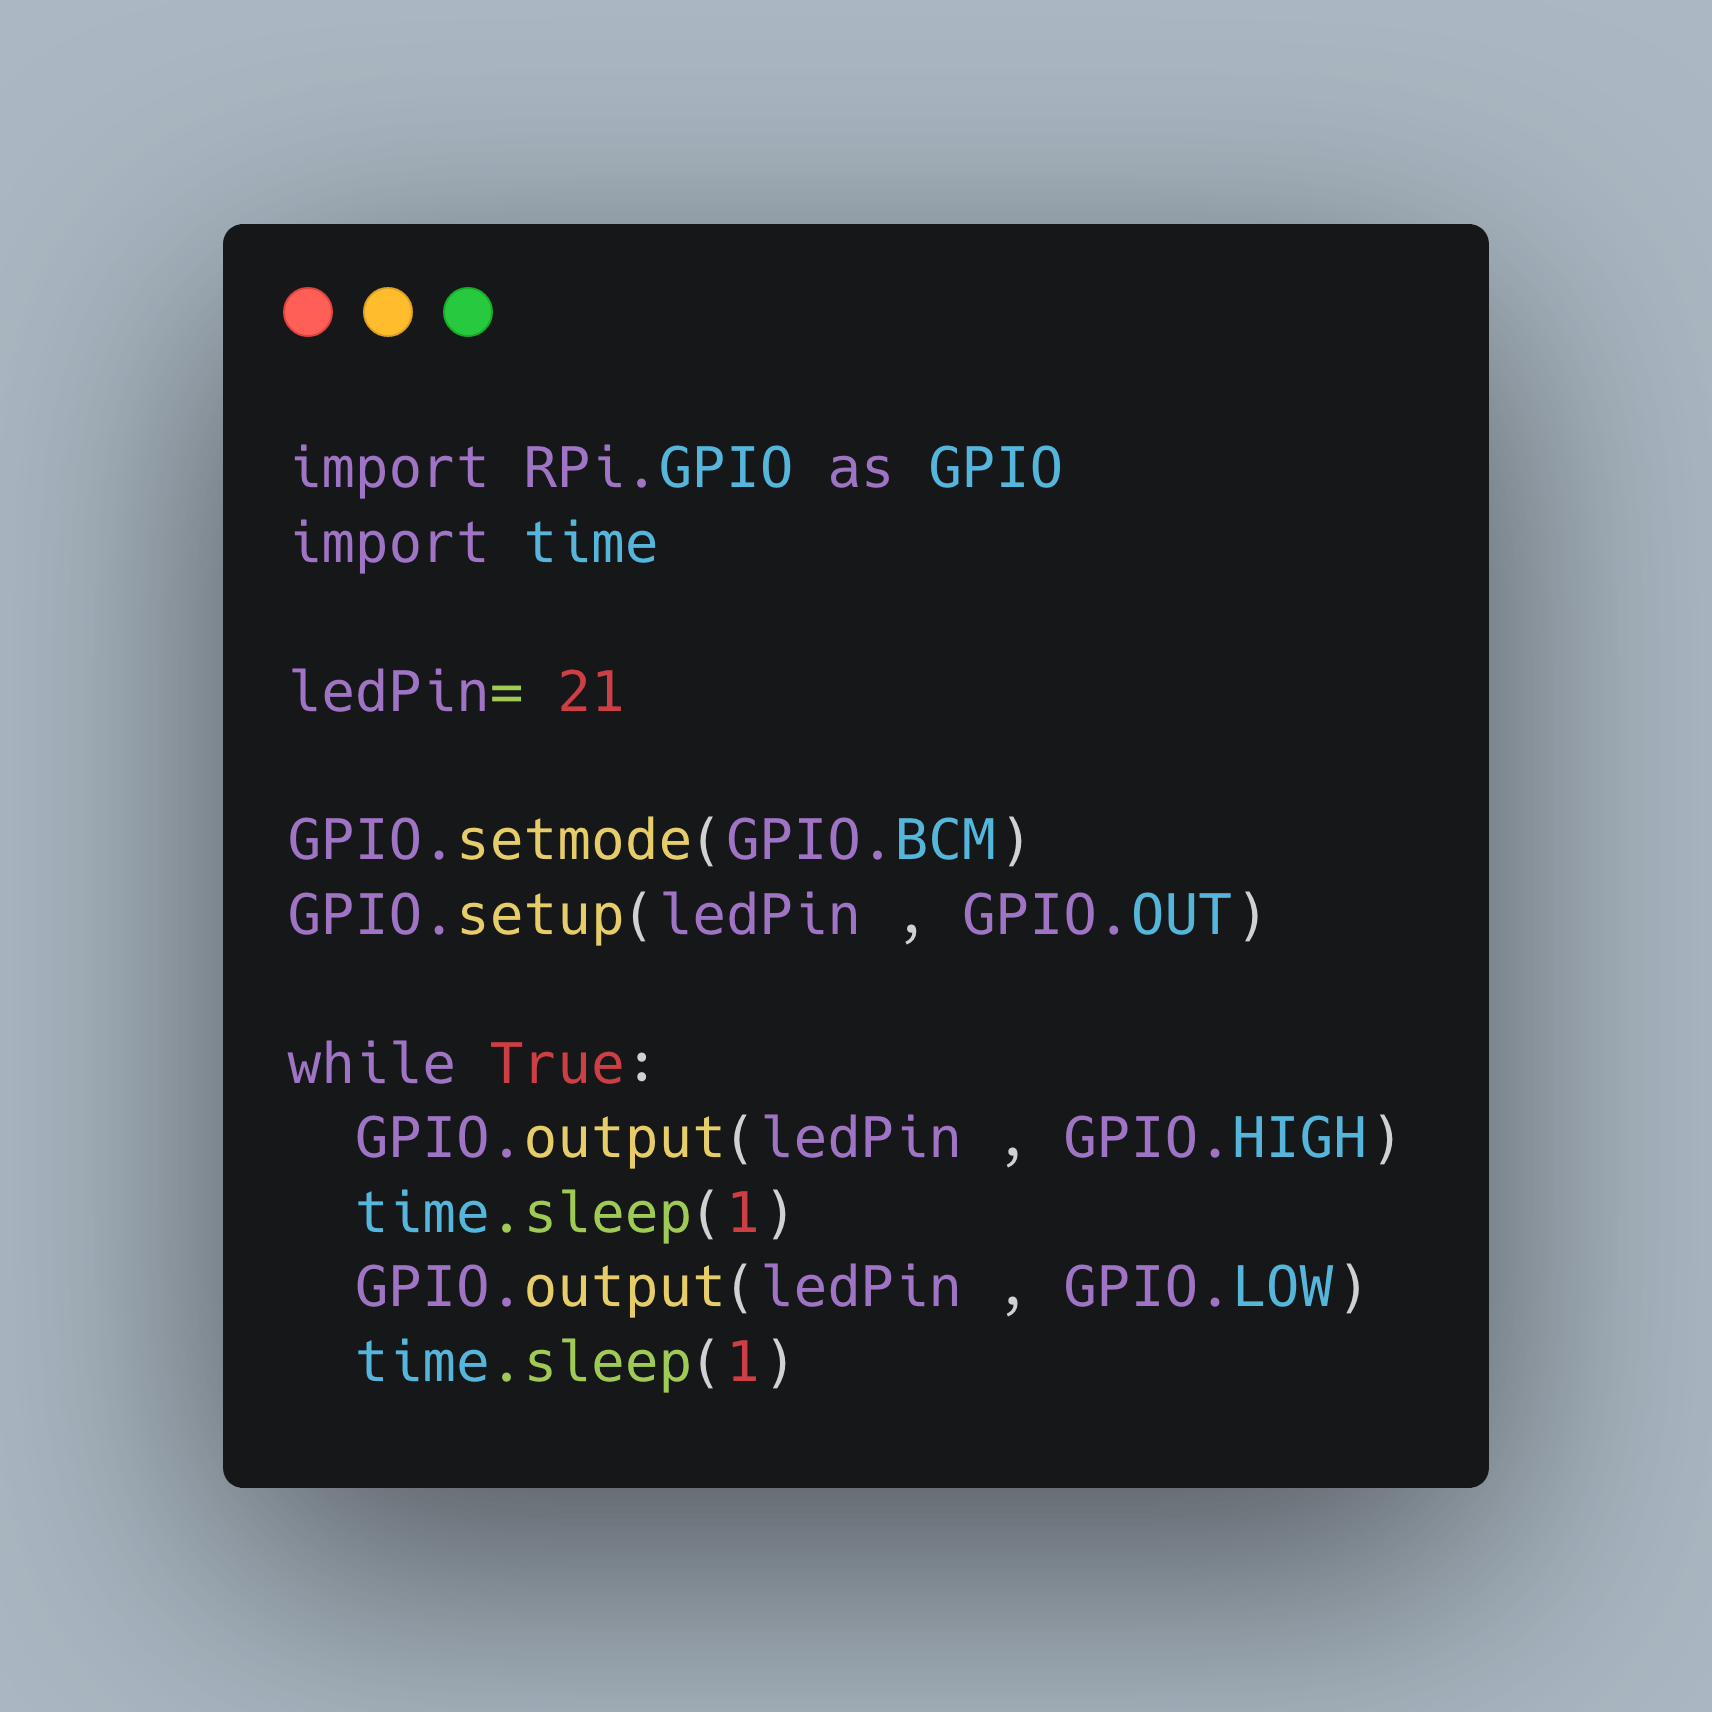
Microcontrollers like the Arduino are an essential part of DIY projects including robotics. In the last article, we saw the Pin layout and GPIO functions of the Arduino Uno, the Raspberry Pi and the Raspberry Pico. GPIO pins can either read or write digital data, that is a continuous high or low voltage, or work with analog data, a PWM signal that alternates between high and low voltage in a compressed time frame. We also saw that these microcontrollers and single-board computers support different GPIO functions, including protocols to communicate data with other hardware.
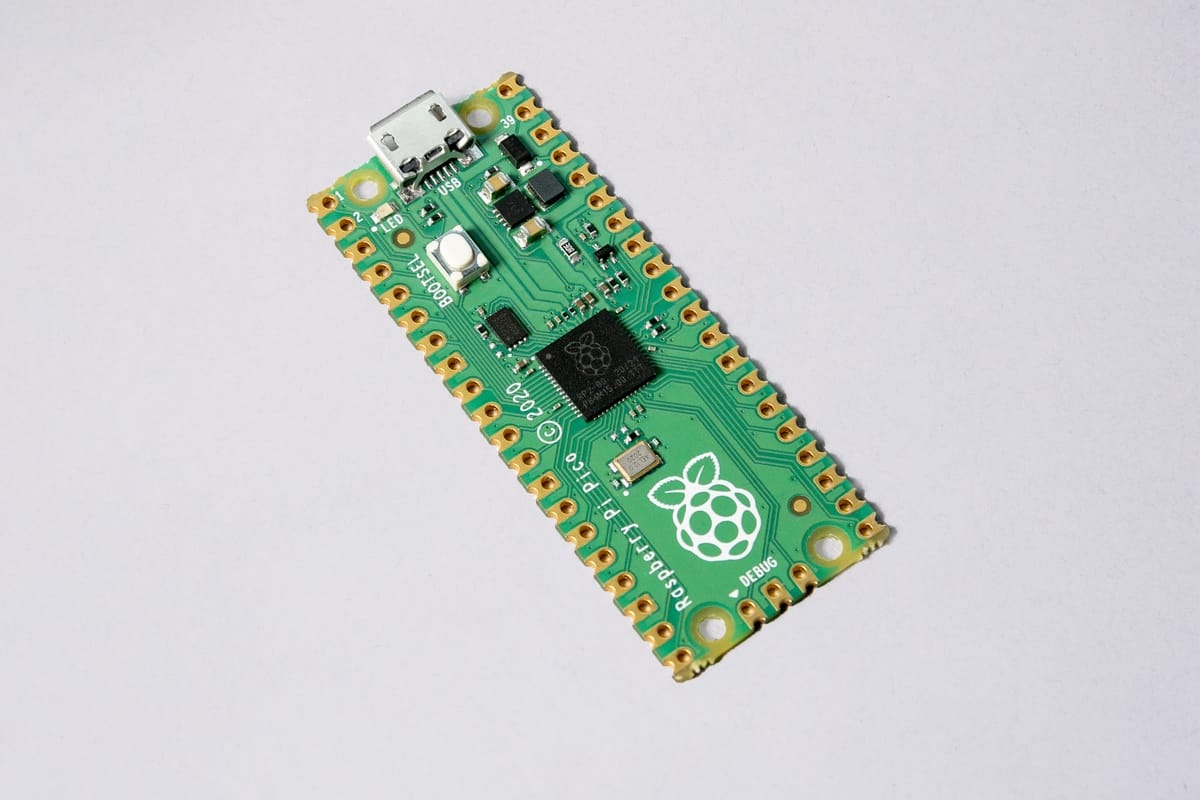
The Raspberry Pi Pico, or shorthand Pico, is a new microcontroller from the Raspberry Pi foundation. From its hardware side, it provides a dual core ARM processor, 2MB of flash memory, and 26 GPIO pins. From its software side, it offers an extensive C/C++ SDK as well as a port of MicroPython.