The Raspberry Pico, or shorthand Pico, is a new microcontroller from the Raspberry Pi foundation. It provides a dual core ARM processor, 2MB of flash memory, and 26 GPIO pins. You can program the Pico with either a C/C++ SDK or MicroPython. I became fascinated by this device and started to develop a library for reading the DHT11 temperature sensor. However, to get the exact timing requirements of the proprietary, 1-wire requirement right, we need to use the PIO subsystem.
The previous article explained the Pio system and the language. In this article, I will design and implement a PIO prototype program for connecting a DHT11 sensor. The prototype is concerned with sending the required startup signal to the sensor, and then record its response, electrical pulses in the range of 26-70 us, which is the encoded sensor data. Development happens with MicroPython: The interactive REPL environment, and the nature of a scripting language, provides a flexible environment.
DHT11 Protocol Overview
The DHT11 protocol works over a 1-wire connection. This line is active high. To enable the DHT 11 sensor
- Send LOW for at least 18ms
- Release LOW
- Expect LOW for 80us
- Expect HIGH for 80us
The sensor will then transmit a total amount of 40bit data by sending differently typed impulses over the wire:
- Bit 0: HIGH for 26-28us, followed by LOW for 50us
- Bit 1: High for 50us, followed by HIGH for 70us
The 40bits data are divided into 2x8 Bit for the temperature, 2x 8bit for the humidity, and 8bit as the checksum.
PIO Program Design
Let’s consider the essentials of PIO programs:
- can have flexible pin mappings for writing and reading data
- the frequency of 133MHZ can be scaled with an 8bit frequency divider value
- can have 32 instructions
- can write to 32bit registers (or 64bit registers if both FIFOs of the state machine are combined)
These constraints shape the program approach in the following manner:
- the program needs to work with a frequency that is fine grained enough to capture the difference of 28us vs. 70us, and that also encompasses the 18ms during startup
- we need to define the same Pin as an input and output pin
- the pins is active high, and it switches its role from output to input after the DHT11 starting phase to use the correct PIO statements
- we need to record 32bit of payload and then 8bit of checksum data
After some experimentation, I came up with a design that activates the DHT11 sensor with pure MicroPython commands, and then starts a state machine that ticks slow enough to detect the 26-28us pulses in the DHT signal.
Program Prototype
We will implement the program step-by-step, solving one constraint at a time.
MicroPython PIO Program Essentials
The general setup for a MicroPython program with an embedded PIO program is as follows. This example shows how to blink a single LED.
from rp2 import PIO, StateMachine, asm_pio
from machine import Pin
import time

@asm_pio(set_init=PIO.OUT_LOW)
def pio_program():
    set(pins, 1) [31]
    nop()        [31]
    set(pins, 0) [31]

state_machine = StateMachine(0, pio_program, freq = 2000, set_base=Pin(25))

state_machine.active(1)
In this program, following steps happen:
- Line 1-3: The
importstatements define the required objects of the program - Line 5.: the decorator
@asm_pioidentifies the very next method as a PIO program. The decorator accepts all the arguments with which to customize the state machine, like initial direction of pins, the shift direction of the ISR/OSR, and auto or threshold values for the push and pull methods - Line 7 - 9: Pio assembler commands as documented in the official documentation. In MicroPython, there are subtle differences to the naming conventions, so be sure to read the community documentation and also browse the examples
- Line 11: The PIO program is used to construct a state machine. The object receives two mandatory arguments - the state machine id, and the name of the function containing the PIO program. Other arguments are the frequency, and the various pin settings (on, out, side, set and jmp pin)
- Line 13: The instantiated state machine is activated
Frequency Calculation
You can set a PIO program frequency to anything between 2Khz and 133Mhz. Using an online tool, we can see how frequency translates to seconds: 2000 Hz = 500us, 5000 Hz = 200us, and 10000 Hz = 100us. However, the frequency defines how fast the sum of all instructions inside the program runs. Therefore, we first calculate the cycle of all instructions as cycle = target_frequency * (number of statements + wait cycles), and the state machines frequency as state_machine_frequency = cycle * * (number of statements + wait cycles)
For the starter program, we need to operate around 26us. If we aim for a total of 20 instructions, this translates to 2000Hz / 20 = 100Hz = 10ms = 10000us - too fast sending the 40us signal. And the other way around 25000 / 20 = 25000 Hz = 0.04ms = 40us - this would force use to wait for 500 instructions.
Therefore, the starter PIO program will only send the initial impulse, and all other calculations will be run by the other state machine.
The reader state machine has 16 instructions, and 1 instruction will be stalled for 31 cycles. Therefore, the cycle of the state machine needs to be 1us * (16+31)= 21277Hz, and the total frequency is 21277Hz * (16 + 31) = 1000019Hz.
The frequency is configured as follows:
dht_reader = StateMachine(1,dht11_reader, freq = 1000019)
Pin Setup & Configuration
As mentioned before, the DHT11 startup sequence is covered by a MicroPython sections, and then the PIO program will be launched.
The startup sequence consist of setting the pin to output mode with a pull-up, then send an initial high voltage for 250ms, then a low impulse for 40ms.
dht_pin = Pin(15, Pin.OUT, Pin.PULL_DOWN)
dht_pin.value(1)
utime.sleep_ms(250)
dht_pin.value(0)
utime.sleep_ms(20)
Then, we change the pin to input with a pull up, and start the state machine. The pin will be used both as the input pin (because we will be reading a value from it) and as a jump pin (because we will use its state for branching statements).
dht_pin = Pin(15, Pin.IN, Pin.PULL_UP)
dht_reader = StateMachine(1,dht11_reader, freq = 1000019, in_base=dht_pin, jmp_pin=dht_pin)
Reading and Pushing Data
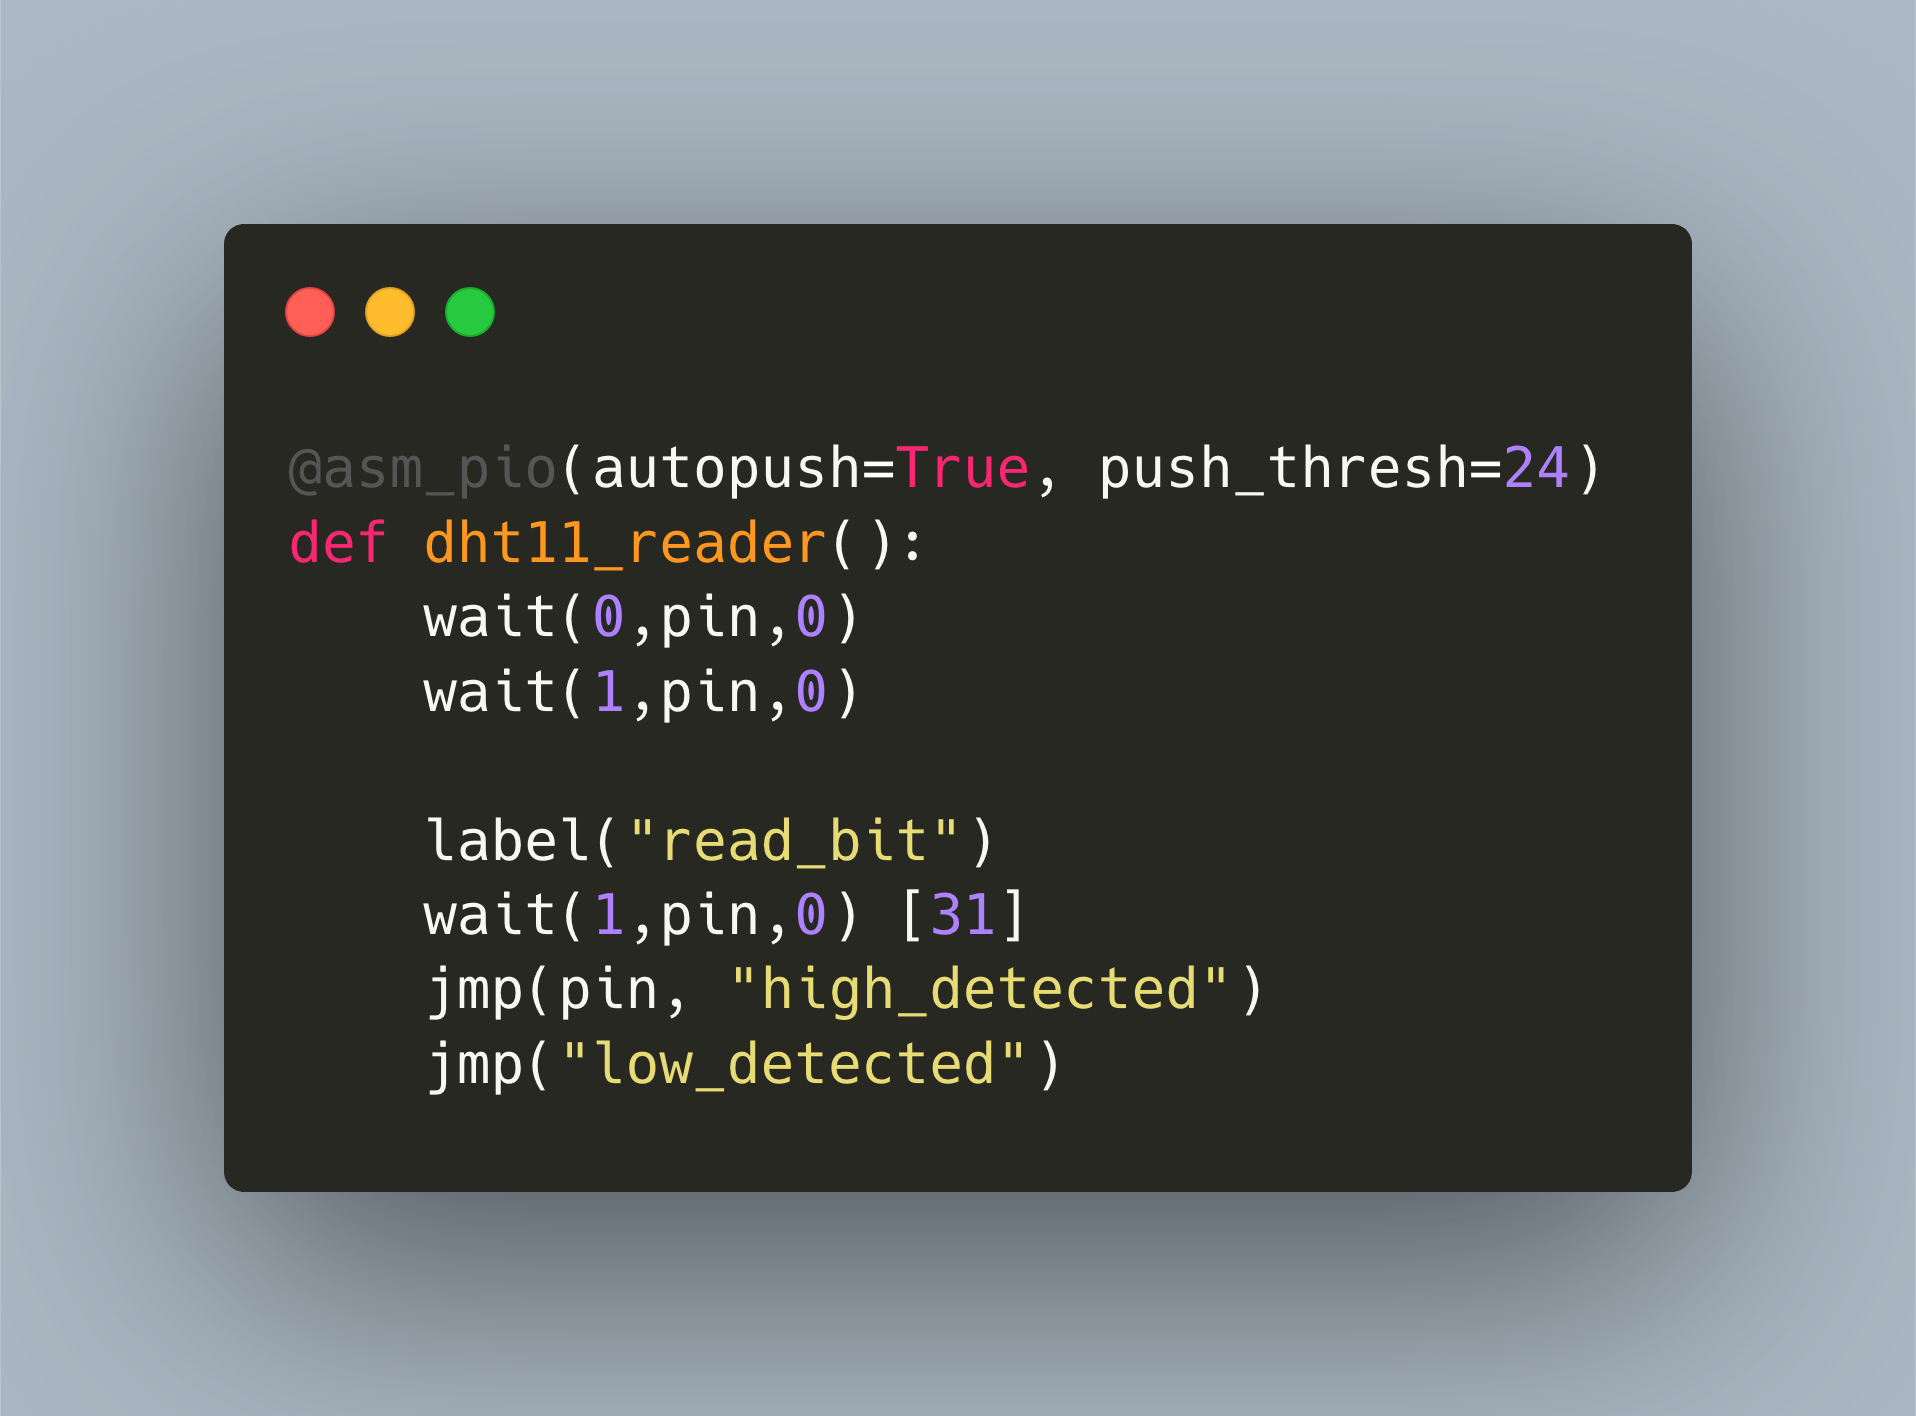
The final requirement is to implement the core logic for detecting the DHT11 pulses and convert them into data. After several attempts, I took an approach inspired by this forum. In essence, the PIO program performs these steps:
- Wait for the pin to go low, then wait for the pin to go high, capturing the DHT11 response signal
- Start the
read_bitloop, which will again wait for the pin to go low - Then, when the pin goes high, wait for 32us and read the pin value: If its still high, then the DHT sends sends the bit
0b1, otherwise its0b0 - Call the corresponding
high_detectedandlow_detectedcode block to write 3-bit data to the ISR - Next bit is read
Whenever 24bits are written, the results will be auto-pushed to the state machine.
The complete PIO program is as follows.
@asm_pio(autopush=True, push_thresh=24)
def dht11_reader():
    # ínitial LOW-HIGH confirmation pulse
    wait(0,pin,0)
    wait(1,pin,0)

    # Main loop
    # General idea: if pin changes from high to low within 32 cycles, its logic 1, otherwise logic 0
    label("read_bit")
    wait(1,pin,0) [31]
    jmp(pin, "high_detected")
    jmp("low_detected")

    # Write 0b111 = (7), return to pattern loop
    label("high_detected")
    set(y,0b111)
    in_(y,3)
    wait(0,pin,0)
    jmp("read_bit")

    # Write 0b100 =(4), return to pattern loop
    label("low_detected")
    set(y,0b100)
    in_(y,3)
    wait(0,pin,0)
    jmp("read_bit")
Main Program
The main program starts an infinite loop. After waiting for 2.5ms for powering up the DHT11 sensor, the program sends the start signal to the sensor, starts the state machine, and reads 5 times 24bits of data. The data will be stored as strings inside an array. Once completed, the captured data will be printed as binary number to the scree, and then converted to humidity and temperature values.
print("Starting DHT11 Program ...")

i = 0
while True:
    sleep(2.0)

    i +=1
    print("Cycle {} - Running state machine ...".format(i))

    dht_pin = Pin(15, Pin.OUT, Pin.PULL_DOWN)
    dht_pin.value(1)
    utime.sleep_ms(250)
    dht_pin.value(0)
    utime.sleep_ms(30)
    dht_pin = Pin(15, Pin.IN, Pin.PULL_UP)
    dht_reader = StateMachine(1,dht11_reader, freq = 1000019, in_base=dht_pin, jmp_pin=dht_pin)

    dht_reader.active(1)
    data = []
    for _ in range(5):
        data.append(bin(dht_reader.get()))

    dht_reader.active(0)
    sleep(0.5)

    for d in data:
        print(d)
Output Example
Measurements from my room, taken 03.07.2021, 10:27, yields the following data:
Starting DHT11 Program ...
Cycle 1 - Running state machine ...
0b100111111100100100111111
0b111111100111111111111100
0b111111100100100111100100
0b111111111100100111100100
0b100100100100111100100111

Temperature: 24.2 Degree Celcius
Humidity: 48.1 %

Temperature: 24.3 Degree Celcius
Humidity: 48.2 %
Conclusion
This article detailed the implementation of a PIO program with MicroPython to read the DHT11 temperature sensor. We learned about the PIOs essential features - frequency selection, flexible pin mappings, working with 32bit registers - and the constraints of the DHT11 - read/write operations between 80ms and 24us, switch the single pins role from output to input, write chunks of 8bit of data. From this, we crafted a program step by step. At the end, the program worked, but development time and effort were extensive. The original goal of using PIO was having precise timing controls, yet I found this only achieved at a high price in terms of time spent. In the end, I also discovered a pure MicroPython library for DHT11 that works flawlessly, and given the recent support of the Arduino framework, C libraries for this sensor could become compatible with the Pico. For these reasons, I will not continue the development of a Pico C-SDK DHT11 library.