Google Kubernetes Engine: Mostly Automated Installation with Terraform

The Google Kubernetes Engine provides a managed Kubernetes environment. Like its counterpart in AWS, it is also deeply integrated into the Google cloud, and allows to use other abstractions.
This article is a hands-on tutorial on creating a GKE cluster. To automate as many steps as possible, I will use Terraform to bootstrap the cluster up to the point where you can use kubectl to interact with the Kubernetes components.
Prerequisites
Google Kubernetes Engine, called GKE from here on, requires a fully registered and activated Google account. You also need to provide billing information, such as a credit card, and be willing to pay the cost of hosting nodes and pods. If you register a new account, you will get a free budget pf $300 for using all Google cloud services.
The cluster installation is coordinated from a dedicated computer, which is named the GKE controller in this article. On the GKE controller, you will install the gcloud binary and the Terraform binary. The gcloud binary provides extensive tools for everything starting from authenticates, IAM user creation to resource creation and maintenance. Terraform uses the gcloud binary to create the resources.
In direct comparison with AWS, I found the Google cloud management console better structured and easier to use. Its helpful to take some time reading the GKE introduction documentation for getting to know how a Kubernetes cluster on Google cloud is operated.
Part 1: Tool Installation
Gcloud
The gcloud binary is available for all platforms, either as a direct download or even packaged.
Assuming you use Linux, just run the following commands to get started:
$> curl -O https://dl.google.com/dl/cloudsdk/channels/rapid/downloads/google-cloud-cli-409.0.0-linux-x86_64.tar.gz
$> tar -xzf google-cloud-cli-409.0.0-linux-x86.tar.gz
$>  mv ./google-cloud-sdk ~/.google-cloud-sdk
$> ~/.google-cloud-sdk/install.sh

Welcome to the Google cloud CLI!
#...
$> export PATH=$PATH:~/.google-cloud-sdk/bin
Terraform
Terraform is also a binary specific to your platform. When running Linux, use the following commands:
cd ~
wget https://releases.hashicorp.com/terraform/1.3.1/terraform_1.3.1_linux_amd64.zip
unzip terraform_1.3.1_linux_amd64.zip
chmod +x terraform
mv terraform /usr/local/bin
export PATH=$PATH:/usr/local/bin
Part 2: GKE Initialization
The tool installation is only the first step, we also need to initialize the tools by performing a login to the Google account and by installing additional helpers.
With your primary Google cloud account data, run gloud init and follow along the instructions - this will open a web page in your browser, in which you enter the credentials.
gloud init

Welcome! This command will take you through the configuration of gcloud.

Your current configuration has been set to: [default]

You can skip diagnostics next time by using the following flag:
  gcloud init --skip-diagnostics

Network diagnostic detects and fixes local network connection issues.
Checking network connection...done.
Reachability Check passed.
Network diagnostic passed (1/1 checks passed).

You must log in to continue. Would you like to log in (Y/n)?  Y

Your browser has been opened to visit:

    https://accounts.google.com/o...
When the credentials are accepted, the next step is to create a uniquely named Google cloud project:
Pick cloud project to use:
 [1] coral-marker-368316
 [2] Enter a project ID
 [3] Create a new project
Please enter numeric choice or text value (must exactly match list item):  3

Enter a Project ID. Note that a Project ID CANNOT be changed later.
Project IDs must be 6-30 characters (lowercase ASCII, digits, or
hyphens) in length and start with a lowercase letter. [gke-cluster-md5sum42].

#...

This gcloud configuration is called [default]. You can create additional configurations if you work with multiple accounts and/or projects.
Run `gcloud topic configurations` to learn more.
With the correct credentials and a defined project, we now need to enable remote logins:
gcloud auth application-default login
Your browser has been opened to visit:

    https://accounts.google.com/o/...


Credentials saved to file: [~.config/gcloud/application_default_credentials.json]
And finally, configure necessary access rights for the API.
gcloud services enable container.googleapis.com

Operation "operations/acf.p2-83384886424-03221d4a-bca7-4fef-a9ae-d69b911d8336" finished successfully.
When you receive an error like FAILED_PRECONDITION: Billing account for project is not found. Billing must be enabled for activation of service, follow these steps to verify billing.
Part 3: Terraform Project
Now that the gcloud binary is installed and fully initialized, we can create the Terraform resource definitions. The primary source for the following configuration files stem from the official documentation about Terraform GKE. These examples work out of the box, I merely renamed some resources.
The first choice is the region in which the cluster and its nodes should be made available. Check the Google cloud region overview and pick the most suitable one.
Let’s start with the provider.tf configuration. Use the most recent Google cloud provider version, define the region, and use the project name that you created earlier.
// provider.tf
terraform {
  required_providers {
    google = {
      source = "hashicorp/google"
      version = "4.43.0"
    }
  }
}

provider "google" {
  project     = "gke-cluster-md5sum42"
  region      = "europe-west3"
}
We create a service account and a container cluster resource next. The container cluster provides extensive configuration options, such as defining the Kubernetes release channel, a cost management configuration, network properties etc. We will keep it simple here, and only define the Kubernetes version.
Another feature to consider is how to manage the nodes of the cluster. Basically, you associate one or several node pools, which themselves are groups of similarly configured VMs. You can either use the default node pool or create a separate one. I will use the latter option.
In the main.tf file, enter these resource configurations:
// main.tf
resource "google_service_account" "gke_sa" {
  account_id   = "gke-cluster"
  display_name = "Service Account"
}

resource "google_container_cluster" "gke_cluster" {
  name     = "gke-cluster"
  location = "europe-west3"

  remove_default_node_pool = true
  initial_node_count       = 1
}

resource "google_container_node_pool" "gke_nodes" {
  name       = "nodes"
  location   = "europe-west3"
  cluster    = google_container_cluster.gke_cluster.name
  node_count = 2
  version = "1.23.8"

  node_config {
    preemptible  = true
    machine_type = "e2-medium"

    service_account = google_service_account.gke_sa.email
    oauth_scopes = [
      "https://www.googleapis.com/auth/cloud-platform"
    ]
  }
}
Finally, we initialize the Terraform project so that all required providers are installed.
terraform init

Initializing the backend...

Initializing provider plugins...
- Finding hashicorp/google versions matching "4.43.0"...
- Installing hashicorp/google v4.43.0...
- Installed hashicorp/google v4.43.0 (signed by HashiCorp)

Terraform has created a lock file .terraform.lock.hcl to record the provider
selections it made above. Include this file in your version control repository
so that Terraform can guarantee to make the same selections by default when
you run "terraform init" in the future.

Terraform has been successfully initialized!
That’s it. We can now create the cluster.
Part 4: Cluster Creation
The cluster is crated with two separate commands: First the service account and the container cluster, and then the node pool. With this, you can perform configuration updates on the node pool without recreating the cluster
# this can take 10 minutes
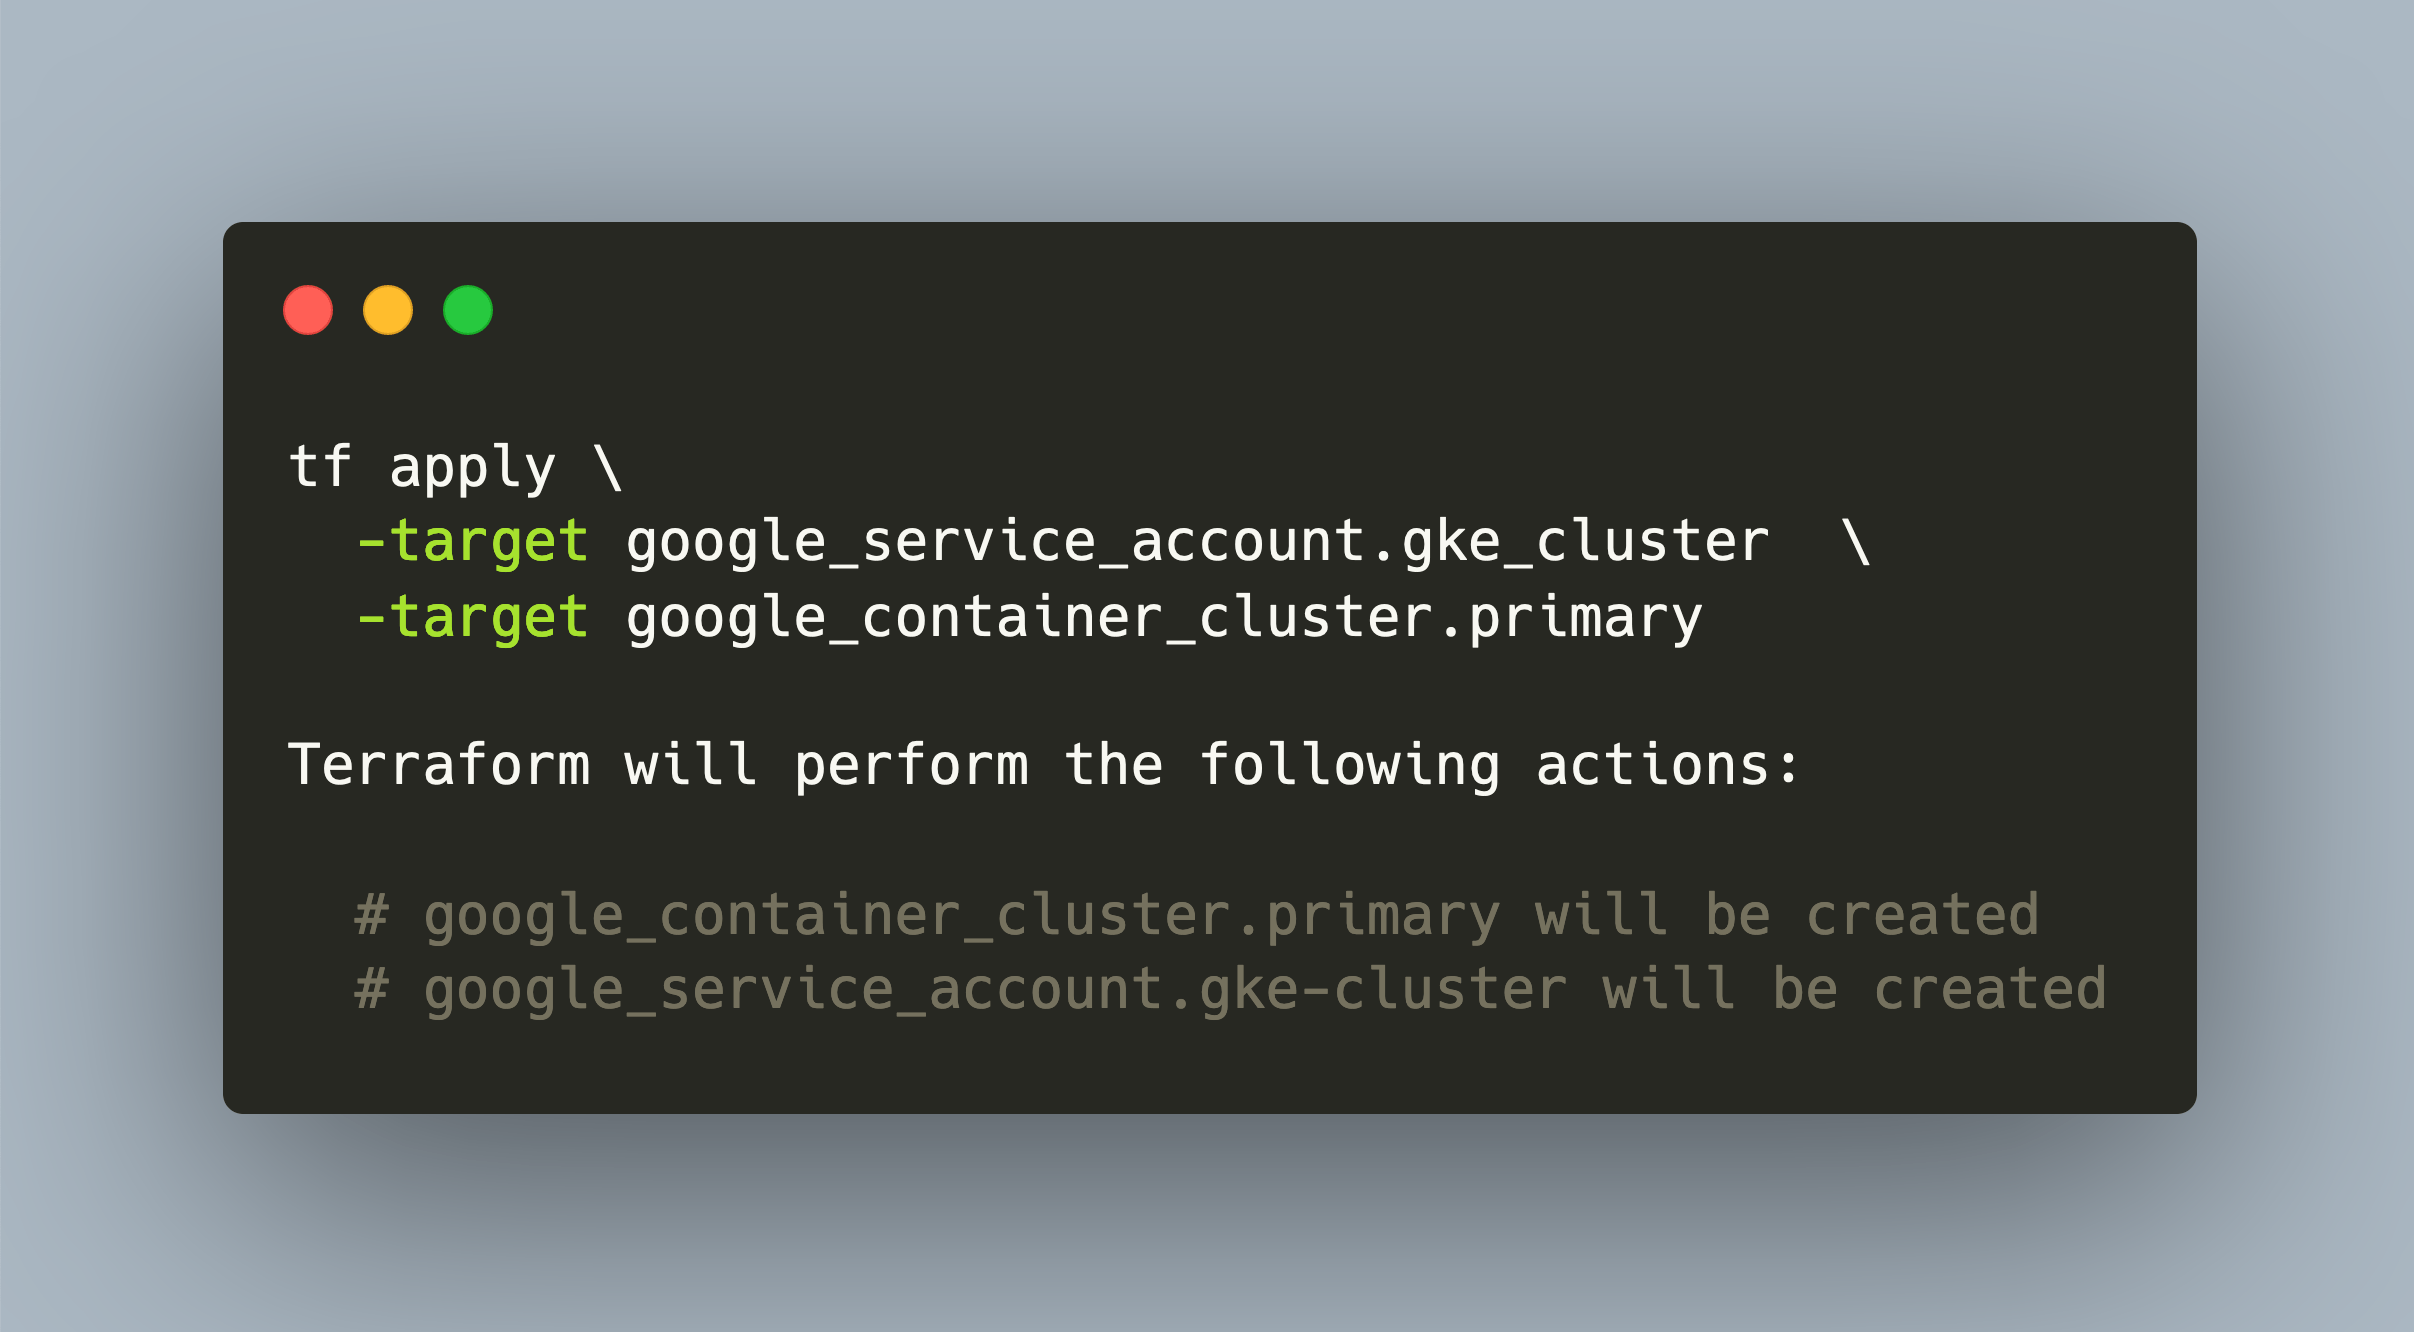
tf apply -target google_service_account.gke_cluster -target google_container_cluster.primary

Terraform will perform the following actions:

  # google_container_cluster.primary will be created
  # google_service_account.gke-cluster will be created

google_container_cluster.primary: Creating...
google_container_cluster.primary: Still creating... [10s elapsed]
#...
google_container_cluster.primary: Still creating... [11m10s elapsed]
google_container_cluster.primary: Creation complete after 11m20s [id=projects/gke-cluster-md5sum42/locations/europe-west3/clusters/gke-cluster-md5sum42]

Apply complete! Resources: 1 added, 0 changed, 0 destroyed.
Now we create the nodes:
tf apply -target google_container_cluster.primary
google_container_node_pool.gke_nodes: Creating...
google_container_node_pool.gke_nodes: Still creating... [10s elapsed]
google_container_node_pool.gke_nodes: Still creating... [20s elapsed]
google_container_node_pool.gke_nodes: Still creating... [30s elapsed]
google_container_node_pool.gke_nodes: Still creating... [40s elapsed]
google_container_node_pool.gke_nodes: Still creating... [50s elapsed]
google_container_node_pool.gke_nodes: Still creating... [1m0s elapsed]
google_container_node_pool.gke_nodes: Still creating... [1m10s elapsed]
google_container_node_pool.gke_nodes: Still creating... [1m20s elapsed]
google_container_node_pool.gke_nodes: Creation complete after 1m22s [id=projects/gke-cluster-md5sum42/locations/europe-west3/clusters/x/nodePools/nodes]
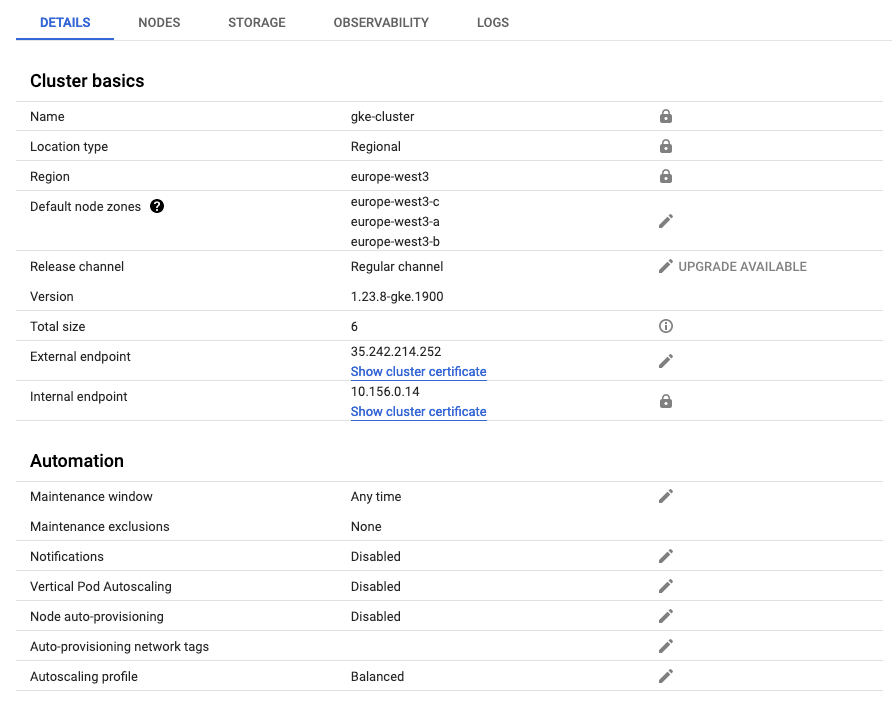
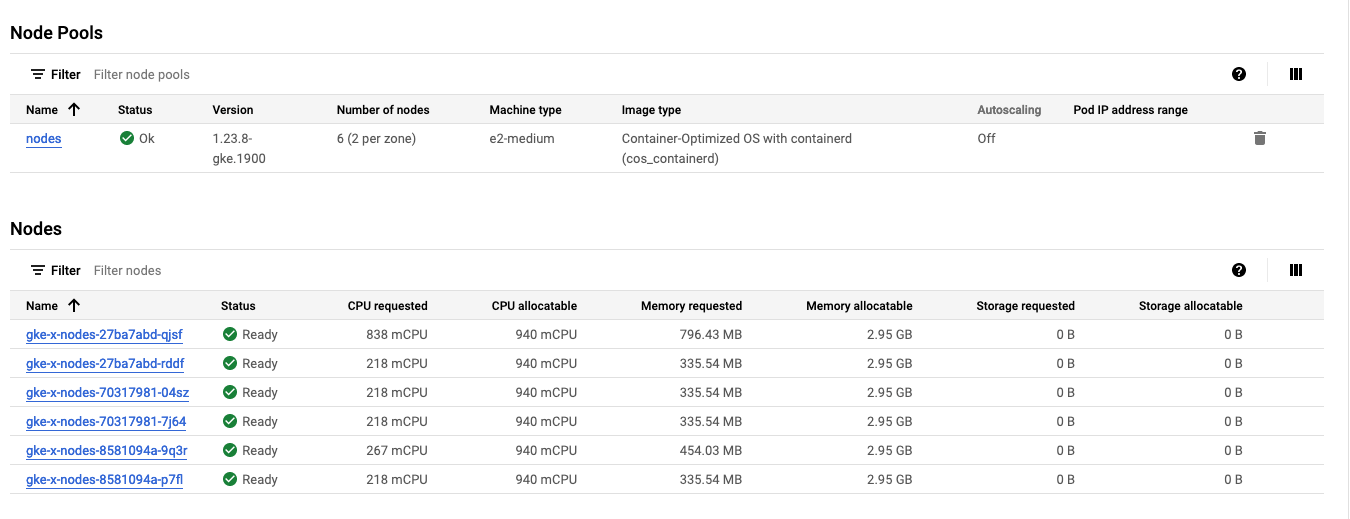
The cluster is visible in the cloud console, and its nodes shown:


Part 5: Cluster Access and Maintenance
To start working with the cluster, we need to get the kubeconfig file. The gcloud binary has a simple command that copies the kubeconfig file to the local machine. Run the following command with correct values for the cluster name and the region
gcloud container clusters get-credentials gke-cluster-md5sum42 --region=eu-west3
Then we can explore the nodes:
k get nodes
W1112 15:49:51.535124   15155 gcp.go:120] WARNING: the gcp auth plugin is deprecated in v1.22+, unavailable in v1.25+; use gcloud instead.
To learn more, consult https://cloud.google.com/blog/products/containers-kubernetes/kubectl-auth-changes-in-gke
NAME                        STATUS   ROLES    AGE     VERSION
gke-x-nodes-27ba7abd-qjsf   Ready    <none>   9m13s   v1.23.8-gke.1900
gke-x-nodes-27ba7abd-rddf   Ready    <none>   9m12s   v1.23.8-gke.1900
gke-x-nodes-70317981-04sz   Ready    <none>   9m10s   v1.23.8-gke.1900
gke-x-nodes-70317981-7j64   Ready    <none>   9m12s   v1.23.8-gke.1900
gke-x-nodes-8581094a-9q3r   Ready    <none>   9m10s   v1.23.8-gke.1900
gke-x-nodes-8581094a-p7fl   Ready    <none>   9m11s   v1.23.8-gke.1900
How about SSH access? There is no built-in support to roll your own SSH keys. Instead, Google recommends to use a feature called OS Login, which manages SSH key access automatically. I did not try this feature.
However, in the google cloud dashboard, sveral SSH access methods are shown:

Lets try the gcloud ssh login variant, and fetch some info about the Linux Image.
gcloud compute ssh --zone "europe-west3-c" "gke-gke-cluster-nodes-153c18f5-721h"  --project "gke-cluster-md5sum42"

$>
Part 6: Cluster Updates
Having the cluster configuration as Terraform resource, cluster maintenance means to update resource definitions and apply them.
To add a new node pool, define it in the main.tf file and apply the changes.
resource "google_container_node_pool" "gke_nodes_2" {
  name       = "nodes"
  location   = "europe-west3"
  cluster    = google_container_cluster.gke_cluster.name
  node_count = 3
  version = "1.23.8"

  node_config {
    preemptible  = true
    machine_type = "e2-small"

    service_account = google_service_account.gke_sa.email
    oauth_scopes = [
      "https://www.googleapis.com/auth/cloud-platform"
    ]
  }
}
tf apply --auto-approve

Terraform used the selected providers to generate the following execution plan. Resource actions
are indicated with the following symbols:
  + create
  ~ update in-place

Terraform will perform the following actions:

  # google_container_node_pool.gke_nodes will be updated in-place
  ~ resource "google_container_node_pool" "gke_nodes" {
      ~ node_count                  = 2 -> 6
      ~ version                     = "1.23.8-gke.1900" -> "1.23.8"
    }

  # google_container_node_pool.gke_nodes_2 will be created
  + resource "google_container_node_pool" "gke_nodes_2" {
      + cluster                     = "gke-cluster"
      + node_count                  = 3
      + version                     = "1.23.8"
  #...

Plan: 1 to add, 1 to change, 0 to destroy.
google_container_node_pool.gke_nodes_2: Creating...
google_container_node_pool.gke_nodes: Modifying... [id=projects/gke-cluster-md5sum42/locations/europe-west3/clusters/gke-cluster/nodePools/nodes]
google_container_node_pool.gke_nodes: Still modifying... [id=projects/
#...
...3/clusters/gke-cluster/nodePools/nodes, 3m30s elapsed]
google_container_node_pool.gke_nodes: Modifications complete after 3m33s [id=projects/gke-cluster-md5sum42/locations/europe-west3/clusters/gke-cluster/nodePools/nodes]
How about node version update? Will they disrupt the workloads? Change the node_version attribute to a higher number, and then apply the changes.
resource "google_container_node_pool" "gke_nodes" {
  version    = "1.23.12"
  #...
tf apply

google_container_node_pool.gke_nodes: Modifying... [id=projects/gke-cluster-md5sum42/locations/europe-west3/clusters/gke-cluster/nodePools/nodes]
google_container_node_pool.gke_nodes: Still modifying... [id=projects/gke-cluster-md5sum42/locations...3/clusters/gke-cluster/nodePools/nodes, 10s elapsed]
google_container_node_pool.gke_nodes: Still modifying... [id=projects/
#...
google_container_node_pool.gke_nodes: Modifications complete after 11m25s [id=projects/gke-cluster-md5sum42/locations/europe-west3/clusters/gke-cluster/nodePools/nodes]
During this update, I watched the status of all deployments with k get deploy -A -w to detect any changes.
k get deploy -A -w

NAMESPACE     NAME                            READY   UP-TO-DATE   AVAILABLE   AGE
default       nginx                           20/20   20           20          11s
default       redis                           5/5     5            5           48s
kube-system   event-exporter-gke              1/1     1            1           48m
kube-system   konnectivity-agent              6/6     6            6           48m
kube-system   konnectivity-agent-autoscaler   1/1     1            1           48m
kube-system   kube-dns                        2/2     2            2           49m
kube-system   kube-dns-autoscaler             1/1     1            1           48m
kube-system   l7-default-backend              1/1     1            1           48m
kube-system   metrics-server-v0.5.2           1/1     1            1           48m
The update worked, and I could not see any changes in the deployments.
k get nodes

NAME                                  STATUS   ROLES    AGE     VERSION
gke-gke-cluster-nodes-153c18f5-ei1b   Ready    <none>   2m48s   v1.23.12-gke.100
gke-gke-cluster-nodes-153c18f5-sn2t   Ready    <none>   4m5s    v1.23.12-gke.100
gke-gke-cluster-nodes-7f87c398-xfp2   Ready    <none>   9m45s   v1.23.12-gke.100
gke-gke-cluster-nodes-7f87c398-yjte   Ready    <none>   10m     v1.23.12-gke.100
gke-gke-cluster-nodes-dfc633f9-zduc   Ready    <none>   6m40s   v1.23.12-gke.100
gke-gke-cluster-nodes-dfc633f9-zplv   Ready    <none>   5m46s   v1.23.12-gke.100
Part 7: GKE Cluster Internals
I was curious to find out which Kubernetes components the cluster uses. Running kubectl get all -A revealed these facts:
- Linux distribution: Container Optimzed OS, version Lakitu
- Container runtime: containerd
- Logging: fluentbit-gke and gke-metrics-agent
- Network communication: kube-dns, kube-proxy-gke, konnectivity-agent
- Storage: pdcsi-node
- Ingress: l7-loadbalancer
Conclusion
Google cloud provide a managed Kubernetes cluster called Google Kubernetes Engine. In this article, you learned how to setup a Cluster with the help of Terraform. The article showed all necessary steps: a) install the gcloud and terraform binary, b) configure the glocud binary to use your Google cloud credentials, c) create the Terraform project and finally d) create the cluster. Furthermore, I showed how cluster maintenance actions, adding new nodes and changing the Kubernetes version, are applied. And finally, you saw some detail information which Kubernetes components are used in a Google Kubernetes cluster.