Kops is a Kubernetes distribution that installs a Kubernetes cluster on cloud providers. Fully supported are AWS und GCE, and beta support exists for Digital Ocean, Hetzner and Open Stack.
This article is a tutorial for installing a 3 node Kubernetes cluster on AWS. We will quickly review the prerequisite requirements, then start the installation process. This encompasses the download of the AWS and kops binary, then creating AWS IAM users and an S3 Bucket, and finally the cluster configuration. In order to automate this process as much as possible, we will use Terraform to automate the installation.
You can clone the terraform project files from my Github project kubernetes-kops-terraform.
Prerequisites
To follow this tutorial, you need to have this:
- A fully registered and activated AWS account to create the required resources (IAM user, Rout53 DNS entries, AWS instances), and you should also be willing to pay for the AWS resources if you want to use the cluster for several days or weeks
- A domain name at which the cluster is publicly or privately reachable (you can use Amazon or any other domain registrar with which you can configure nameserver entries)
The installation happens from a dedicated computer which I call the kops controller. You will install the AWS cli and the kops binary on it, and you should be able to run Terraform from it. You can use the AWS GUI or CLI to create the resources, but I decided to use Terraform for automating as many installation steps as possible. AWS is complex, and I made generous use of the GUI and documentation to learn about the AWS resources that are created, and then put them into Terraform.
Part 1: Tool Installation
AWS CLI
To install the AWS CLI on a Linux host, execute the following commands in you shell:
$> curl "https://awscli.amazonaws.com/awscli-exe-linux-x86_64.zip" -o "awscliv2.zip"
$> unzip awscliv2.zip
$> sudo ./aws/install

installer: Package name is AWS Command Line Interface
installer: Installing at base path /
installer: The install was successful.

$> aws --version

aws-cli/2.8.2 Python/3.9.11
Kops Binary
The kops binary is provided platform specifically compiled - fetch the correct version, make the binary executable, and put it into your shells executable path. For Linux it’s this:
curl -Lo kops https://github.com/kubernetes/kops/releases/download/$(curl -s https://api.github.com/repos/kubernetes/kops/releases/latest | grep tag_name | cut -d '"' -f 4)/kops-linux-amd64

chmod +x kops

sudo mv kops /usr/local/bin/
Terraform
Terraform is also a binary specific to your platform. When running Linux, use the following commands:
cd ~
wget https://releases.hashicorp.com/terraform/1.3.1/terraform_1.3.1_linux_amd64.zip
unzip terraform_1.3.1_linux_amd64.zip
chmod +x terraform
mv terraform /usr/local/bin
export PATH=$PATH:/usr/local/bin
Part 2: AWS Resource Creation
Environment Variables
Before starting, we need to define environment variables that will be used by the AWS cli via Terraform in order to authenticate and authorize changes with AWS.
As mentioned in the introduction, I decided to use Terraform as much as possible. Therefore, with an admin user first, we will create a new IAM user with the appropriate access rights. Then, all subsequent commands will be run as the new user.
Define these environment variables:
export AWS_ACCESS_KEY_ADMIN_USER=REDACTED
export AWS_SECRET_KEY_ADMIN_USER=REDACTED

export AWS_ACCESS_KEY_KOPS_USER=""
export AWS_SECRET_KEY_KOPS_USER=""
And then, for the following Terraform commands, we will set the context like this:
// Admin Context
export AWS_ACCESS_KEY=$AWS_ACCESS_KEY_ADMIN_USER
export AWS_SECRET_KEY=$AWS_SECRET_KEY_ADMIN_USER
IAM User
If you do not have an AWS account yet, create one on the AWS startpage.
An AWS user is given access right by defining policies. Working with AWS for the first time, I needed to invest some time in learning how AWS polices are defined and represented in Terraform. My approach is this:
- Check the requires
arnpolicies of kops - For each line, identify the service that is being used. Example: From
arn:aws:iam::aws:policy/AmazonEC2FullAccesitsec2 - Add all of these services in the notation
<servicename>:*into a Terraform policy project.
When you are unsure, log into the AWS management console, create the policy, and study its JSON representation:
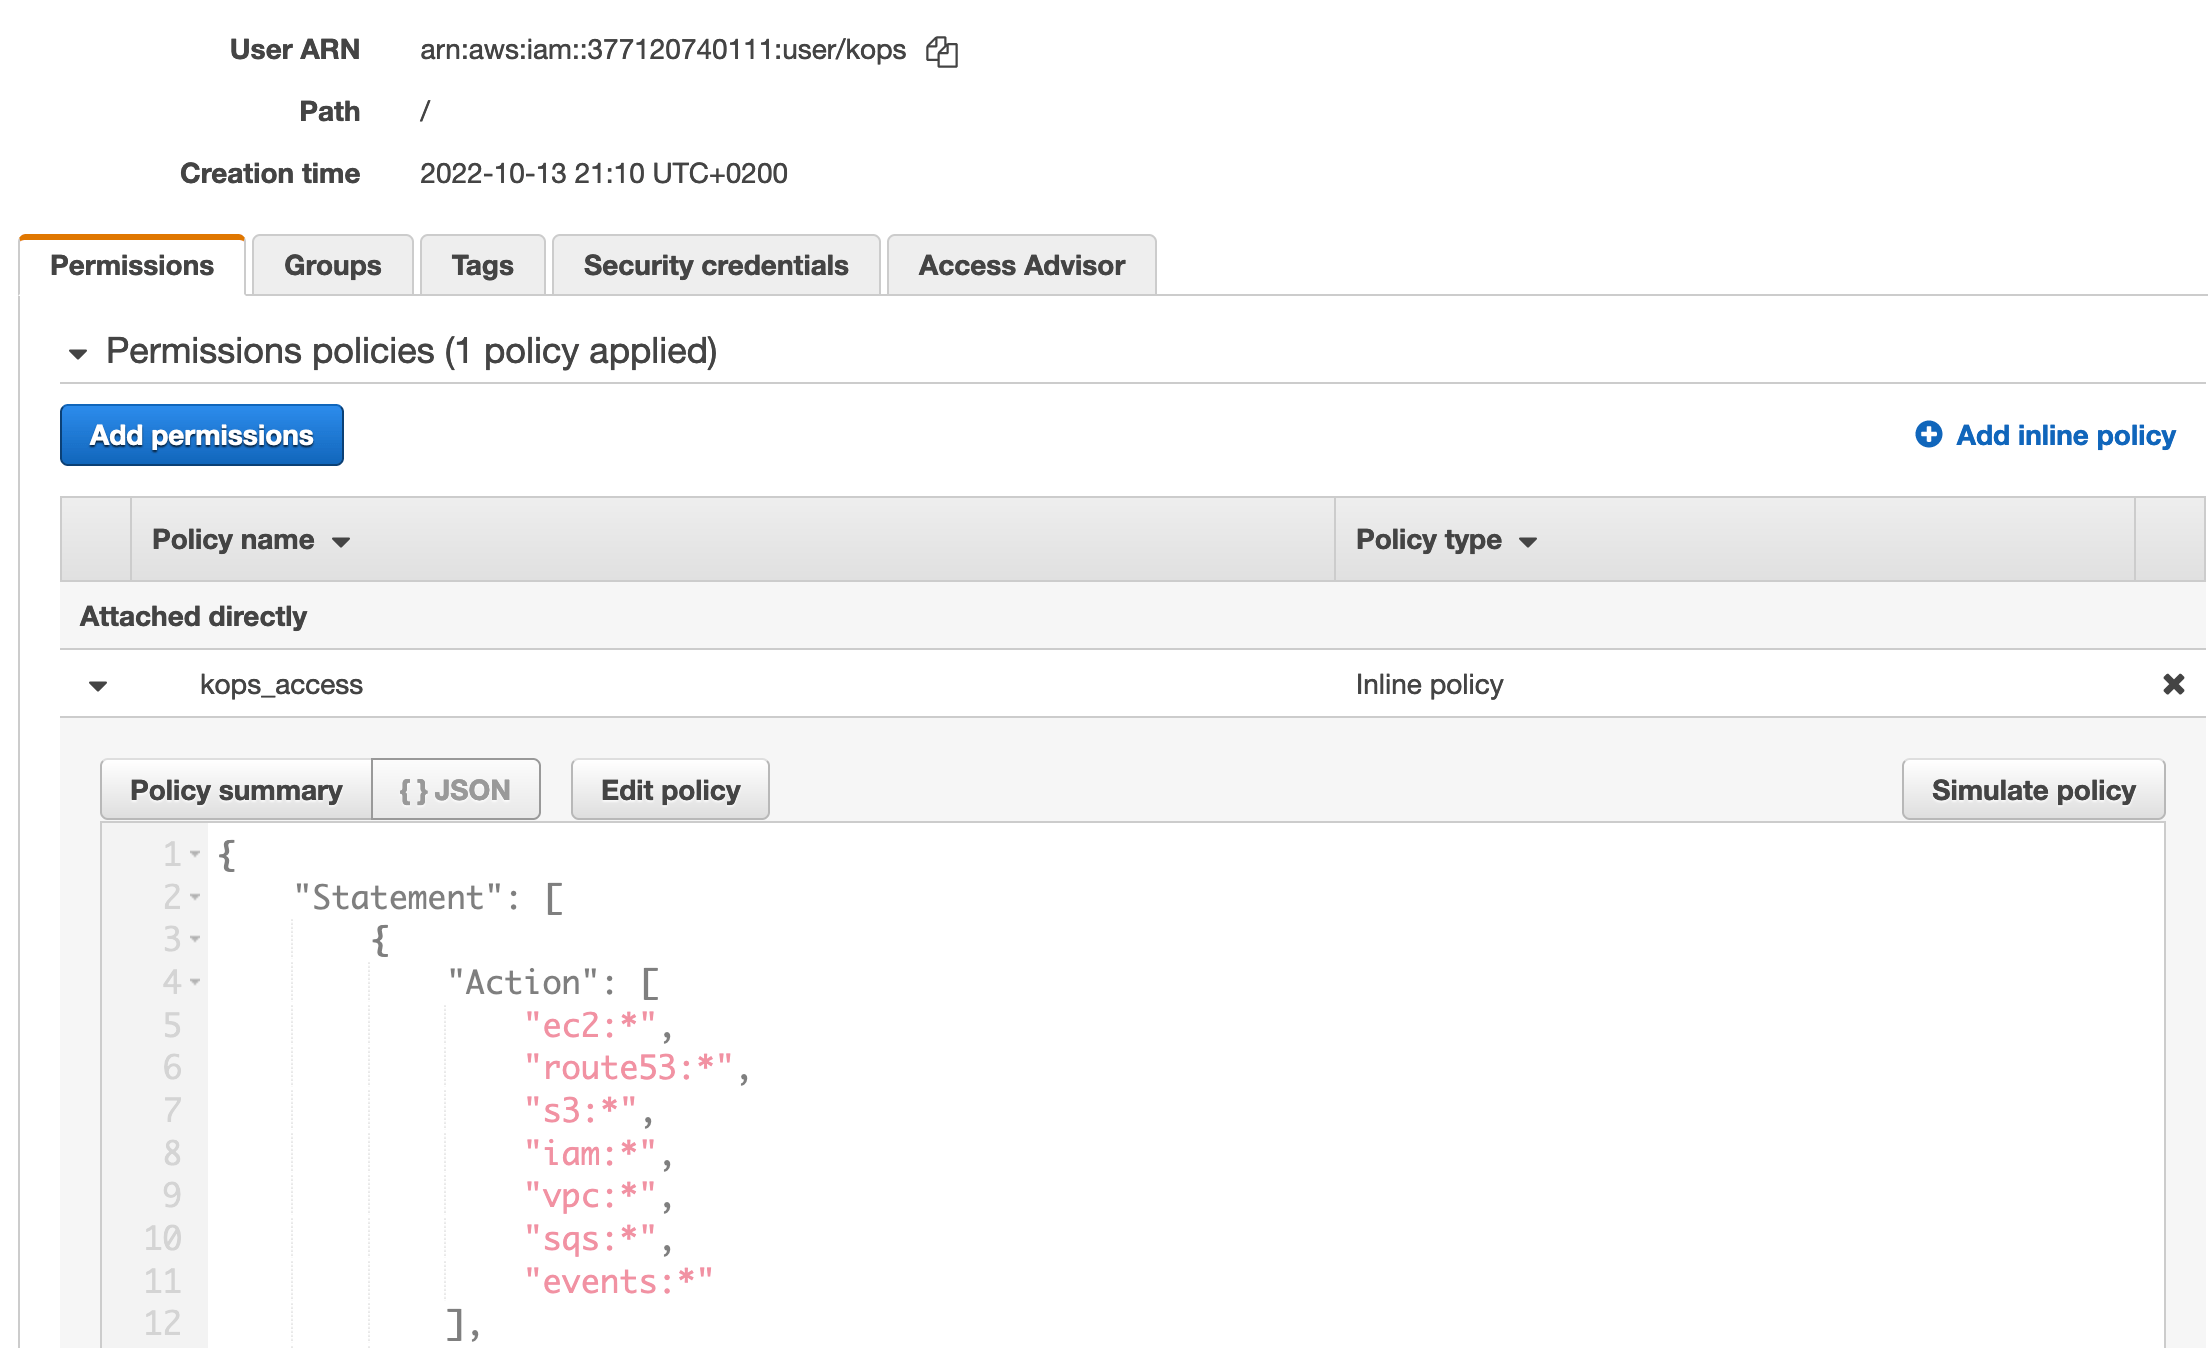
The final Terraform configuration is this:
// Admin Context
// export AWS_ACCESS_KEY=$AWS_ACCESS_KEY_ADMIN_USER
// export AWS_SECRET_KEY=$AWS_SECRET_KEY_ADMIN_USER

resource "aws_iam_user" "kops" {
  name = "kops"
  path = "/"
}

resource "aws_iam_user_policy" "kops_access" {
  name = "kops_access"
  user = aws_iam_user.kops.id

  policy = jsonencode({
    "Version" : "2012-10-17",
    "Statement" : [
      {
        "Effect" : "Allow",
        "Action" : [
          "ec2:*",
          "route53:*",
          "s3:*",
          "iam:*",
          "vpc:*",
          "sqs:*",
          "events:*",
          "autoscaling:*",
          "elasticloadbalancing:*"
        ],
        "Resource" : "*"
      }
    ]
  })
}
This user will be used from hereon to create the other required resources. We need to get the users access keys first:
// Admin Context
// export AWS_ACCESS_KEY=$AWS_ACCESS_KEY_ADMIN_USER
// export AWS_SECRET_KEY=$AWS_SECRET_KEY_ADMIN_USER

resource "aws_iam_access_key" "kops" {
  user = aws_iam_user.kops.id
}

output "kops_iam_key" {
  value = aws_iam_access_key.kops.id
}

output "kops_iam_secret" {
  value = aws_iam_access_key.kops.secret
  sensitive = true
}
Then, using these outputs, we can get the secrets and store them in ENV vars:
export AWS_ACCESS_KEY_KOPS_USER=${$(terraform output kops_iam_key)}
export AWS_SECRET_KEY_KOPS_USER=${$(terraform output kops_iam_secret)}
Route53 Domain
When using Kops, the cluster needs an DNS entry that resolves to AWS. You cannot work with pure IP addresses. The kops documentation mentions several options: You can use a domain name registered with AWS or any other registrar, and you can use either a top-level domain or a subdomain. I decided to use a subdomain with my default registrar, and then create an AWS Rout53 domain definition that essentially provides nameserver entries that I need to put to my registrar.
The required Terraform config is this:
// Kops Context
// export AWS_ACCESS_KEY=$AWS_ACCESS_KEY_KOPS_USER
// export AWS_SECRET_KEY=$AWS_SECRET_KEY_KOPS_USER

resource "aws_route53_zone" "example_com" {
  name = "example.com"
}

resource "aws_route53_zone" "k8s_example_com" {
  name = "k8s.example.com"
}

resource "aws_route53_record" "dev-ns" {
  zone_id = aws_route53_zone.example_com.zone_id
  name    = "k8s.example.com"
  type    = "NS"
  ttl     = "30"
  records = aws_route53_zone.k8s_example_com.name_servers
}
During the run, all required resources will be created:
aws_iam_user.kops: Creating...
aws_iam_user.terraform: Creating...
aws_route53_zone.k8s_example_com: Creating...
aws_route53_zone.example_com: Creating...
...
aws_route53_zone.k8s_example_com: Creation complete after 54s [id=Z091510633HKXRCKOKW5K]
...
aws_route53_record.dev-ns: Creation complete after 48s [id=Z02685872Q1CYFRCQO740_k8s.example.com_NS]
Once completed, we access the Terraform state object to grab the nameserver entries:
terraform state show output.kops_name_servers


output.kops_name_servers = [
  "ns-115.awsdns-14.com",
  "ns-1433.awsdns-51.org",
  "ns-1745.awsdns-26.co.uk",
  "ns-752.awsdns-30.net",
]
Put those nameserver entries into your registrar, and check that the domain is reachable. I’m sorry to not provide any automation for this step.
S3 Bucket
The final part is to create an S3 Bucket that will hold the state of the Kops cluster (yes, there is no ETCD). Its rather easy, and as before, we define an output variable to catch the information that we need for kops.
// Kops Context
// export AWS_ACCESS_KEY=$AWS_ACCESS_KEY_KOPS_USER
// export AWS_SECRET_KEY=$AWS_SECRET_KEY_KOPS_USER

resource "aws_s3_bucket" "kops_state" {
  bucket = "${random_pet.bucket_name.id}-kops-state"
}

resource "random_pet" "bucket_name" {}

output kops_bucket_name = aws_s3_bucket.kops_state
Part 3: Cluster Creation
Finally, we have all tools installed and all required resources setup. We can now create the cluster.
Setup
The cluster will be created in one of the availability zones of AWS. To see which ones are available, we will run the following AWS command:
$> aws ec2 describe-availability-zones --region eu-central-1
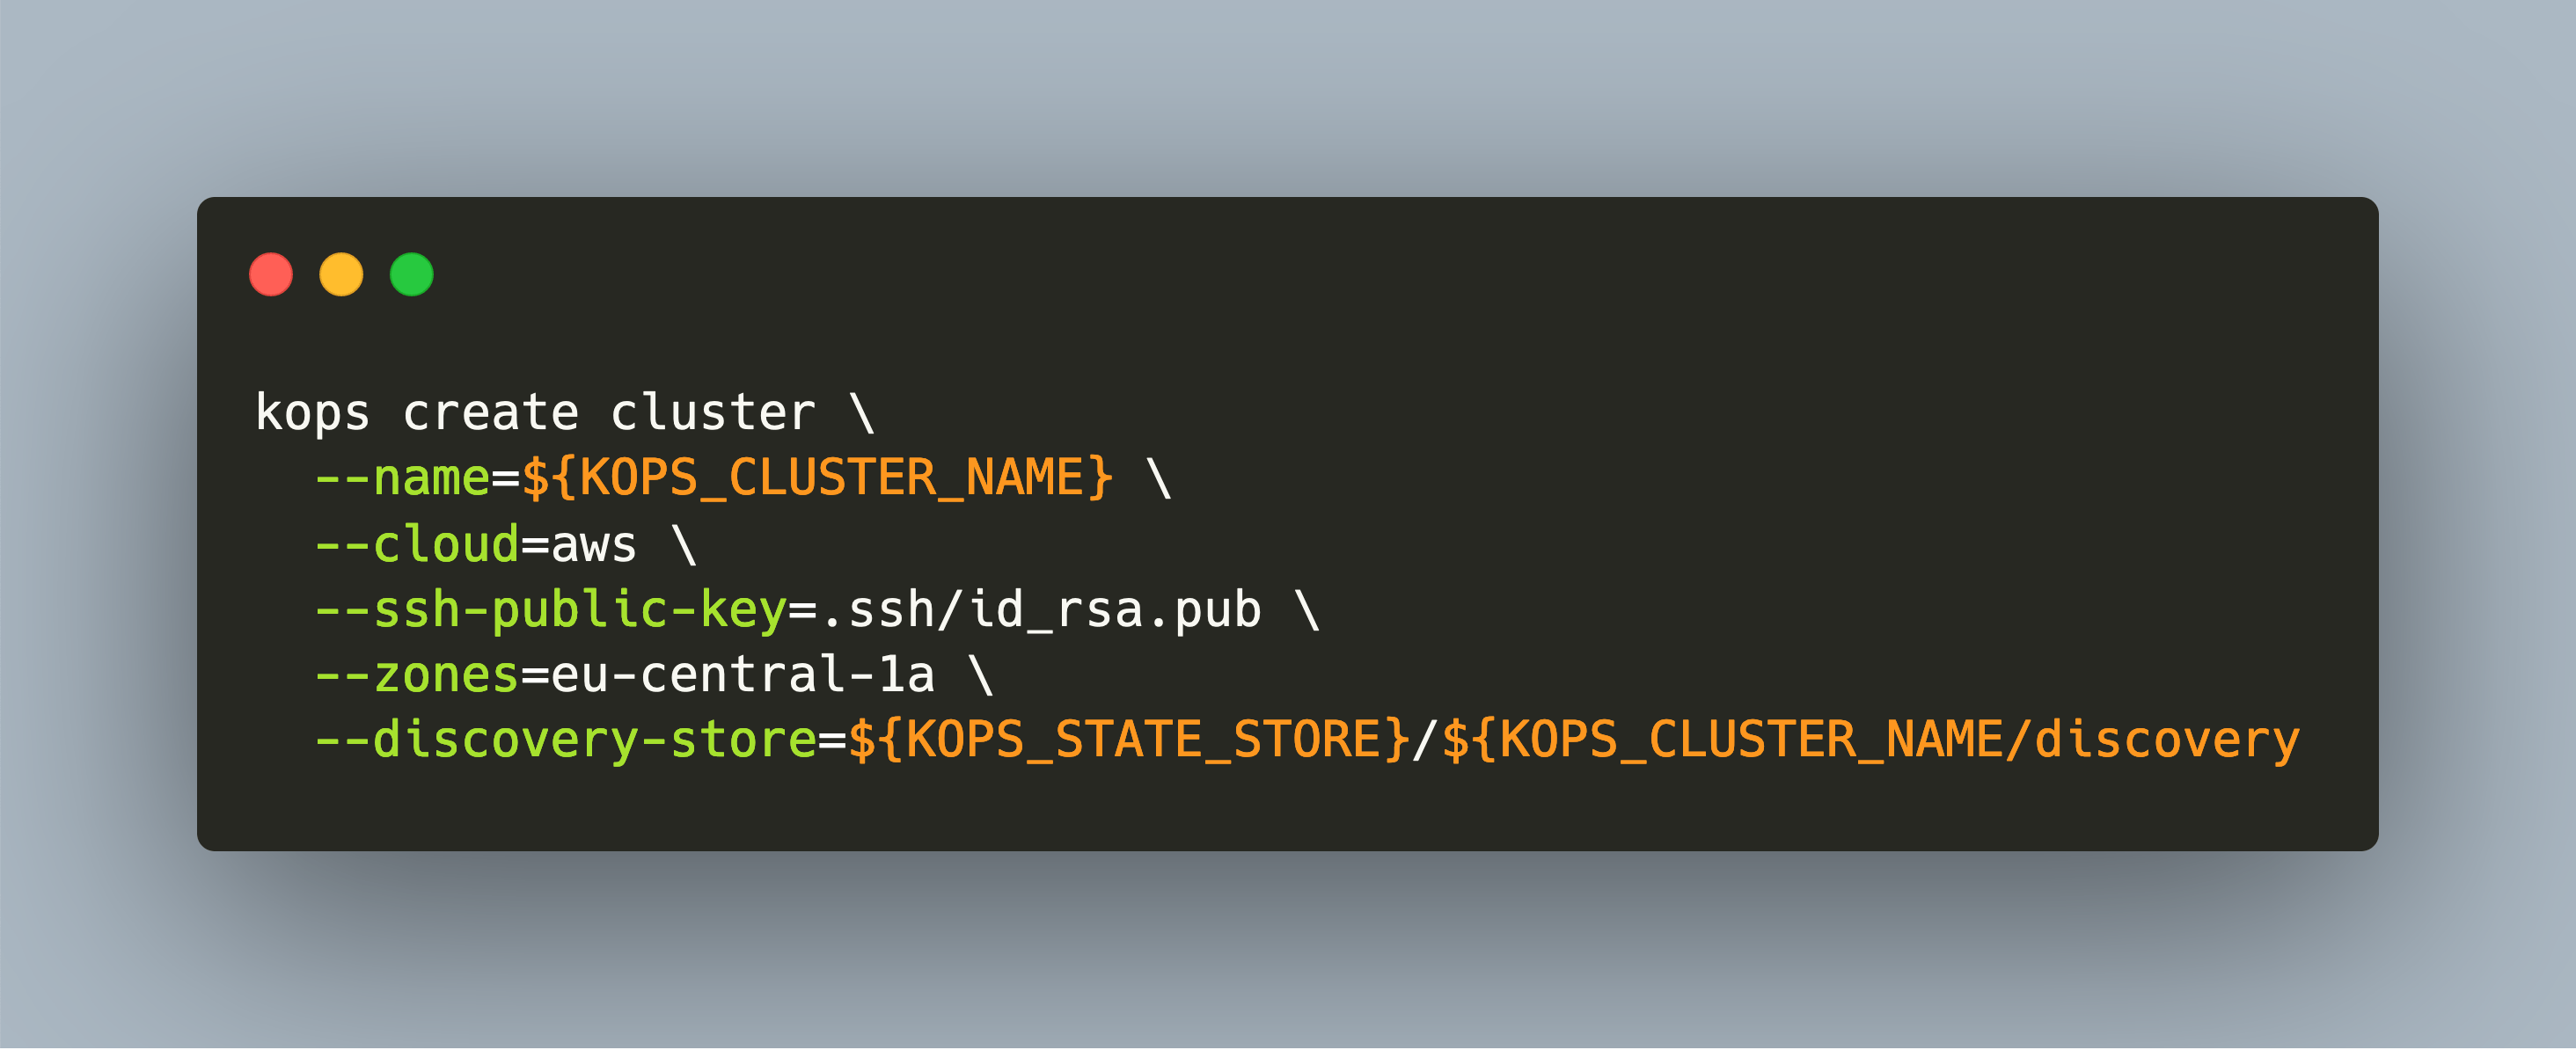
This will output a list of zones, typically they are enumerated following the schema <zone><{a..c}>. Use one of the availability zones, define the domain name and run the following commands:
export KOPS_CLUSTER_NAME=k8s.example.com
export KOPS_BUCKET_NAME=${$(terraform output kops_bucket_name)//\"/}
export KOPS_STATE_STORE=s3://${KOPS_BUCKET_NAME}

$> kops create cluster \
    --name=${KOPS_CLUSTER_NAME} \
    --cloud=aws \
    --ssh-public-key=.ssh/id_rsa.pub \
    --zones=eu-central-1a \
    --discovery-store=${KOPS_STATE_STORE}/${KOPS_CLUSTER_NAME}/discovery
This will create a configuration file describing your cluster. If you want to fine tune them, run the kops edit cluster command: It will open a YAML file containing all cluster information. Kubernetes user will feel right at home. Amongst other, you can also define which Kubernetes version to use.
apiVersion: kops.k8s.io/v1alpha2
kind: Cluster
metadata:
  creationTimestamp: "2022-10-16T18:39:36Z"
  name: k8s.example.com
spec:
  api:
    dns: {}
  authorization:
    rbac: {}
  channel: stable
  cloudProvider: aws
  configBase: s3://blessed-bat-kops-state/k8s.example.com
  etcdClusters:
  - cpuRequest: 200m
    etcdMembers:
    - encryptedVolume: true
      instanceGroup: master-eu-central-1a
      name: a
    memoryRequest: 100Mi
    name: main
  - cpuRequest: 100m
    etcdMembers:
    - encryptedVolume: true
      instanceGroup: master-eu-central-1a
      name: a
    memoryRequest: 100Mi
    name: events
    ...
  kubernetesVersion: 1.24.6
  masterInternalName: api.internal.k8s.example.com
  masterPublicName: api.k8s.example.com
  networkCIDR: 172.20.0.0/16
  networking:
    kubenet: {}
  nonMasqueradeCIDR: 100.64.0.0/10
When you are happy, run the following command:
$> kops update cluster --name ${KOPS_CLUSTER_NAME} --yes
… and see the cluster being created:
I1015 16:24:57.034956    5692 executor.go:111] Tasks: 0 done / 101 total; 50 can run
W1015 16:24:57.178958    5692 vfs_castore.go:379] CA private key was not found
I1015 16:24:57.199138    5692 keypair.go:225] Issuing new certificate: "etcd-clients-ca"
...
I1015 16:25:00.170992    5692 executor.go:111] Tasks: 97 done / 101 total; 2 can run
...

Cluster is starting.  It should be ready in a few minutes.

Suggestions:
 * validate cluster: kops validate cluster --wait 10m
 * list nodes: kubectl get nodes --show-labels
 * ssh to the master: ssh -i ~/.ssh/id_rsa ubuntu@api.k8s.example.com
 * the ubuntu user is specific to Ubuntu. If not using Ubuntu please use the appropriate user based on your OS.
 * read about installing addons at: https://kops.sigs.k8s.io/addons.
Part 4: Cluster Access and Maintenance
Kubeconfig and SSH Access
Like every other Kubernetes cluster, you need to use the kubeconfig file. Run the following command to configure kubectl in your shell to access the new cluster:
kops export kubeconfig --admin

kubectl get nodes -o wide

NAME                  STATUS   ROLES           AGE     VERSION   INTERNAL-IP     EXTERNAL-IP     OS-IMAGE             KERNEL-VERSION    CONTAINER-RUNTIME
i-04d11902bdae6741f   Ready    node            3m3s    v1.24.6   172.20.44.129   3.120.193.125   Ubuntu 20.04.5 LTS   5.15.0-1020-aws   containerd://1.6.8
i-0785e808463cabcfd   Ready    control-plane   4m10s   v1.24.6   172.20.49.96    3.68.96.186     Ubuntu 20.04.5 LTS   5.15.0-1020-aws   containerd://1.6.8
In addition, you can access the controller node with the created ssh key:
ssh -i .ssh/id_rsa.key ubuntu@api.k8s.example.com

top

iB Mem :   3864.0 total,    106.0 free,    866.1 used,   2891.9 buff/cache
MiB Swap:      0.0 total,      0.0 free,      0.0 used.   2722.1 avail Mem

    PID USER      PR  NI    VIRT    RES    SHR S  %CPU  %MEM     TIME+ COMMAND
   4393 root      20   0 1174448 374632  74056 S   5.3   9.5   0:41.99 kube-apiserver
   4576 root      20   0   10.7g  54144  23988 S   3.7   1.4   0:13.12 etcd
   3642 root      20   0 1953272 102788  64404 S   2.0   2.6   0:15.43 kubelet
   5007 root      20   0  819560 104940  62780 S   1.3   2.7   0:08.18 kube-controll+
   3415 root      20   0 1728452  76664  39452 S   0.7   1.9   0:21.60 containerd
Conclusion
For installing a Kubernetes cluster, you have many options. One of them is kops which installs the cluster within AWS. For this, you need the AWS CLI or GUI to create an IAM user, S3 buckets, and route 53 DNS servers. In this article, I showed how to automate these steps using Terraform. With the correct setup of the required binaries and environment variables, you can execute the Terraform project and all AWS resources are created automatic. Then, use the kops binary to provision the cluster.