Terraform is a declarative infrastructure configuration language that enables you to define computing resources, firewall rules, user accounts, and any other concepts of cloud infrastructures.
This article is a hands-on workshop for working with Terraform in the Hetzner cloud computing environment. You will learn how to setup the Terraform project, see how the provider is configured, and then learn to provision instances and firewall rules.
The technical context for this article is Terraform v1.4.6 Terraform HCloud provider v1.3.6, but it is applicable to newer versions as well.
Hetzner Terraform Provider Overview
The Terraform registry has an official Hetzner provider plugin, categorized as partner and therefor developed by Hetzner itself. Browsing the documentation, we can see that the following Hetzner Cloud concepts can be managed:
hcloud_firewall: The firewall configurationhcloud_floating_ip: A virtual IP, independent of any concrete server instance. Can be used for example as a load balancer entry IP.hcloud_load_balancer: The load balancer implementation in the Hetzner cloud, provides sub-resources fornetwork,service, andtargethcloud_managed_certificate: Certificates managed by Hetznerhcloud_network: Configure networks as part of an installation, with sub-resources forroute,subnethcloud_placement_group: An abstraction determining how related resources are placed in the Terraform cloudhcloud_primary_ip: A publicly accessible IP that maps to a concrete serverhcloud_rdns: Manage reverse DNS entries on the Hetzner cloudhcloud_server: A concrete server instance that should be managed with Hetzner.hcloud_server_network: A private network that connects servershcloud_snapshot: A filesystem backup of a serverhcloud_ssh_key: SSH Keys used to access severshcloud_uploaded_certificate: Represents manually managed certificateshcloud_volume: Storage volumes that can be attached to servers, with theattachmentsub-resource.
In this tutorial, we will work with hcloud_server, hcloud_ssh_key, and hlcoud_firewall resources.
Hetzner Account Setup
To get a Hetzner Cloud Account, head over to the account signup page and finish the onboarding process. Then we need to grab an access token that is invoked by Terraform to access the Terraform cloud. Here is how:
- Login to the Hetzner Cloud console
- Go to “Security”, then “API Token”
- Generate the token, and copy the token string
Terraform Project Setup
Create the project with the following bash script. Just substitute the variables TF_PROJECT_NAME and TF_HETZNER_TOKEN.
TF_PROJECT_NAME=terraform_hetzner
TF_HETZNER_CLOUD_TOKEN=$

mkdir $TF_PROJECT_NAME

tffiles=('variables' 'terraform' 'main' 'data' 'outputs'); for file in "${tffiles[@]}" ; do touch "$TF_PROJECT_NAME/$file".tf; done
cat << EOF >> "$TF_PROJECT_NAME/variables.tf"
variable "hcloud_token" {
  sensitive = true
  default = "$TF_HETZNER_TOKEN"
}
EOF
Configure the Hetzner Provider
Following the official documentation, we configure the provider as follows:
//terraform.tf
terraform {
  required_providers {
    hcloud = {
      source = "hetznercloud/hcloud"
      version = ">=1.36.0"
    }
  }
}

provider "hcloud" {
  token = var.hcloud_token
}
Now we can initialize the project:
$> terraform init

Initializing the backend...

Initializing provider plugins...
- Finding hetznercloud/hcloud versions matching ">= 1.35.2"...
- Installing hetznercloud/hcloud v1.35.2...
- Installed hetznercloud/hcloud v1.35.2 (signed by a HashiCorp partner, key ID 5219EACB3A77198B)

...

Terraform has been successfully initialized!
Configure an SSH Key
Although you can connect to any Hetzner server via their cloud console, I prefer to use a direct SSH connection. For this, we need an SSH key.
The hcloud_ssh_key resource is configured with a public key in string format. You could point it to other public key files on your computer or create a new SSH key just for this project. I prefer the latter.
There are several Terraform provider for creating SSH keys. I choosed the hashicorp/tls provider - it does not require any setup, yo there is no entry in the terraform.tf file. An SSH key resource is created with the following configuration:
//main.tf
resource "tls_private_key" "generic-ssh-key" {
  algorithm = "RSA"
  rsa_bits  = 4096
}
This resource exposes the following attributes:
# tls_private_key.hcloud-ssh-key will be created
  + resource "tls_private_key" "hcloud-ssh-key" {
      + algorithm                     = "RSA"
      + ecdsa_curve                   = "P224"
      + id                            = (known after apply)
      + private_key_openssh           = (sensitive value)
      + private_key_pem               = (sensitive value)
      + private_key_pem_pkcs8         = (sensitive value)
      + public_key_fingerprint_md5    = (known after apply)
      + public_key_fingerprint_sha256 = (known after apply)
      + public_key_openssh            = (known after apply)
      + public_key_pem                = (known after apply)
      + rsa_bits                      = 4096
    }
As you see, the public_key_openssh attribute will contain the public key in string format. Let’s add this to a hcloud_ssh_key resource:
//main.tf
resource "hcloud_ssh_key" "primary-ssh-key" {
  name = "primary-ssh-key"
  public_key = tls_private_key.generic-ssh-key.public_key_openssh
}
Let’s create the resources:
terraform apply

Terraform used the selected providers to generate the following execution plan. Resource actions are indicated with the
following symbols:
  + create

Terraform will perform the following actions:

  # hcloud_ssh_key.hcloud-ssh-key will be created
  //....
  # tls_private_key.generic-ssh-key will be created

  //....

tls_private_key.generic-ssh-key: Creating...
tls_private_key.generic-ssh-key: Creation complete after 2s [id=576c4774f968f85211cab6b5dbd22f64c3d012fb]
hcloud_ssh_key.hcloud-ssh-key: Creating...
hcloud_ssh_key.hcloud-ssh-key: Creation complete after 0s [id=8209589]
Ok, now we can configure the servers.
Configure a Server
A server resource requires several attributes to be set. We need to figure out which images and which server types exists and get to know their concrete names to reference them in the Terraform resource config.
I could not find it in the Terraform resource documentation, but I found out about the REST API and that you can query it with the same access token we created earlier. Then, all our information needs are just a curl away.
To get a list of all images:
curl \
 -H "Authorization: Bearer $TF_HETZNER_TOKEN" \
 'https://api.hetzner.cloud/v1/images'

{
  "images": [
    {
      "id": 3,
      "type": "system",
      "status": "available",
      "name": "centos-7",
  ...
And to get the ids for the server types:
curl \
 -H "Authorization: Bearer $TF_HETZNER_TOKEN" \
 'https://api.hetzner.cloud/v1/server_types'

"server_types": [
    {
      "id": 1,
      "name": "cx11",
      "description": "CX11",
      "cores": 1,
      "memory": 2.0,
      "disk": 20,
  ...
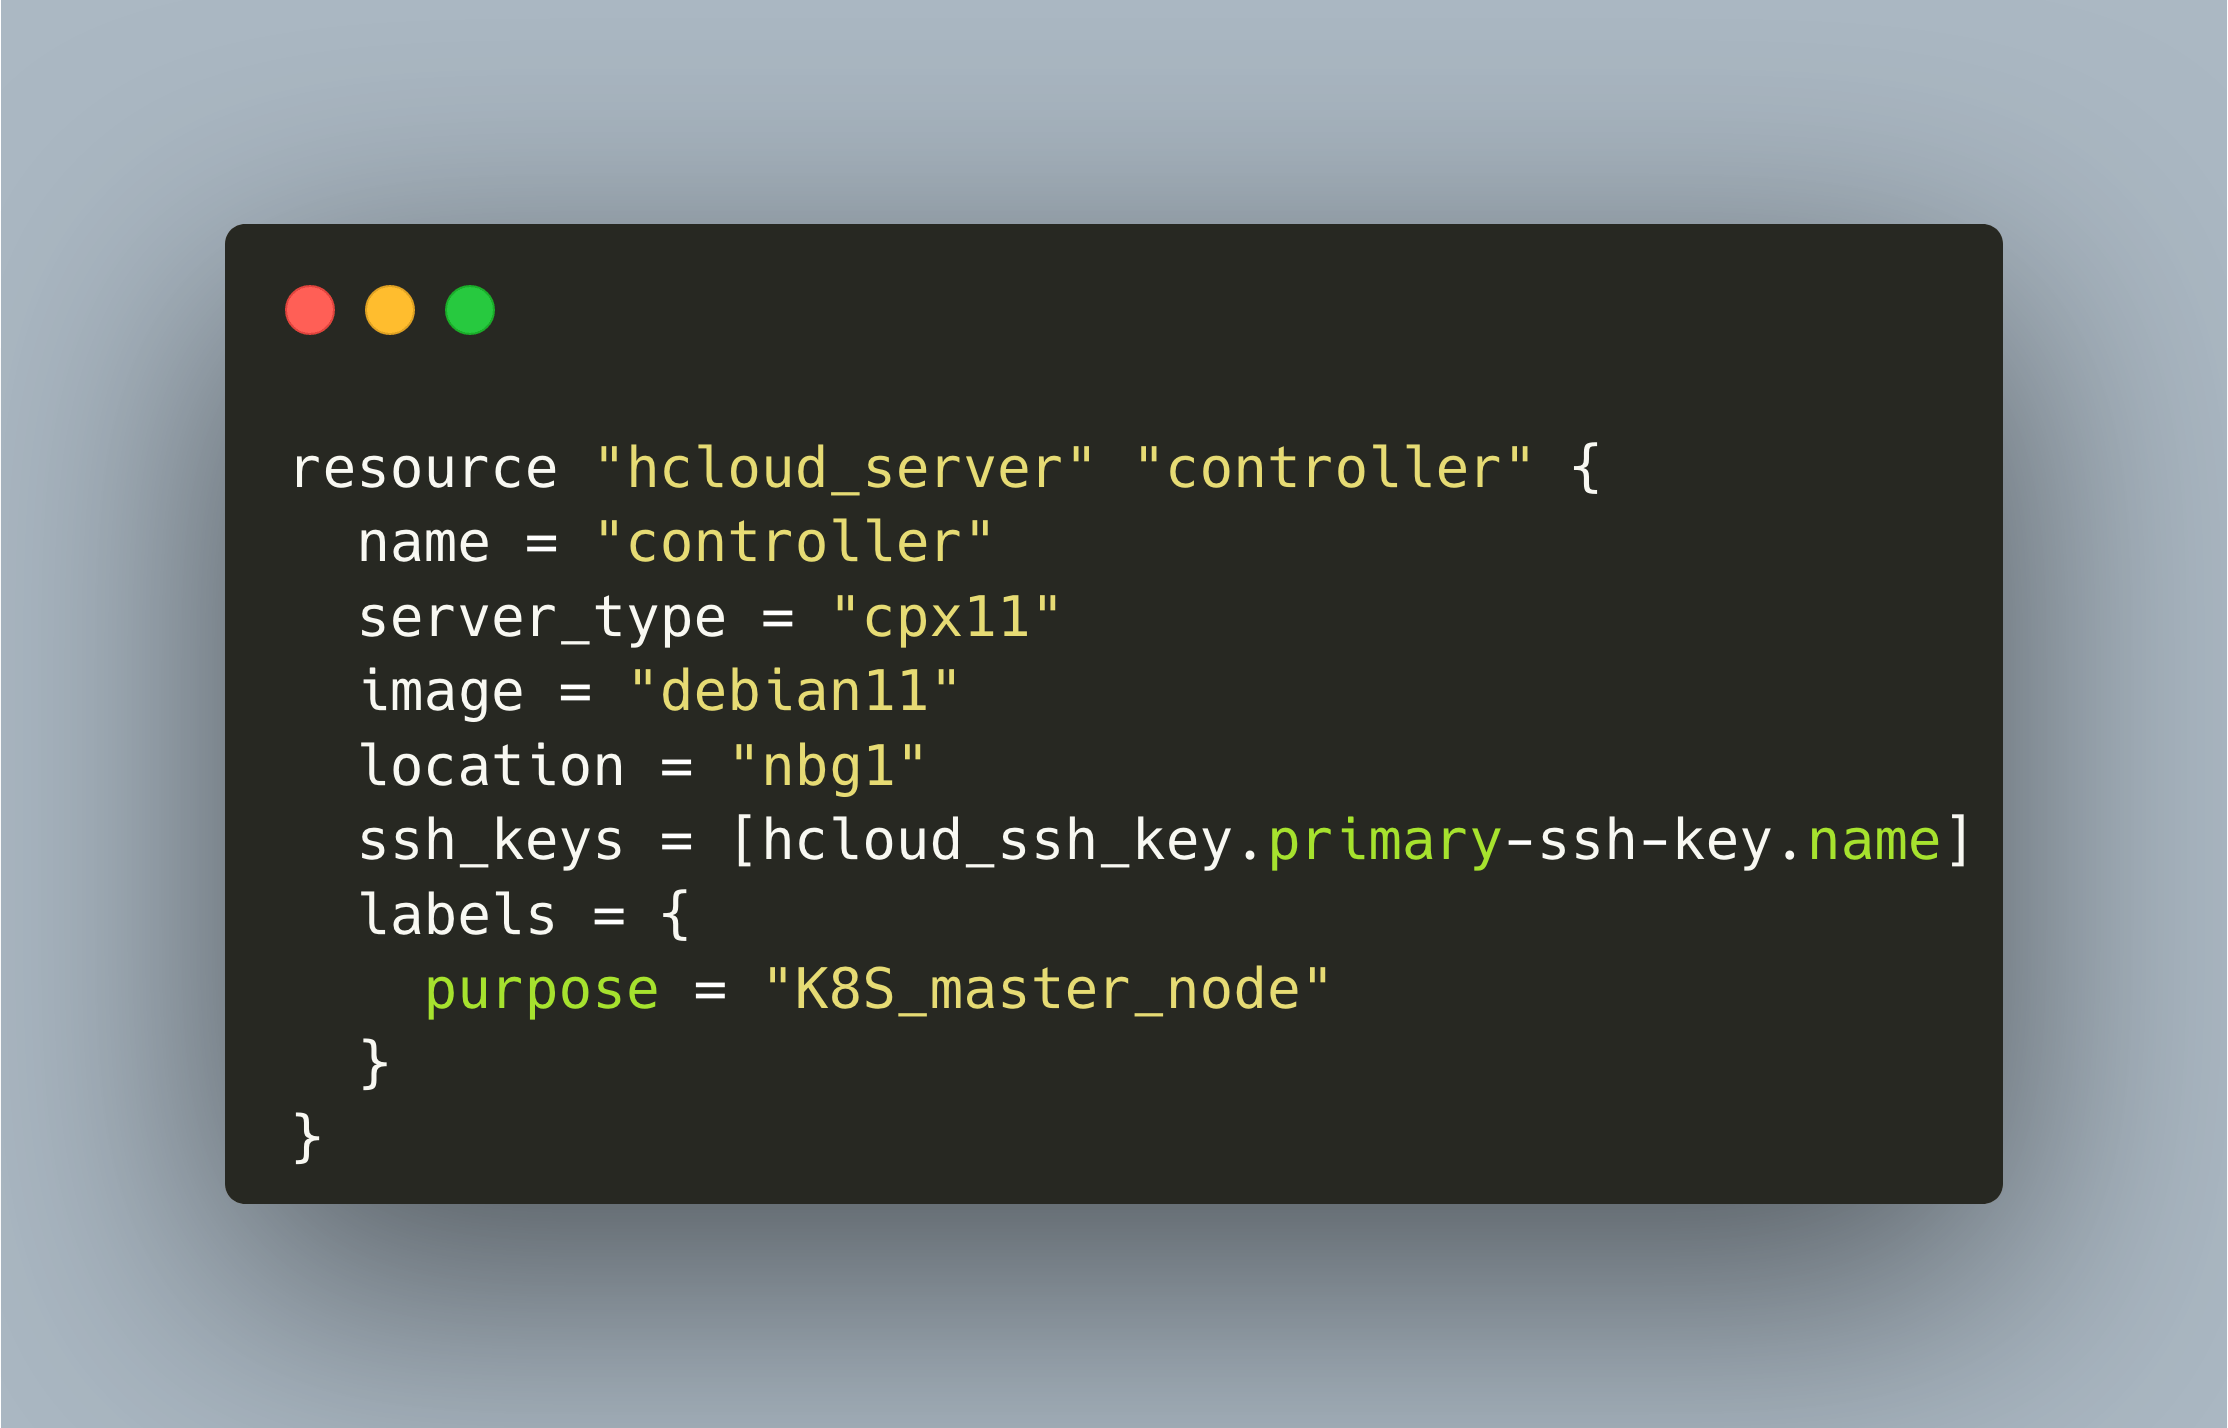
I decided for the image debian-11 and the server type cpx11. The final hcloud_server resource definition includes this information, and it references the hlcoud_ssh_key resource that we created earlier
//main.tf
resource "hcloud_server" "controller" {
  name = "controller"
  server_type = "cpx11"
  image = "debian11"
  location = "nbg1"
  ssh_keys = [hcloud_ssh_key.primary-ssh-key.name]
  labels = {
    purpose = "K8S_master_node"
  }
}
Let’s apply this plan.
Enter a value: yes

hcloud_server.controller: Creating...
hcloud_server.controller: Creation complete after 9s [id=24378332]
The server is created:

Firewall Rules
To make the server access more secure, lets create firewall rules that only allow Ingress traffic on ports 22, 80, 443, and 6443.
The creation of firewall rules is well documented but lets see if we can import existing rules as well. Check the id of a firewall resource in the URL from the cloud console (e.g. https://console.hetzner.cloud/projects/1111111/firewalls/500620/rules)
terraform import hcloud_firewall.default 500620

hcloud_firewall.default: Importing from ID "500620"...
hcloud_firewall.default: Import prepared!
  Prepared hcloud_firewall for import
hcloud_firewall.default: Refreshing state... [id=500620]

Import successful!

The resources that were imported are shown above. These resources are now in
your Terraform state and will henceforth be managed by Terraform.
This works. However, a terraform import only updates the state, not the resource files. This needs to be done manually. But you can get a copyable representation of the resource by running terraform show.
terraform show

resource "hcloud_firewall" "default" {
  labels = {}
  name   = "firewall-1"

  rule {
    destination_ips = []
    direction       = "in"
    port            = "22"
    protocol        = "tcp"
    source_ips = [
      "0.0.0.0/0",
      "::/0",
    ]
  }
}
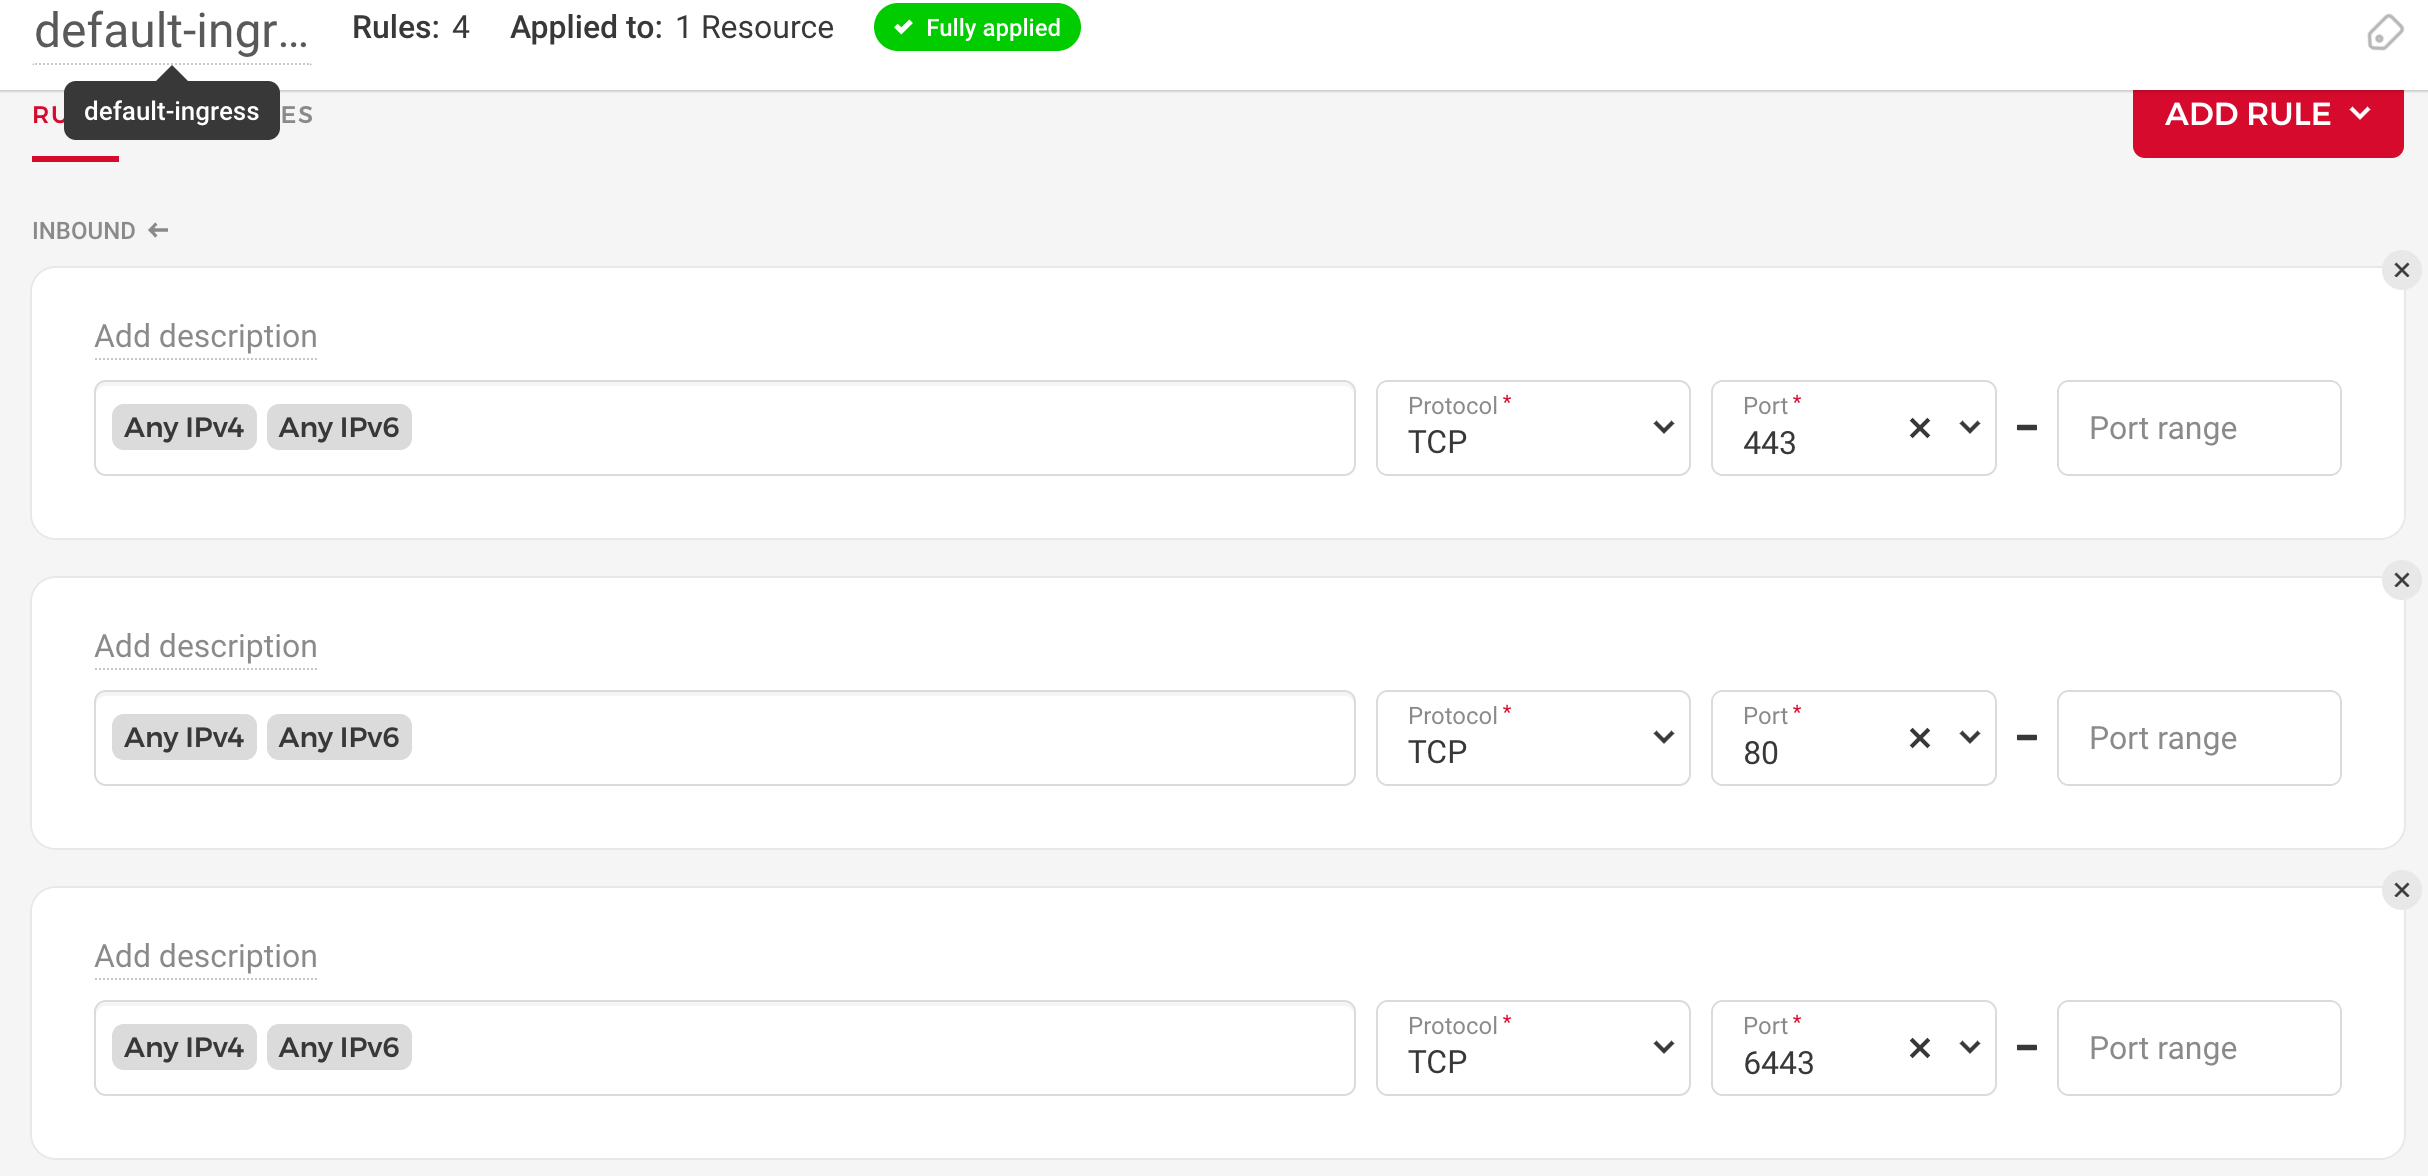
We add this definition to the main.tf file and add additional rule blocks for the other ports.
After applying these resources, the firewall shows up in the configuration IP as expected:
Lets also add a default egress rule to only allow outgoing DNS traffic:
resource "hcloud_firewall" "default-egress" {
  labels = {}
  name   = "default-egress"

  rule {
    direction       = "out"
    port            = "53"
    protocol        = "tcp"
    destination_ips = [
      "0.0.0.0/0",
      "::/0",
    ]
  }

  rule {
    direction       = "out"
    port            = "53"
    protocol        = "udp"
    destination_ips = [
      "0.0.0.0/0",
      "::/0",
    ]
  }
}
Lets plan and apply these changes:
terraform plan
tls_private_key.generic-ssh-key: Refreshing state... [id=21b74ea792b55b6cd29613e3a4de098ac774874b]
hcloud_firewall.default-ingress: Refreshing state... [id=550572]
hcloud_ssh_key.primary-ssh-key: Refreshing state... [id=8225679]
hcloud_server.controller: Refreshing state... [id=24411292]

Terraform used the selected providers to generate the following execution plan.
Resource actions are indicated with the following symbols:
  + create
  ~ update in-place

Terraform will perform the following actions:

  # hcloud_firewall.default-egress will be created
  + resource "hcloud_firewall" "default-egress" {
      + id     = (known after apply)
      + labels = (known after apply)
      + name   = "default-ingress"

      + rule {
          + destination_ips = []
          + direction       = "out"
          + port            = "53"
          + protocol        = "tcp"
          + source_ips      = []
        }
      + rule {
          + destination_ips = []
          + direction       = "out"
          + port            = "53"
          + protocol        = "udp"
          + source_ips      = []
        }
    }

  # hcloud_server.controller will be updated in-place
  ~ resource "hcloud_server" "controller" {
      ~ firewall_ids               = [
          - 550572,
        ] -> (known after apply)
        id                         = "24411292"
        name                       = "controller"
        # (16 unchanged attributes hidden)
    }

Plan: 1 to add, 1 to change, 0 to destroy.
Ok, all firewall rules are configured and applied.
Getting Access to the Server
The final step is to access the server. For this, we need to export the private key, which is kept in terraform state only, to a local file, and then use an SSH client.
To export the private key, we will use a local provisioner in the SSH key resource definition to grab the key string. This provisioner effectively runs a BASH script that will create a .ssh-tf-hetzner-cloud directory in your home directory, then grab the public and private key string formats from the tls_private_key file, and copy them to concrete files.
resource "tls_private_key" "generic-ssh-key" {
  algorithm = "RSA"
  rsa_bits  = 4096

  provisioner "local-exec" {
    command = <<EOF
      rm -rvf ~.ssh-tf-hetzner-cloud/
      mkdir -p ~.ssh-tf-hetzner-cloud/
      echo "${tls_private_key.generic-ssh-key.private_key_openssh}" > ~.ssh-tf-hetzner-cloud/id_rsa.key
      echo "${tls_private_key.generic-ssh-key.public_key_openssh}" > ~.ssh-tf-hetzner-cloud/id_rsa.pub
      chmod 400 ~.ssh-tf-hetzner-cloud/id_rsa.key
      chmod 400 ~.ssh-tf-hetzner-cloud/id_rsa.key
    EOF
  }
}
Because provisioners are only executed at creation time, we need to re-create the tls_private_key resources. One way to do this is to taint the resource, and then run a new terraform apply. Here is how:
terraform taint tls_private_key.generic-ssh-key

Resource instance tls_private_key.generic-ssh-key has been marked as tainted.

terraform plan

tls_private_key.generic-ssh-key: Refreshing state... [id=21b74ea792b55b6cd29613e3a4de098ac774874b]
hcloud_firewall.default-egress: Refreshing state... [id=550580]
hcloud_firewall.default-ingress: Refreshing state... [id=550572]
hcloud_ssh_key.primary-ssh-key: Refreshing state... [id=8225679]
hcloud_server.controller: Refreshing state... [id=24411292]

Terraform used the selected providers to generate the following execution plan.
Resource actions are indicated with the following symbols:
-/+ destroy and then create replacement

Terraform will perform the following actions:

  # hcloud_ssh_key.primary-ssh-key must be replaced
-/+ resource "hcloud_ssh_key" "primary-ssh-key" {
      ~ fingerprint = "ad:b1:40:ce:b4:c9:66:cb:82:80:f9:58:35:24:18:ea" -> (known after apply)
      ~ id          = "8225679" -> (known after apply)
      - labels      = {} -> null
        name        = "hcloud-ssh-key"

     ....

Plan: 2 to add, 0 to change, 2 to destroy.
So, the SSH key resource is recreated, the servers reconfigured, and we have the key files on our computer. Everything we need to access the servers:
ssh root@159.69.35.153 -i .ssh-tf-hetzner-cloud/id_rsa.key
The authenticity of host '159.69.35.153 (159.69.35.153)' can't be established.
ED25519 key fingerprint is SHA256:ZU4XG1VBkr+lgor7uhsf7CESVYERt7QgtMZ52XbDmFE.
This key is not known by any other names
Are you sure you want to continue connecting (yes/no/[fingerprint])? yes
Warning: Permanently added '159.69.35.153' (ED25519) to the list of known hosts.

root@controller:~#
Yes! It worked.
Conclusion
Terraform is a powerful infrastructure configuration language. In this hands-on tutorial, you learned how to work with Terraform for access the Hetzner cloud computing service. Specifically, we created a basic project file setup, configured the provider with an access token, and then created a cloud computing server, firewall rule, SSH keys to access the servers. With this project, you have implemented the infrastructure-as-code principle, and can create an immutable infrastructure in less than a minutes.