Kubeadm is a Kubernetes distribution that provides all customization options that you can think of: container runtime, container network interface, cluster storage and ingress. You can configure all these aspects of your cluster, but have to understand the individual options and their setup as well. For a complete overview about this remarkable distribution, see my previous article.
This article is a tutorial about creating a 3 node Kubernetes cluster. One node will be the control plane node, and 2 others will be the worker nodes. The components used in this tutorial are etcd, container-d and calico. Let’s get started.
Prerequisites
The servers on which you want to use kubeadm must fulfill the following requirements:
- Compatible Linux distribution (based on Debian ore RedHat)
- At least 2GB RAM and 2 CPUs
- An unique machine UUID
- Required network ports and SSH access
As before in this series, I like to provision cloud servers from Hetzner. The following server types fulfill the hardware requirements:
- 1x CPX11 node (2 AMD CPU, 2GB RAM, 40GB SSD)
- 2x CPX21 nodes (3 AMD CPU, 4GB RAM, 80GB SSD)
After provisioning the VMSs with Debian 11 and a public key for SSH access, all nodes are shown in the Hetzner cloud dashboard UI as well. Let’s use the SSH access to check the machine IDs:
> ssh devcon@kubeadm-master cat /sys/class/dmi/id/product_uuid
5e7f6356-817c-4868-8ca9-0631ae3b6727
> ssh devcon@kubeadm-worker1 cat /sys/class/dmi/id/product_uuid
d03b1fb7-606e-4bd0-955a-537eec794e8f
> ssh devcon@kubeadm-worker2 cat /sys/class/dmi/id/product_uuid
7057de4c-f596-4935-837c-701013f833dc
Now we can continue the setup and install the container runtime.
Step 1: Container Runtime
On each node, run this:
> apt update
> apt install containerd -y
Step 2: Install Core Binaries
The core binaries are kubeadm and kubelet which need to be installed on each node. Additionally, kubectl is needed to access the cluster. You can either install the binary on a separate controller machine, or on the nodes itself. I decided for the later.
Run these commands on each node:
> apt install -y apt-transport-https ca-certificates curl
> curl -fsSLo /usr/share/keyrings/kubernetes-archive-keyring.gpg https://packages.cloud.google.com/apt/doc/apt-key.gpg
> echo "deb [signed-by=/usr/share/keyrings/kubernetes-archive-keyring.gpg] https://apt.kubernetes.io/ kubernetes-xenial main" | sudo tee /etc/apt/sources.list.d/kubernetes.list
> apt update
> apt install -y ubeadm=1.23.11-00 kubectl=1.23.11-00 kubelet=1.23.11-00
> apt-mark hold kubelet kubeadm kubectl
...

Setting up kubeadm (1.23.11-00) ...
Setting up kubectl (1.23.11-00) ...
Setting up kubelet (1.23.11-00) ...
Step3: Configure and Initialize the Control Plane Node
The highly customizable kubeadm init command consists of these phases according to the official documentation:
preflight: Sanity checks on the nodecerts: Create all the required client and server certificates for the kube scheduler, kubeproxy, etcd, and apiserverkubeconfig: Generate configuration files necessary for the clusterkubelet-start: Write and start the kubelet configurationcontrol-plane: Generate the static pod manifests files that will start the apiserver, controller-manager and scheduleretcd: Start theetcdserverupload-config: Store the kubeadm and kubelet configuration as a ConfigMapupload-certs: Store the generated certificatesmark-control-plane: Signify whether a node is a part of the control planebootstrap-token: Generate the token that is consumed by additional worker nodes to join the clusterkubelet-finalize: Update the kubelet when TLS bootstrap between new nodes is doneaddon: Install coredns and kube-proxy
The configuration that you want to apply is reflected in config files and flags to this command. As explained in the beginning, this tutorial uses these components: etcd, container-d, and calico. Let’s see how each component is reflected during the initialization:
- etcd: No additional configuration required because the default configuration installs an etcd instance on each controller node
- container-d: The container runtime is defined by the flag
--cri-socket /run/containerd/containerd.sock. According to the documentation, that is not strictly required, but I want to make the configuration explicit. - cgroup driver: The used distribution Debian 11 is based on systemd which is also the predefined cgroup used by an kubeadm installation. The systemd drop-in-file does not need to be modified.
- calico: Following the calico Kubernetes documentation, we need to pass the flag
--pod-network-cidr=192.168.0.0/16to define the POD cidr network.
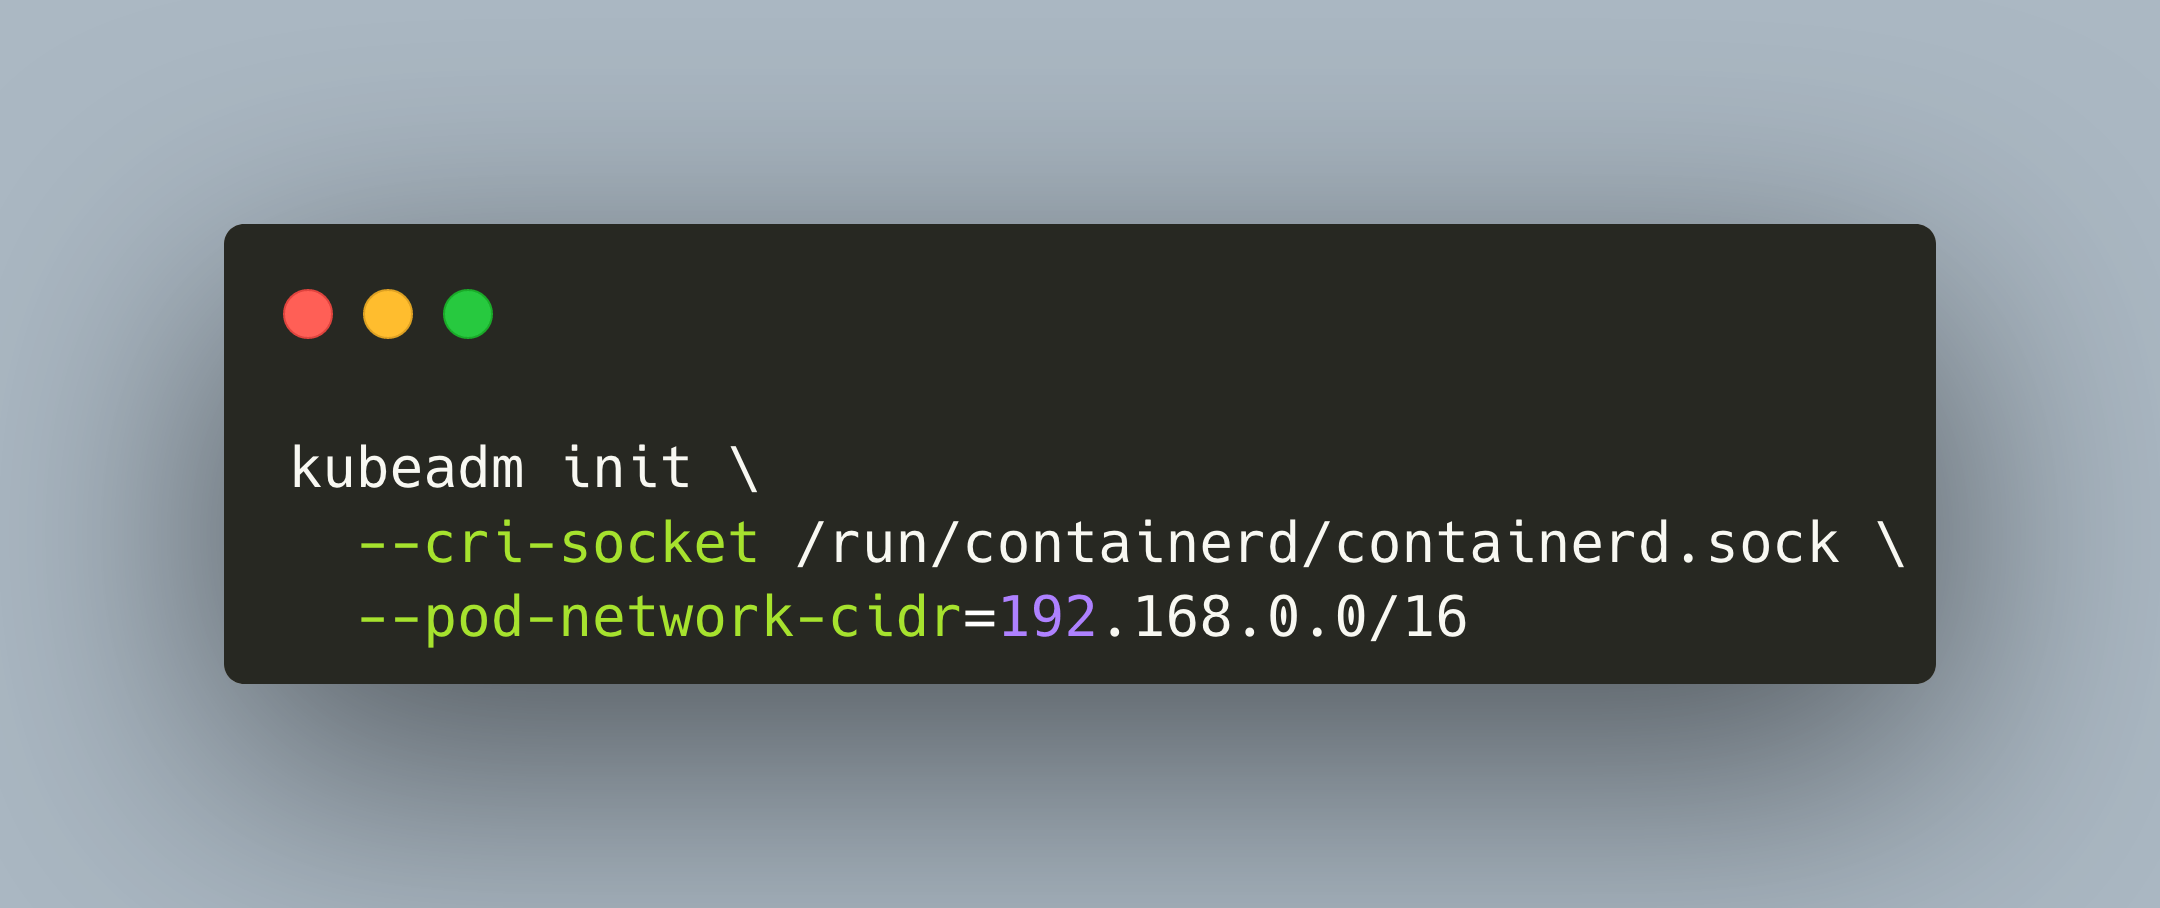
Putting this all together, we need to use this command:
> kubeadm init \
  --cri-socket /run/containerd/containerd.sock \
  --pod-network-cidr=192.168.0.0/16
Error 1: No Bridged Network Traffic
My first attempt resulted in this message:
error execution phase preflight: [preflight] Some fatal errors occurred:
 [ERROR FileContent--proc-sys-net-bridge-bridge-nf-call-iptables]: /proc/sys/net/bridge/bridge-nf-call-iptables does not exist
 [ERROR FileContent--proc-sys-net-ipv4-ip_forward]: /proc/sys/net/ipv4/ip_forward contents are not set to 1
[preflight] If you know what you are doing, you can make a check non-fatal with `--ignore-preflight-errors=...`
To see the stack trace of this error execute with --v=5 or higher
After some searching, I came across the section about forwarding ipv4 and enabling bridged traffic, and could resolve the error by running these commands:
> modprobe br_netfilter
> echo 1 > /proc/sys/net/ipv4/ip_forward
Now the kubeadm init command was successful:
> kubeadm init \
  --cri-socket /run/containerd/containerd.sock \
  --pod-network-cidr=192.168.0.0/16

I0921 18:25:38.337096    1083 version.go:255] remote version is much newer: v1.25.1; falling back to: stable-1.23
[init] Using Kubernetes version: v1.23.12
[preflight] Running pre-flight checks
[preflight] Pulling images required for setting up a Kubernetes cluster
[preflight] This might take a minute or two, depending on the speed of your internet connection
[preflight] You can also perform this action in beforehand using 'kubeadm config images pull'
[certs] Using certificateDir folder "/etc/kubernetes/pki"
[certs] Generating "ca" certificate and key
[certs] Generating "apiserver" certificate and key
[certs] apiserver serving cert is signed for DNS names [kubeadm-master kubernetes kubernetes.default kubernetes.default.svc kubernetes.default.svc.cluster.local] and IPs [10.96.0.1 167.235.73.16]
[certs] Generating "apiserver-kubelet-client" certificate and key
[certs] Generating "front-proxy-ca" certificate and key
[certs] Generating "front-proxy-client" certificate and key
[certs] Generating "etcd/ca" certificate and key
[certs] Generating "etcd/server" certificate and key
[certs] etcd/server serving cert is signed for DNS names [kubeadm-master localhost] and IPs [167.235.73.16 127.0.0.1 ::1]
[certs] Generating "etcd/peer" certificate and key
[certs] etcd/peer serving cert is signed for DNS names [kubeadm-master localhost] and IPs [167.235.73.16 127.0.0.1 ::1]
[certs] Generating "etcd/healthcheck-client" certificate and key
[certs] Generating "apiserver-etcd-client" certificate and key
[certs] Generating "sa" key and public key
[kubeconfig] Using kubeconfig folder "/etc/kubernetes"
[kubeconfig] Writing "admin.conf" kubeconfig file
[kubeconfig] Writing "kubelet.conf" kubeconfig file
[kubeconfig] Writing "controller-manager.conf" kubeconfig file
[kubeconfig] Writing "scheduler.conf" kubeconfig file
[kubelet-start] Writing kubelet environment file with flags to file "/var/lib/kubelet/kubeadm-flags.env"
[kubelet-start] Writing kubelet configuration to file "/var/lib/kubelet/config.yaml"
[kubelet-start] Starting the kubelet
[control-plane] Using manifest folder "/etc/kubernetes/manifests"
[control-plane] Creating static Pod manifest for "kube-apiserver"
[control-plane] Creating static Pod manifest for "kube-controller-manager"
[control-plane] Creating static Pod manifest for "kube-scheduler"
[etcd] Creating static Pod manifest for local etcd in "/etc/kubernetes/manifests"
[wait-control-plane] Waiting for the kubelet to boot up the control plane as static Pods from directory "/etc/kubernetes/manifests". This can take up to 4m0s
Error 2: Kubelet not Starting, no Connection to API Server
Although the installation was successful, the control plane could not be started:
 kubelet.service - kubelet: The Kubernetes Node Agent
     Loaded: loaded (/lib/systemd/system/kubelet.service; enabled; vendor preset: enabled)
    Drop-In: /etc/systemd/system/kubelet.service.d
             └─10-kubeadm.conf
     Active: active (running) since Wed 2022-09-21 18:26:00 UTC; 4min 31s ago
       Docs: https://kubernetes.io/docs/home/
   Main PID: 1210 (kubelet)
      Tasks: 15 (limit: 2275)
     Memory: 51.8M
        CPU: 3.073s
     CGroup: /system.slice/kubelet.service
             └─1210 /usr/bin/kubelet --bootstrap-kubeconfig=/etc/kubernetes/bootstrap-kubelet.conf --kubeconfig=/etc/kubernetes/kubelet.conf --config=/var/lib/kubelet/config.y>

Sep 21 18:30:30 kubeadm-master kubelet[1210]: I0921 18:30:30.420016    1210 kubelet_node_status.go:70] "Attempting to register node" node="kubeadm-master"
Sep 21 18:30:30 kubeadm-master kubelet[1210]: E0921 18:30:30.420356    1210 kubelet_node_status.go:92] "Unable to register node with API server" err="Post \"https://167.235.73>
Sep 21 18:30:30 kubeadm-master kubelet[1210]: E0921 18:30:30.476732    1210 kubelet.go:2466] "Error getting node" err="node \"kubeadm-master\" not found"
Sep 21 18:30:30 kubeadm-master kubelet[1210]: E0921 18:30:30.577352    1210 kubelet.go:2466] "Error getting node" err="node \"kubeadm-master\" not found"
Sep 21 18:30:30 kubeadm-master kubelet[1210]: E0921 18:30:30.678057    1210 kubelet.go:2466] "Error getting node" err="node \"kubeadm-master\" not found"
Sep 21 18:30:30 kubeadm-master kubelet[1210]: E0921 18:30:30.767292    1210 kubelet.go:2391] "Container runtime network not ready" networkReady="NetworkReady=false reason:Netw>
The true error is this:
"Unable to register node with API server" err="Post \"https://167.235.73.16:6443/api/v1/nodes\": dial tcp 167.235.73.16:6443: connect: connection refused" node="kubeadm-master"
The node is not found because no connection to the API server could be made. Let’s check if the container actually runs. With container-d, there is a CLI called crt that can be used for this purpose.
> ctr containers ls

CONTAINER    IMAGE    RUNTIME
No containers were shown! The kubelet could not start any containers.
Fix: Container-D does not start Containers, Systemd Cgroup not configured
No containers are started. I followed the kubeadm documentation and used the provided container-d configuration. But this turned out to be wrong. After several attempts, trying configurations on Github, I ended up with this /etc/containerd/config.toml:
version = 2
[plugins]
  [plugins."io.containerd.grpc.v1.cri"]
   [plugins."io.containerd.grpc.v1.cri".containerd]
      [plugins."io.containerd.grpc.v1.cri".containerd.runtimes]
        [plugins."io.containerd.grpc.v1.cri".containerd.runtimes.runc]
          runtime_type = "io.containerd.runc.v2"
          [plugins."io.containerd.grpc.v1.cri".containerd.runtimes.runc.options]
            SystemdCgroup = true
After restarting the kubelet, the log messages looked ok:
Sep 22 18:24:22 kubeadm-master systemd[1]: Starting containerd container runtime...
Sep 22 18:24:22 kubeadm-master containerd[4525]: time="2022-09-22T18:24:22.461097686Z" level=info msg="starting containerd" revision="1.4.13~ds1-1~deb11u2" version="1.4.13~ds1"
Sep 22 18:24:22 kubeadm-master containerd[4525]: time="2022-09-22T18:24:22.488329644Z" level=info msg="loading plugin \"io.containerd.content.v1.content\"..." type=io.containerd.content.v1
Sep 22 18:24:22 kubeadm-master containerd[4525]: time="2022-09-22T18:24:22.488404939Z" level=info msg="loading plugin \"io.containerd.snapshotter.v1.aufs\"..." type=io.containerd.snapshotter.v1
...
Sep 22 18:24:22 kubeadm-master containerd[4525]: time="2022-09-22T18:24:22.492172348Z" level=info msg="Connect containerd service"
Sep 22 18:24:22 kubeadm-master containerd[4525]: time="2022-09-22T18:24:22.492229387Z" level=info msg="Get image filesystem path \"/var/lib/containerd/io.containerd.snapshotter.v1.overlayfs\""
Sep 22 18:24:22 kubeadm-master containerd[4525]: time="2022-09-22T18:24:22.492636512Z" level=info msg="loading plugin \"io.containerd.grpc.v1.introspection\"..." type=io.containerd.grpc.v1
Sep 22 18:24:22 kubeadm-master containerd[4525]: time="2022-09-22T18:24:22.492859036Z" level=info msg=serving... address=/run/containerd/containerd.sock.ttrpc
Sep 22 18:24:22 kubeadm-master containerd[4525]: time="2022-09-22T18:24:22.492910004Z" level=info msg=serving... address=/run/containerd/containerd.sock
Sep 22 18:24:22 kubeadm-master systemd[1]: Started containerd container runtime.
Sep 22 18:24:22 kubeadm-master containerd[4525]: time="2022-09-22T18:24:22.494527616Z" level=info msg="containerd successfully booted in 0.033852s"
Sep 22 18:24:22 kubeadm-master containerd[4525]: time="2022-09-22T18:24:22.496585268Z" level=info msg="Start subscribing containerd event"
Sep 22 18:24:22 kubeadm-master containerd[4525]: time="2022-09-22T18:24:22.497656229Z" level=info msg="Start recovering state"
Sep 22 18:24:22 kubeadm-master containerd[4525]: time="2022-09-22T18:24:22.520900147Z" level=info msg="Start event monitor"
Sep 22 18:24:22 kubeadm-master containerd[4525]: time="2022-09-22T18:24:22.520938540Z" level=info msg="Start snapshots syncer"
Sep 22 18:24:22 kubeadm-master containerd[4525]: time="2022-09-22T18:24:22.520953207Z" level=info msg="Start cni network conf syncer"
Sep 22 18:24:22 kubeadm-master containerd[4525]: time="2022-09-22T18:24:22.520959961Z" level=info msg="Start streaming server"
I could still not see a starting container. During another kubeadm init run, I could see this:
Sep 22 18:21:34 kubeadm-master containerd[4217]: time="2022-09-22T18:21:34.308595595Z" level=error msg="CreateContainer within sandbox \"0dca170c53c7acb0226d4d8a4bb16ff01276eb878e9cf272f72fac96bfdbc64c\" for &ContainerMetadata{Name:kube-apiserver,Attempt:0,} failed" error="failed to create containerd container: get apparmor_parser version: exec: \"apparmor_parser\": executable file not found in $PATH"
Fix: Container-D does not start Containers, apparmor_parser not found
I encountered a similar apparmor error during the update of my K3S environment that runs this blog. The solution:
> apt install apparmor apparmor-utils
And then the log files showed:
Sep 22 18:27:26 kubeadm-master containerd[4910]: time="2022-09-22T18:27:26.224317618Z" level=info msg="CreateContainer within sandbox \"3e496fe8311f62ffe3b2cdb25bc15db94f4174062f2ea125551a45a67d23ff09\" for &ContainerMetadata{Name:etcd,Attempt:0,} returns container id \"db73dddff4a2a15f61a7fcebca6e9233fd2d534d2f4d8247bab185098880915c\""
Sep 22 18:27:26 kubeadm-master containerd[4910]: time="2022-09-22T18:27:26.227736747Z" level=info msg="StartContainer for \"db73dddff4a2a15f61a7fcebca6e9233fd2d534d2f4d8247bab185098880915c\""
Sep 22 18:27:26 kubeadm-master containerd[4910]: time="2022-09-22T18:27:26.303206330Z" level=info msg="StartContainer for \"1f78ba91b4d21eea12cac0178665cff66684a964988d0ad2c2dc283f98f29fee\" returns successfully"
Step 3 Redone: Configure and Initialize the Control Plane Node
Finally the kubeadm init command was successful:
[wait-control-plane] Waiting for the kubelet to boot up the control plane as static Pods from directory "/etc/kubernetes/manifests". This can take up to 4m0s
[apiclient] All control plane components are healthy after 11.003329 seconds
[upload-config] Storing the configuration used in ConfigMap "kubeadm-config" in the "kube-system" Namespace
[kubelet] Creating a ConfigMap "kubelet-config-1.23" in namespace kube-system with the configuration for the kubelets in the cluster
NOTE: The "kubelet-config-1.23" naming of the kubelet ConfigMap is deprecated. Once the UnversionedKubeletConfigMap feature gate graduates to Beta the default name will become just "kubelet-config". Kubeadm upgrade will handle this transition transparently.
[upload-certs] Skipping phase. Please see --upload-certs
[mark-control-plane] Marking the node kubeadm-master as control-plane by adding the labels: [node-role.kubernetes.io/master(deprecated) node-role.kubernetes.io/control-plane node.kubernetes.io/exclude-from-external-load-balancers]
[mark-control-plane] Marking the node kubeadm-master as control-plane by adding the taints [node-role.kubernetes.io/master:NoSchedule]
[bootstrap-token] Using token: wf7h09.uo6sb20y6mlsz2ly
[bootstrap-token] Configuring bootstrap tokens, cluster-info ConfigMap, RBAC Roles
[bootstrap-token] configured RBAC rules to allow Node Bootstrap tokens to get nodes
[bootstrap-token] configured RBAC rules to allow Node Bootstrap tokens to post CSRs in order for nodes to get long term certificate credentials
[bootstrap-token] configured RBAC rules to allow the csrapprover controller automatically approve CSRs from a Node Bootstrap Token
[bootstrap-token] configured RBAC rules to allow certificate rotation for all node client certificates in the cluster
[bootstrap-token] Creating the "cluster-info" ConfigMap in the "kube-public" namespace
[kubelet-finalize] Updating "/etc/kubernetes/kubelet.conf" to point to a rotatable kubelet client certificate and key
[addons] Applied essential addon: CoreDNS
[addons] Applied essential addon: kube-proxy
Step 4: Persist IPv4 and Bridge Network Settings
Before we continue, lets persist the IPv4 and bridge network settings by running this script:
# Source: https://kubernetes.io/docs/setup/production-environment/container-runtimes/#forwarding-ipv4-and-letting-iptables-see-bridged-traffic
> cat <<EOF | sudo tee /etc/modules-load.d/k8s.conf
overlay
br_netfilter
EOF

> sudo modprobe overlay
> sudo modprobe br_netfilter

# sysctl params required by setup, params persist across reboots
> cat <<EOF | sudo tee /etc/sysctl.d/k8s.conf
net.bridge.bridge-nf-call-iptables  = 1
net.bridge.bridge-nf-call-ip6tables = 1
net.ipv4.ip_forward                 = 1
EOF

# Apply sysctl params without reboot
> sudo sysctl --system
Also, we can now use our created kubeconfig to access the cluster.
> mkdir -p $HOME/.kube
> sudo cp -i /etc/kubernetes/admin.conf $HOME/.kube/config
> sudo chown $(id -u):$(id -g) $HOME/.kube/config
We should see the very first node now properly configured:
> k get nodes

NAME             STATUS     ROLES                  AGE   VERSION
kubeadm-master   NotReady   control-plane,master   20h   v1.23.11
Step 5: Install a Network Plugin
The next step is to install Calico. We follow the Calico quickstart guide and grab a manifest file that is compatible with our Kubernetes version:
> kubectl create -f https://raw.githubusercontent.com/projectcalico/calico/v3.24.1/manifests/tigera-operator.yaml

namespace/tigera-operator created
customresourcedefinition.apiextensions.k8s.io/bgpconfigurations.crd.projectcalico.org created
customresourcedefinition.apiextensions.k8s.io/bgppeers.crd.projectcalico.org created
customresourcedefinition.apiextensions.k8s.io/blockaffinities.crd.projectcalico.org created
customresourcedefinition.apiextensions.k8s.io/caliconodestatuses.crd.projectcalico.org created
customresourcedefinition.apiextensions.k8s.io/clusterinformations.crd.projectcalico.org created
customresourcedefinition.apiextensions.k8s.io/felixconfigurations.crd.projectcalico.org created
customresourcedefinition.apiextensions.k8s.io/globalnetworkpolicies.crd.projectcalico.org created
customresourcedefinition.apiextensions.k8s.io/globalnetworksets.crd.projectcalico.org created
customresourcedefinition.apiextensions.k8s.io/hostendpoints.crd.projectcalico.org created
customresourcedefinition.apiextensions.k8s.io/ipamblocks.crd.projectcalico.org created
customresourcedefinition.apiextensions.k8s.io/ipamconfigs.crd.projectcalico.org created
customresourcedefinition.apiextensions.k8s.io/ipamhandles.crd.projectcalico.org created
customresourcedefinition.apiextensions.k8s.io/ippools.crd.projectcalico.org created
customresourcedefinition.apiextensions.k8s.io/ipreservations.crd.projectcalico.org created
customresourcedefinition.apiextensions.k8s.io/kubecontrollersconfigurations.crd.projectcalico.org created
customresourcedefinition.apiextensions.k8s.io/networkpolicies.crd.projectcalico.org created
customresourcedefinition.apiextensions.k8s.io/networksets.crd.projectcalico.org created
customresourcedefinition.apiextensions.k8s.io/apiservers.operator.tigera.io created
customresourcedefinition.apiextensions.k8s.io/imagesets.operator.tigera.io created
customresourcedefinition.apiextensions.k8s.io/installations.operator.tigera.io created
customresourcedefinition.apiextensions.k8s.io/tigerastatuses.operator.tigera.io created
serviceaccount/tigera-operator created
clusterrole.rbac.authorization.k8s.io/tigera-operator created
clusterrolebinding.rbac.authorization.k8s.io/tigera-operator created
deployment.apps/tigera-operator created

> kubectl create -f https://raw.githubusercontent.com/projectcalico/calico/v3.24.1/manifests/custom-resources.yaml

installation.operator.tigera.io/default created
apiserver.operator.tigera.io/default created
After some time:
> k get deploy

NAME              READY   UP-TO-DATE   AVAILABLE   AGE
tigera-operator   1/1     1            1           5m29s
Step 6: Install Core Binaries on the Worker Node
The binaries kubeadm and kubelet are installed on the worker nodes with the very same commands. Using the experience from troubleshooting the installation on the worker node, we need to do three things:
- Correctly configure containerd to work with the systemd cgroup
> nano /etc/containerd/config.toml

version = 2
[plugins]
  [plugins."io.containerd.grpc.v1.cri"]
  [plugins."io.containerd.grpc.v1.cri".containerd]
      [plugins."io.containerd.grpc.v1.cri".containerd.runtimes]
        [plugins."io.containerd.grpc.v1.cri".containerd.runtimes.runc]
          runtime_type = "io.containerd.runc.v2"
          [plugins."io.containerd.grpc.v1.cri".containerd.runtimes.runc.options]
            SystemdCgroup = true

> systemct restart containerd
- Install apparmor
> apt install apparmor apparmor-utils
- Install the core binaries (without kubectl)
apt install -y apt-transport-https ca-certificates curl
curl -fsSLo /usr/share/keyrings/kubernetes-archive-keyring.gpg https://packages.cloud.google.com/apt/doc/apt-key.gpg
echo "deb [signed-by=/usr/share/keyrings/kubernetes-archive-keyring.gpg] https://apt.kubernetes.io/ kubernetes-xenial main" | sudo tee /etc/apt/sources.list.d/kubernetes.list
apt update
apt install -y kubeadm=1.23.11-00 kubelet=1.23.11-00
apt-mark hold kubelet kubeadm
...

Setting up kubeadm (1.23.11-00) ...
Setting up kubectl (1.23.11-00) ...
Setting up kubelet (1.23.11-00) ...
- Get the kubeadm join command from the controller with
kubeadm token create --print-join-command, and then execute this on the worker nodes:
> kubeadm join 167.235.73.16:6443 \
  --token SECRET \
  --discovery-token-ca-cert-hash  sha256:SECRET

[preflight] Running pre-flight checks
[preflight] Reading configuration from the cluster...
[preflight] FYI: You can look at this config file with 'kubectl -n kube-system get cm kubeadm-config -o yaml'
[kubelet-start] Writing kubelet configuration to file "/var/lib/kubelet/config.yaml"
[kubelet-start] Writing kubelet environment file with flags to file "/var/lib/kubelet/kubeadm-flags.env"
[kubelet-start] Starting the kubelet
[kubelet-start] Waiting for the kubelet to perform the TLS Bootstrap...

This node has joined the cluster:
* Certificate signing request was sent to apiserver and a response was received.
* The Kubelet was informed of the new secure connection details.
Step 7: Verify Cluster Initialization
On the controller node, let’s see that all nodes have joined the cluster and work correctly:
> k get nodes
NAME              STATUS   ROLES                  AGE     VERSION
kubeadm-master    Ready    control-plane,master   21h     v1.23.11
kubeadm-worker1   Ready    <none>                 7m44s   v1.23.11
kubeadm-worker2   Ready    <none>                 4m3s    v1.23.11
Lets test and run a simple nginx deployment.
> k create deploy  nginx --image nginx:stable --replicas=8
nginx-647b7ff47f-5rxp2   1/1     Running   0          7m13s
nginx-647b7ff47f-8mqrx   1/1     Running   0          7m13s
nginx-647b7ff47f-94895   1/1     Running   0          7m13s
nginx-647b7ff47f-j55zk   1/1     Running   0          7m13s
nginx-647b7ff47f-jrjtt   1/1     Running   0          7m13s
nginx-647b7ff47f-kn64q   1/1     Running   0          7m13s
nginx-647b7ff47f-pqwb7   1/1     Running   0          7m13s
nginx-647b7ff47f-rvc92   1/1     Running   0          7m13s
Perfect!
Upgrade the Kubernetes Version
The final part is to perform and update of the cluster. We will upgrade from v1.23.11 to the latest v1.24 patch version, which is at the time of writing v1.24.6.
First, we upgrade the controller nodes with these commands.
> apt update

> apt-mark unhold kubeadm
> apt install kubeadm=1.24.6-00
> apt-mark hold kubeadm
The next step is to see what the upgrade encompasses:
> kubeadm upgrade plan

[upgrade/config] Making sure the configuration is correct:
[upgrade/config] Reading configuration from the cluster...
[upgrade/config] FYI: You can look at this config file with 'kubectl -n kube-system get cm kubeadm-config -o yaml'
W0924 18:27:05.853337   10456 initconfiguration.go:120] Usage of CRI endpoints without URL scheme is deprecated and can cause kubelet errors in the future. Automatically prepending scheme "unix" to the "criSocket" with value "/run/containerd/containerd.sock". Please update your configuration!
[preflight] Running pre-flight checks.
[upgrade] Running cluster health checks
[upgrade] Fetching available versions to upgrade to
[upgrade/versions] Cluster version: v1.23.12
[upgrade/versions] kubeadm version: v1.24.6
I0924 18:27:10.261173   10456 version.go:255] remote version is much newer: v1.25.2; falling back to: stable-1.24
[upgrade/versions] Target version: v1.24.6
[upgrade/versions] Latest version in the v1.23 series: v1.23.12

Components that must be upgraded manually after you have upgraded the control plane with 'kubeadm upgrade apply':
COMPONENT   CURRENT        TARGET
kubelet     3 x v1.23.11   v1.24.6

Upgrade to the latest stable version:

COMPONENT                 CURRENT    TARGET
kube-apiserver            v1.23.12   v1.24.6
kube-controller-manager   v1.23.12   v1.24.6
kube-scheduler            v1.23.12   v1.24.6
kube-proxy                v1.23.12   v1.24.6
CoreDNS                   v1.8.6     v1.8.6
etcd                      3.5.1-0    3.5.3-0

You can now apply the upgrade by executing the following command:

 kubeadm upgrade apply v1.24.6

_____________________________________________________________________


The table below shows the current state of component configs as understood by this version of kubeadm.
Configs that have a "yes" mark in the "MANUAL UPGRADE REQUIRED" column require manual config upgrade or
resetting to kubeadm defaults before a successful upgrade can be performed. The version to manually
upgrade to is denoted in the "PREFERRED VERSION" column.

API GROUP                 CURRENT VERSION   PREFERRED VERSION   MANUAL UPGRADE REQUIRED
kubeproxy.config.k8s.io   v1alpha1          v1alpha1            no
kubelet.config.k8s.io     v1beta1           v1beta1             no
_____________________________________________________________________
The last section is especially helpful because it will warn you about API deprecations for resources, which means that you need to update manifests file. For us, there is nothing to do here.
Let’s continue with the upgrade.
> kubeadm upgrade apply v1.24.6

…
[preflight] Running pre-flight checks.
[upgrade] Running cluster health checks
[upgrade/version] You have chosen to change the cluster version to "v1.24.6"
[upgrade/versions] Cluster version: v1.23.12
[upgrade/versions] kubeadm version: v1.24.6
[upgrade/confirm] Are you sure you want to proceed with the upgrade? [y/N]: y
…
[upgrade/etcd] Upgrading to TLS for etcd
[upgrade/staticpods] Preparing for "etcd" upgrade
…
[upgrade/staticpods] Preparing for "kube-apiserver" upgrade
…
[upload-config] Storing the configuration used in ConfigMap "kubeadm-config" in the "kube-system" Namespace
…
[addons] Applied essential addon: CoreDNS
[addons] Applied essential addon: kube-proxy

[upgrade/successful] SUCCESS! Your cluster was upgraded to "v1.24.6". Enjoy!

[upgrade/kubelet] Now that your control plane is upgraded, please proceed with upgrading your kubelets if you haven't already done so.
Now we can upgrade the kubectl and kubepoxy components of the controller node. The recommended way is to stop all worklaods, update the binaries, and bring the controller node online again.
> kubectl drain kubeadm-master --ignore-daemonsets

> apt-mark unhold kubectl kubelet
> apt install kubectl=1.24.6-00 kubelet=1.24.6-00
> apt-mark hold kubectl kubelet

> kubectl uncordon kubeadm-master
Let’s check the node status now:
NAME              STATUS   ROLES           AGE   VERSION
kubeadm-master    Ready    control-plane   2d    v1.24.6
kubeadm-worker1   Ready    <none>          27h   v1.23.11
kubeadm-worker2   Ready    <none>          26h   v1.23.11
Ok! Let’s upgrade the worker nodes as well.
> apt-mark unhold kubeadm
> apt install kubeadm=1.24.6-00
> apt-mark hold kubeadm
> kubeadm upgrade node

[upgrade] Reading configuration from the cluster...
[upgrade] FYI: You can look at this config file with 'kubectl -n kube-system get cm kubeadm-config -o yaml'
[preflight] Running pre-flight checks
[preflight] Skipping prepull. Not a control plane node.
[upgrade] Skipping phase. Not a control plane node.
[kubelet-start] Writing kubelet configuration to file "/var/lib/kubelet/config.yaml"
[upgrade] The configuration for this node was successfully updated!
[upgrade] Now you should go ahead and upgrade the kubelet package using your package manager.
> kubectl drain kubeadm-worker1 --ignore-daemonsets

> apt-mark unhold kubectl kubelet
> apt install kubectl=1.24.6-00 kubelet=1.24.6-00
> apt-mark hold kubectl kubelet

> kubectl uncordon kubeadm-worker1
And finally:
k>  get nodes

NAME              STATUS   ROLES           AGE   VERSION
kubeadm-master    Ready    control-plane   2d    v1.24.6
kubeadm-worker1   Ready    <none>          27h   v1.24.6
kubeadm-worker2   Ready    <none>          27h   v1.24.6
All went well.
Conclusion
The kubeadm CLI is a tool to install Kubernetes on any infrastructure. It provides commands for the overall cluster initialization, configuration and upgrading. It’s important to know that central aspects need to be configured and installed additionally. Most notably are the container runtime and the network plugin. Check their requirements beforehand, and add appropriate command line flags to the kubeadm cli command.
This article showed how to install a Kubernetes cluster from scratch in Debian 11. During the installation, I encountered several problems, and detail my analysis and troubleshooting steps. The problems were: nor bridged network traffic allowed, an incorrect configured SystemD cgroup driver for container-d, and no apparmor binary on Debian. I hope these notes are helpful for you if you encounter the very same errors. But with everything in place, the cluster was finally ready, and on a very positive side, upgrading the Kubernetes version node-by-node worked flawlessly.