Equipped with visual sensors, a robot can create a map of its surroundings. Combining camera images, points cloud and laser scans, an abstract map can be created. Then, this map can be used to localize the robot. Combining both aspects at the same time is called SLAM - Simultaneous Localization and Mapping. This is the prerequisite for the very audacious goal is autonomous navigation: Starting at its current position, you give the robot a goal in its surroundings, and the robot moves steadily towards the target position. At a basic level, it should plan the way ahead, recognizing obstacles and estimating a way around them. At an advanced level, it should actively scan its environment and live-detect new obstacles.
The robot operating system provides several tools to facilitate SLAM. In this article, we will explore rtabmap. Following a brief Summary of SLAM approaches and required hardware, we will dive right into starting and tuning rtabmap in mapping mode. You will learn the launch file parameters and tuning tips as well. With a recorded map, we can start either Rtabmap or RViz to localize the robot. Again, I show which launch files and parameter to use. Following this article should give you firm grip on mapping and localization with your robot.
The technical context for this article is Ubuntu Server 20.04, ROS Noetic 1.15.11, and as the hardware either a Raspberry Pi 3 or 4. All instructions should work with newer OS and library versions as well.
Background: Approaches to SLAM
ROS provides several approaches and packages for navigation - see my earlier article. Following this theoretical investigation, let’s consider the two essential requirements to make a selection. First, the SLAM algorithm needs to be well performing. Second, the library should be actively maintained, and needs to support the chosen algorithm and ROS2. Finally, the sensor needs to be supported by the library, should be easy to configure and setup, and has a good price-performance metric.
The two best SLAM algorithms are rtab-map and orb. In this comparative analysis, rtab map is the winner, and in this paper, orb when used with a stereo camera or RGBD supports good navigation and odometry functions. And since orb_slam2 package is only supported up to the ROS1 distribution melodic, rtabmap_ros will be used.
After some research in other robot projects, I gained following insights regarding the sensors
- The classic Kinect 1 or the new Kinect 2 cameras are affordable cameras with a good standing in ROS projects. Plenty examples exist. On the downside, there seem to be compatibility issues[^1], its hard to setup in recent ROS distributions[^2], and the proprietary connector needs to be spliced into USB and 12V Input voltage when using a mobile robot.
- The RealSense Sensors are well supported in current ROS and ROS2 distributions [^3], and the native SDK is also up-to-date and available on all current platforms [^4]. However. the image quality of this device is worse than that of a Kinect[^5], and they are more expensive.
- Finally, the affordable RP Lidar A1M8 is also used in several projects and easy to setup[^6]. Lidar is a technology primary for obstacle detection, it cannot be used to get an image from its surroundings, which is required when e.g. a robotic arms wants to pick up other items. Also, Lidar based navigation can be problematic indoors[^7].
To be effective with my robot project, I want to spend less time with configuration & setup, but more time with using and tuning sensors to achieve semi-autonomous navigation using SLAM. The RealSense camera fulfills these criteria, and its drivers are very recent. Therefore, I bought a RealSense D435 sensor.
Installing RTABmap
First things first: Install all required rtabmap packages with this command:
sudo apt-get install ros-noetic-rtabmap-ros ros-noetic-rtabmap
Now we can continue.
RTAB Mapping Mode
Starting the GUI
Mapping is the active process of creating a map of your surroundings. To start rtabmap in mapping mode, use this command:
roslaunch rtabmap_ros $LAUNCH_FILE \
  rtabmap_args:="--delete_db_on_start" \
  rtabmapviz:=true \
This default command will start the rtabmap GUI application and a pre-configured set of topics from which the map will be generated. The parameter $LAUNCH_FILE can be one of rtabmaps launch file - I prefer rtabmap.launch since it works particularly well, but dependent on your setup, you can also try rgbd.launch or stereo_mapping.launch. Each of these launch files assumes very specific topics to be present. Your need to map them to the topics provided by your camera. Here is the launch file when working with a 3D point cloud:
roslaunch rtabmap_ros rtabmap.launch \
  depth_topic:=/camera/depth/image_rect_raw/ \
  rgb_topic:=/camera/color/image_raw \
  camera_info_topic:=/camera/color/camera_info \
  rtabmapviz:=true \
  localization:=true
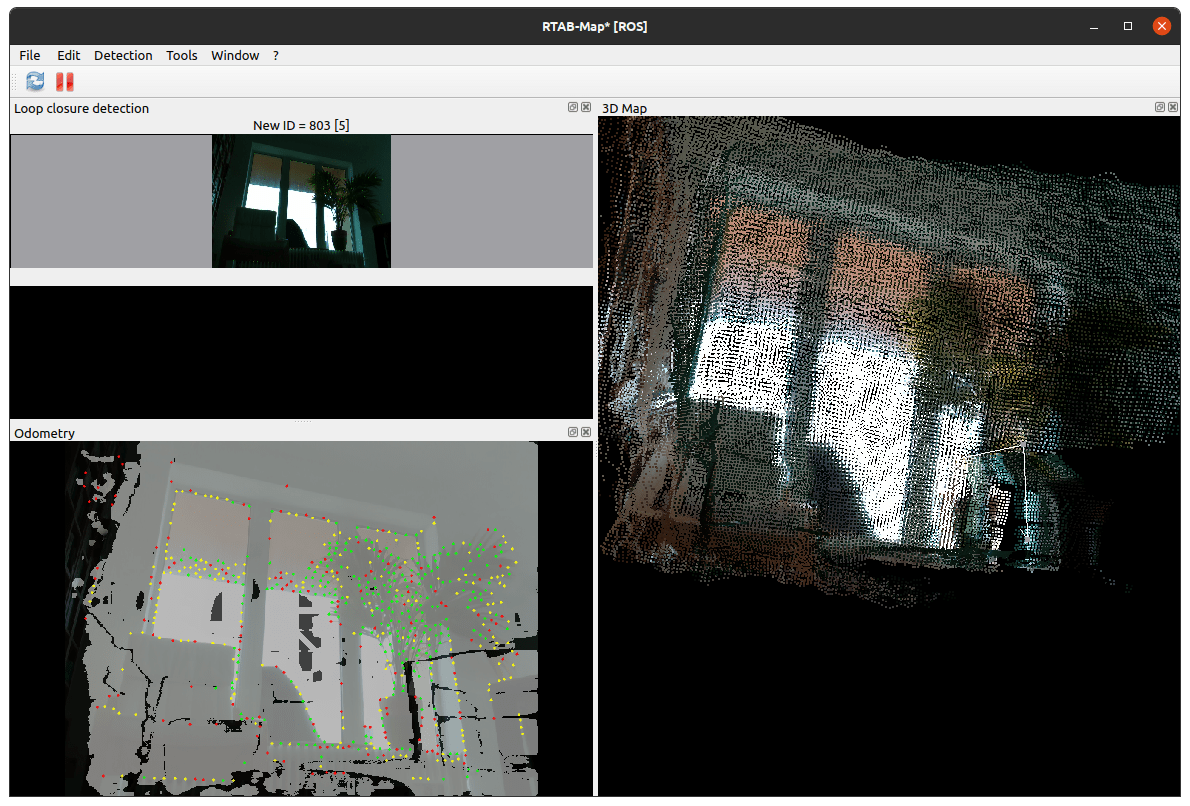
The GUI starts and looks as follows:

Parameter Tuning
Mapping is controlled with more than 100 hundred parameters, not to mention the parameters that are used for the camera sensor of your choice. To be honest, its overwhelming. It appears that studying the papers, catching up the vocabularies and concepts, would be necessary.
My approach is to start with a default config file, load it, run the application, change a parameter, and check the application again. Repeated for several times, and testing the results each time, yielded a good performance. The steps in details:
- Start rtabmap and check the opening log statement - they will mention at which directory your local config file will be stored, which defaults to
~/.ros/rtabmap_gui.ini - Grab one of the recommended starting configuration files: Raspberry Pi or Generic
- Read the tuning tips, and apply them step-by-step in the rtabmap configuration at
Tool/Preferences
I hope this approach helps you too. In addition, try the following startup parameters and see if they improve the performance:
roslaunch rtabmap_ros rtabmap.launch \
  rtabmap_args:="--delete_db_on_start  --Vis/MaxFeatures 500 --Mem/ImagePreDecimation 2 --Mem/ImagePostDecimation 2 --Kp/DetectorStrategy 6 --OdomF2M/MaxSize 1000 --Odom/ImageDecimation 2" \
  approx_sync:=true \
  queue_size:=30 \
  compressed_rate:=1 \
  noise_filter_radius:=0.05  \
  noise_filter_min_neighbors:=2
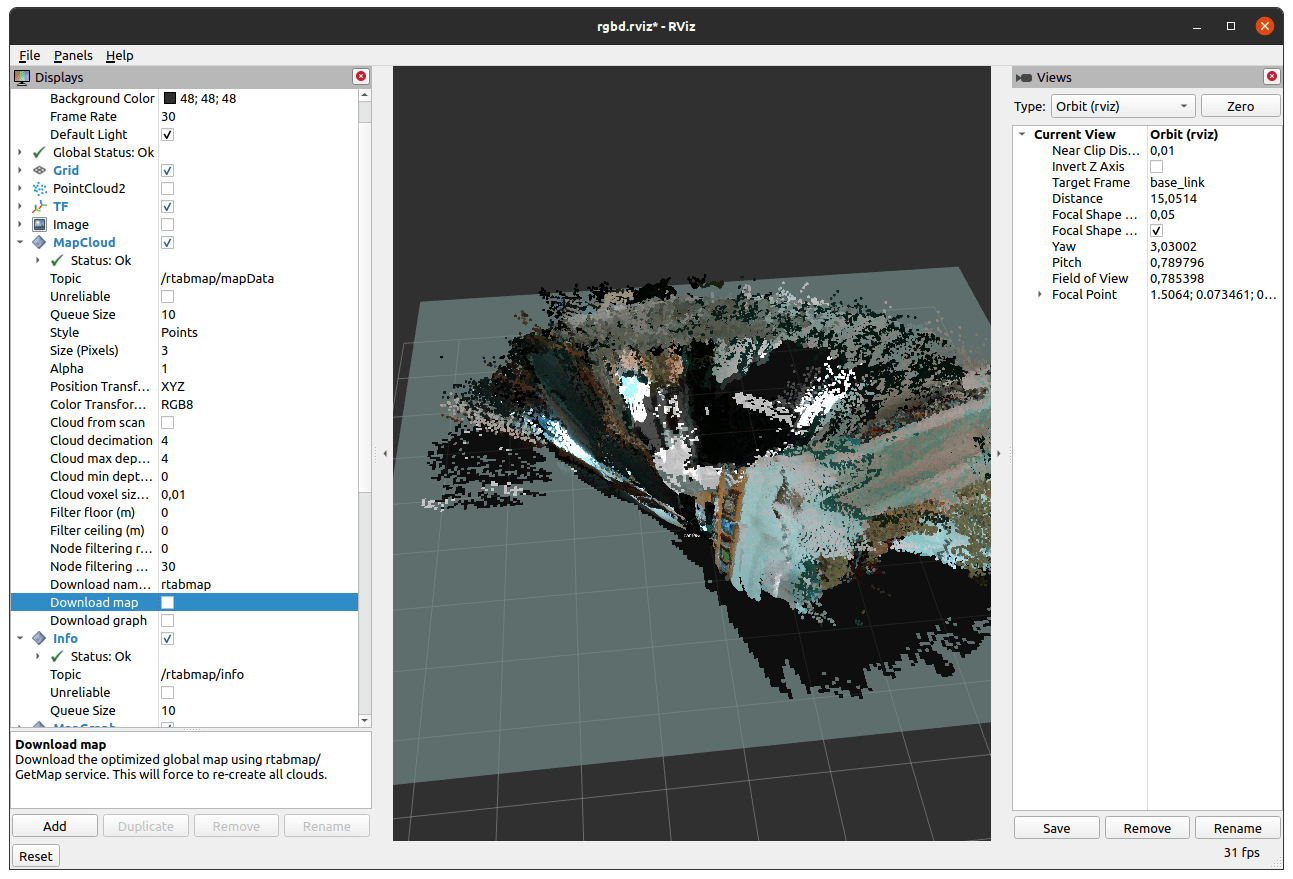
Here is a screenshot of my desktop using rtabmap and RViz for live mapping my apartment.

RTAB Localization Mode
Localization uses a stored map, and by accessing the current sensor data, tries to define where on the map the robot is located.
The localization mode is started with this command:
roslaunch rtabmap_ros rtabmap.launc\
 localization:=true \
 rtabmapviz:=true \
 rviz:=true
This command will also start the tool rviz, and a preconfigured set of panels and topic subscriptions to those provided by rtabmap, such as /rtabmap/cloud_map, the 3D point cloud of the stored map, or /rtabmap/grid_map, the 2D flat map of the surroundings, which is effective for navigation.
Viewing Map Data
To view the map data, you have got two options.
When running RTABmap in mapping mode, you can open rviz and add the MapCloud panel. Then, configure the correct listening topic as /rtabmap/mapData, and activate the checkbox downlod map. This looks as follows:

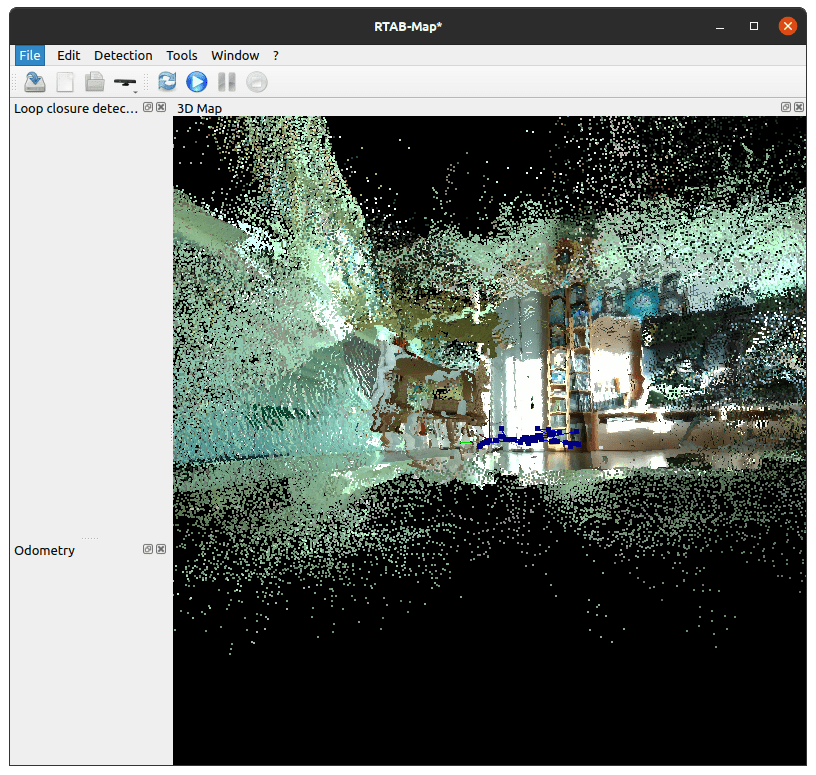
The second option is to load a recorded map into the standalone tool rtabmap-databaseViewer. Run the same name command, then open the map file. Shortly after, click on Edit, View 3DMap, and in the next two dialogues, enter 4.0 and 8.0. Then you can see a map as shown here:

Conclusion
The ROS package RTABMAP is an all in one solution to achieve simultaneous mapping and localization. Your start rtabmap either in mapping or in localization mode via extensively configurable launch files. To help you get started quickly, this article detailed the launch commands and parameters. Also, you learned about how to tune the parameters of rtabmap incrementally to optimize its usage. Once you have a map, you can either load it with the standalone rtabmap binary, or you can start the rtabmap ROS nodes in localization mode: New topics will appear to which RViz can listen and show e.g. the grid map of its surroundings or even pointcloud data.
Sources
Understanding the complexity of the ROS rtabmap was not possible but for there articles:
- Localization and Navigation using RTABmap
- Turtlebot2 rtabmap tutorial
- RTABmap project homepage
- RTABmap forum
- RTABmap Github Project and Issues
Footnotes
[^1]: For example, when searching for questions regarding Kinect in the official ROS forum, it’s hard to find recent answers.
[^2]: In a great article about ROS on Raspberry Pi 4 with Kinect, the details of a long and challenging "configuration and compilation" journey can be found. The author decided to publish a fully configured Raspberry Pi 4 image, saving you lots of hassles he had endured.
[^3]: See the official Github repo
[^4]: The librealsense works on Linux, OsX and Windows.
[^5]: In this YouTube video, you can see the image quality compared between Kinect and RealSense
[^6]: For example in this Raspberry Pi 4 project.
[^7]: Watch this YouTube video to see where Lidar-based obstacle detection fails
