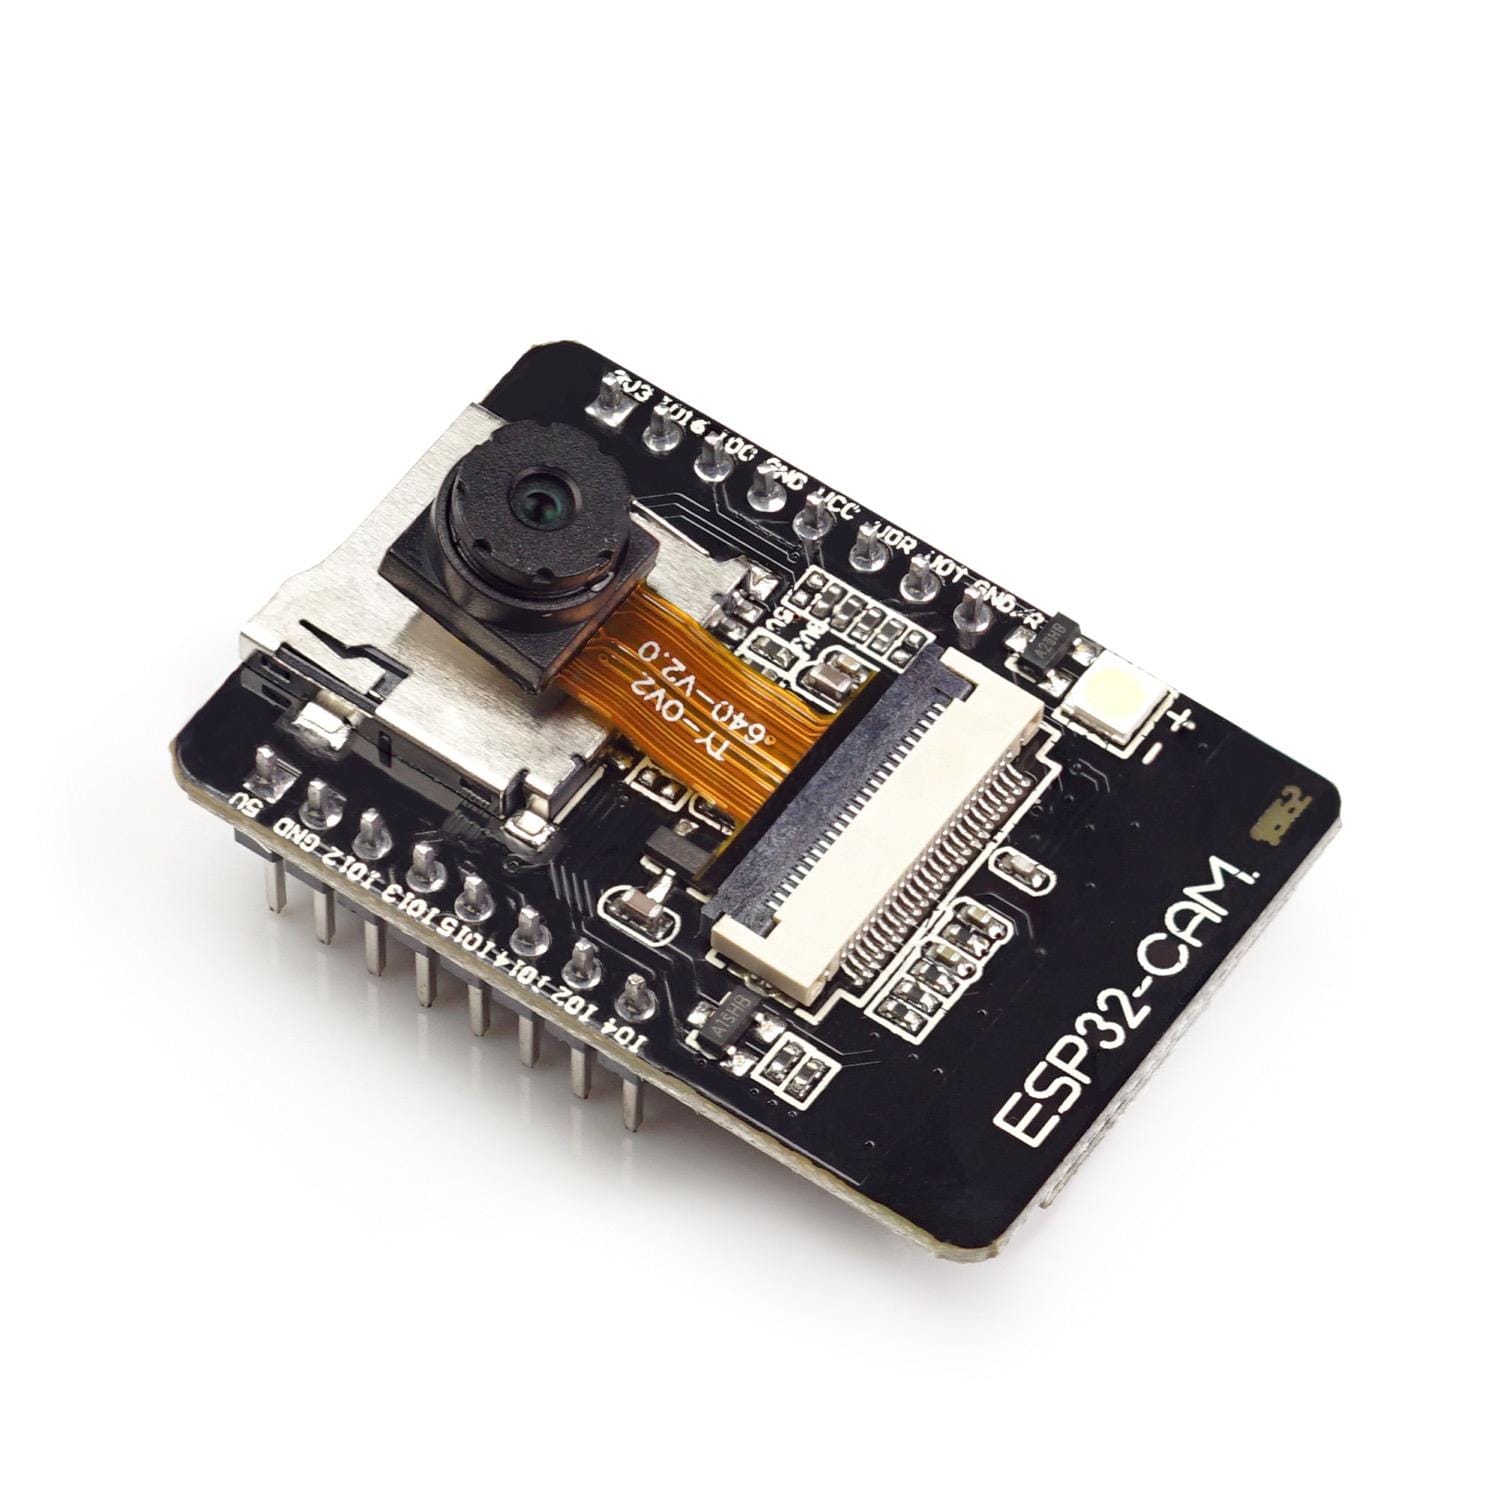
The ESP32 Camera is an ESP32 board nano board with a fixed component, its name giving camera. It has a very compact form factor, and although some pins are directly used for the camera, you still get 10 GPIO pins for connectivity to other sensors.
This article details how to program the ESP32 camera. Specifically, you will learn how to use Arduino C for reading from/writing to analog and digital pins, and you will see an example sketch that transforms the device to a live streaming camera.
Hardware
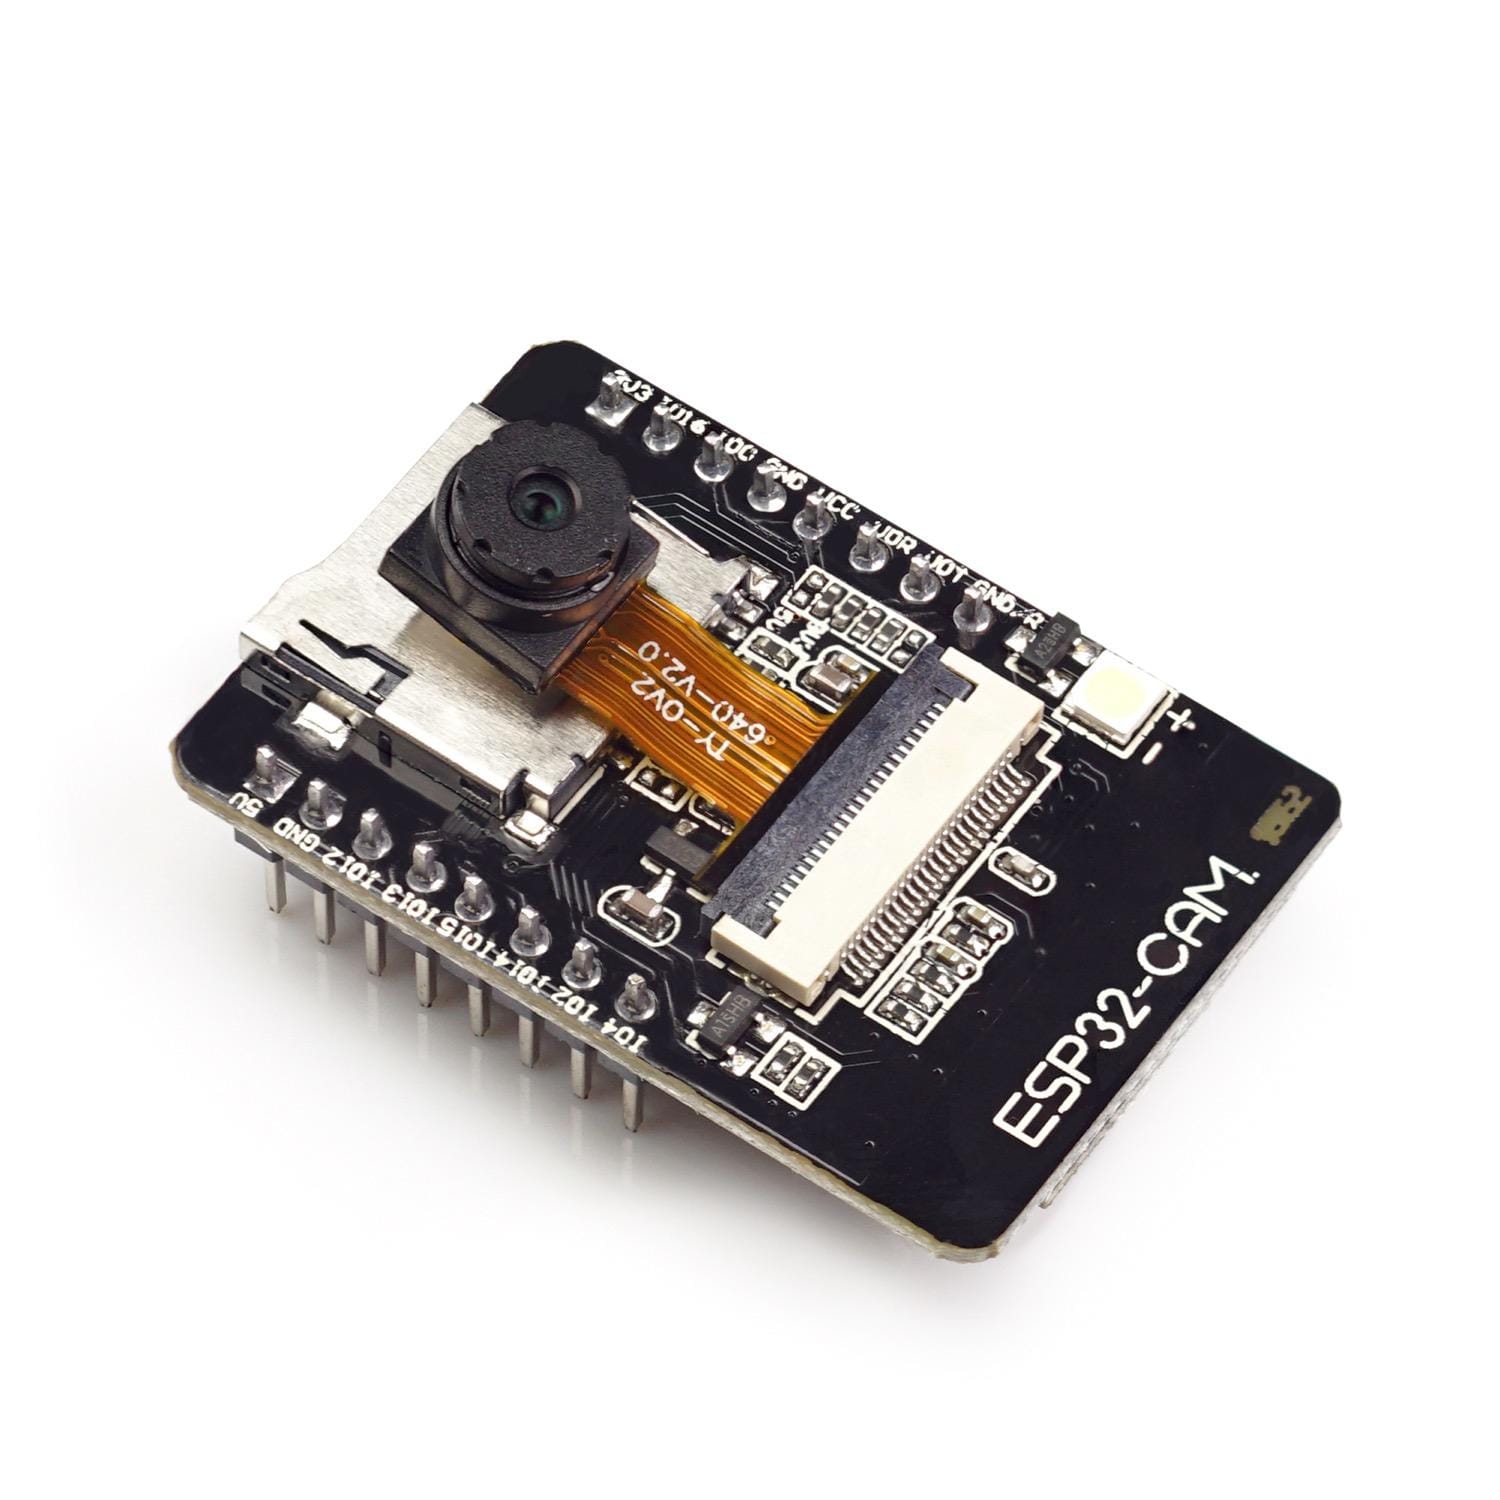
Source: berry-base.de
The ESP32 camera board is based on the ESP32-S design, also known as ESP-WROOM-32, with the following capabilties:
- Processor: Xtensa Dual Core 32-bit LX6, up to 160 Mhz
- 520 KB on-chip SRAM
- 4MB PSRAM
- GPIO: 34 (32 digital, 2 analog)
Furthermore, the board has the following features:
- OV2640 or OV7670 camera
- SDCARD Reader
Supported communication protocols are as follows:
- WiFi 802.11 b/g/n/e/i
- Bluetooth 4.2 and BLE
Digital Pins
Source: randomnerdtutorials.com
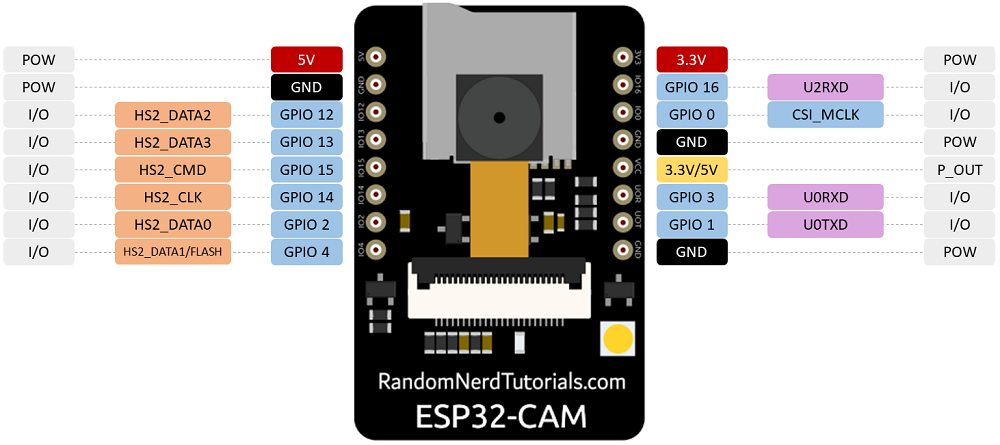
The ESP32-CAM board only provides access to 16 of its 32 pins, and of these, 6 pins are for VCC and GND. The remaining 10 pins can fulfill different roles:
- UART: A simple, asynchronous bi-directional message exchange protocol. Following default pins are used:
- GPIO01: TX
- GPIO02: RX
- SPI: A synchronous serial communication protocol between one server and several clients, where both can actively send data. Following pins need to be used:
- GPIO15: CS
- GPIO14: SCLK
- GPIO13: MOSI
- GPIO12: MISO
- ADC: Analog values can be read and generated as PWM from the following pins:
- GPIO04
- GPIO00
- GPIO02
- GPIO15
- GPIO13
- GPIO12
- GPIO14
The ESP32-CAM is mainly programmed with Arduino C, and this is the focus of this article too. If you are curious, you can also try this MicroPython ESP32 Camera firmware.
Digital Input
To use any of the available pins as digital input, use the method setPinMode(pinNumber, mode), where mode is either INPUT or INPUT_PULLUP. Once configured, the current state is determined with digitalRead(pinNumber), where 0 means no input detected, and 1 means the input is active. In addition to these numerical values, the symbols LOW and HIGH can be used as well. If the input mode is set to INPUT_PULLUP, the values of HIGH and LOW are reversed.
Digital Output
To declare an output pin, use the method pinMode(pinNumer, OUTPUT), followed by digitalWrite(pinNumber, value), where value is either one of the symbols HIGH or LOW.
Analog Input
On the ESP32, ADC values are in 12bit resolution, which means that measurements return a value between 0 to 4095. These are the "steps" in the input voltage from 0 to 3.3V that can be measured.
To set a pin as analog output, declare setPinMode(pinNumber, OUTPUT). With analogRead(pinNumber), the current input voltage will be read and transformed into a 12bit value.
Analog Output
An analog output takes the form of PWM. With the built-in library ledc, a PWM signal is configured by configuring the following aspects:
- channel: a bus on which the signal runs. the ESP32 has 12 different channels
- frequency: A value in HZ that determines how of the the value oscillates between high and low voltage
- duty cycle: the tradeoff between on and off phases
- resolution: 1-20bit divider for applying the duty cycle to the frequency
More specialized libraries, for example ESP32 Analog Write, simplify the creation of PWM signals for specific hardware such as servos.
Camera with Webserver
To setup the ESP32 board as a webserver from which live images or even an image feed can be generated, follow these instructions:
- Open the Arduino IDE
- Go to "Tools", then "Board Manager", and search for the ESP32
- If you can not see a search result, you need to add the board support manually. In this case, go to "Preferences", and choose the field "Additional boards manager URLs". Enter this URL:
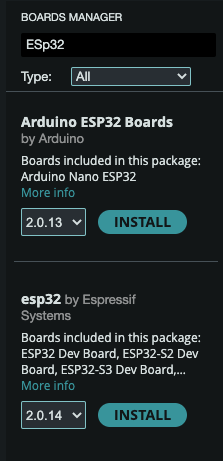
https://raw.githubusercontent.com/espressif/arduino-esp32/gh-pages/package_esp32_index.json - In the search results, select the library called ESP32 by Espressive Systems (see following screenshot)
- Go to "Tools", then "Select Board", and choose "AI-Thinker ESP32-CAM" as well as the port in which the connected camera is detected
- Finally, open "File", "Sketch", then click on "EPS32", "Camera" and "Camera Web Server".
The sketch file loads. The complete source code for this sketch is also published in the projects arduino-esp32 Github repository.
To get it working, follow these steps:
- Change the included definitions to only
#define CAMERA_MODEL_AI_THINKER // Has PSRAM - Input your Wi-Fi credentials
const char* ssid = "**********";
const char* password = "**********";
Then, compile and upload the sketch. You should see logs similar to the following:
Upload:
Connecting.....
Chip is ESP32-D0WDQ6 (revision v1.0)
Features: WiFi, BT, Dual Core, 240MHz, VRef calibration in efuse, Coding Scheme None
Crystal is 40MHz
MAC: 9c:9c:1f:ca:c7:c4
Uploading stub...
Running stub...
Stub running...
Changing baud rate to 460800
Changed.
Configuring flash size...
Flash will be erased from 0x00001000 to 0x00005fff...
Flash will be erased from 0x00008000 to 0x00008fff...
Flash will be erased from 0x0000e000 to 0x0000ffff...
Flash will be erased from 0x00010000 to 0x00182fff...
Compressed 18992 bytes to 13110...
Writing at 0x00001000... (100 %)
Wrote 18992 bytes (13110 compressed) at 0x00001000 in 0.6 seconds (effective 239.7 kbit/s)...
Hash of data verified.
Compressed 3072 bytes to 117...
Writing at 0x00008000... (100 %)
Wrote 3072 bytes (117 compressed) at 0x00008000 in 0.1 seconds (effective 349.3 kbit/s)...
Hash of data verified.
Compressed 8192 bytes to 47...
Writing at 0x0000e000... (100 %)
Wrote 8192 bytes (47 compressed) at 0x0000e000 in 0.1 seconds (effective 509.3 kbit/s)...
Hash of data verified.
Compressed 1516976 bytes to 990575...
Writing at 0x00010000... (1 %)
Writing at 0x00014323... (3 %)
Writing at 0x0001a97e... (4 %)
Writing at 0x000266ca... (6 %)

Wrote 1516976 bytes (990575 compressed) at 0x00010000 in 24.7 seconds (effective 491.4 kbit/s)...
Hash of data verified.

Leaving...
Hard resetting via RTS pin...
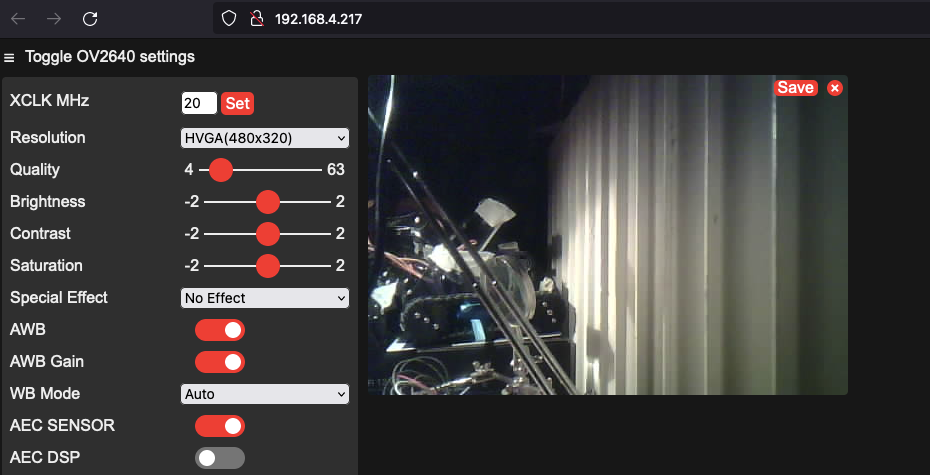
Reboot the camera and check its serial connection - it will detail when the camera module is found and a successful connection to the Wi-Fi hotspot is made. Enter the IP address in your browser, and you should see the following:
Using the SD-Card
To my surprise, there is not included example for using the SD-Card. However, other bloggers implemented source code examples, please refer to Using the ESP32-CAM MicroSD Card.
Conclusion
The ESP32-Cam board is a unique and dedicated variant of the ESP32. With the camera module and an SD-Card reader, it simplifies to implement a live video streaming server or program picture taking that are stored on an SD-Card. This article explained the board, its available pins, how to program digital and analog read or writes, and how to use the camera with the built-in example included as an example sketch in the Arduino IDE.
