Every Arduino programmer needs to start somewhere. The first Arduino device is a simple combination of a membrane keypad and the an 8X8 matrix. When a key is pressed, it is shown on the 8X8 matrix. Just check the API for the membrane, figure out how to process the button pressed. And then send this character to the LED Matrix. This sounds very easy, right?
Well, it is when you have a solid experience with Arduino programming. But when I started this developer journey, many things were unknow to me. It took a long time to understand the root causes of the problems that I was facing. In this blog post I reflect upon these challenges, and identify the key learnings.
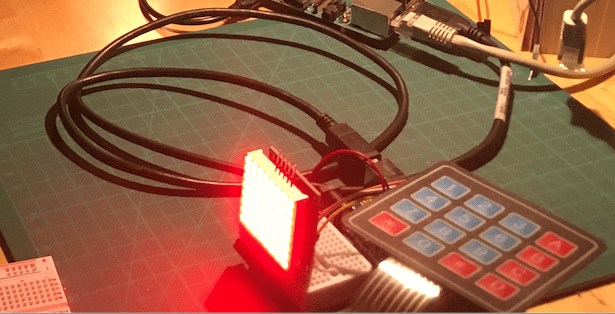
Attaching a LED Matrix
When working with the Arduino IDE, many additional libraries are already installed for you. The software development process therefore starts with identifying which hardware you are attaching to your Arduino, and then to select the appropriate library.
My initial setup was a complete kit with Arduino Uno, about 20 sensors, a breadboard, 4 displays and 4 motors. Following along the tutorial, I used the delivered drivers and, I’m a bit ashamed to say this, just copied the example code into the IDE, burned the program to the bootloader, and started the Arduino. Not surprisingly, the sketch worked every time.
For the LED matrix, I was curious about the functions. So, from my IDE, I saw that there is a method called drawChar. This method takes a line and a character which you want to draw. Whatever I tried, I could not get the display to show the character…
The next day. I read the documentation. The library was to be used for LED matrix and segment matrixes. The method I was using was not designed for a simple LED Matrix. And with this realization, I began anew to select a suitable library.
Choosing a Library - Part 1
Coming from the world of JavaScript development, selecting packages means browsing the central NPM registry, reading documentations, and deciding which library to use. This comfort is not as approachable when developing Arduino apps.
The first difference is a mismatch between the libraries that are bundles with your IDE - Arduino Studio or PlattformIO, and the total number of available libraries. You can find libraries in Github, on private webpages, or even in forums.
The next difference is installation. Libraries that are already bundled in your application can be imported in your projects. Additional libraries can be added with your IDE - if it has access to the sources. Or you need to download the source directly, and add them to your projects.
The third difference is documentation. Libraries that are bundled with your IDE show a helpful description, but only show links to additional information. If you access other libraries, you find a mix of webpages, GitLab repos with a readme file, or pure source code with comments.
The final difference that makes it hard to choose is that there is no “definitive” version for a library, neither by its age, nor by its functions can you make a distinction. When my LED Matrix did not work, I found a library in GitHub, which was recently updated. Looking into its code, I saw great resemblance of the Library that was suggested in my kit. And after some more research, I found a library from 2013 that seems to be the parent of both newer libraries.
At this point, I was utterly confused how to make a good selection. And I started back on square 1.
Choosing a Library - Part 2
After these experiences, I drafted and tested a small decision process with the following steps.
1. Understand the Hardware
You need to understand how the sensor or hardware works in general. You don’t need to understand the electric circuit diagrams (eventually you will have acquired this knowledge). But you should get a basic understanding about the operational processes.
Turning back to the LED matrix, a crucial point was to understand aspects like power management, clearing the display, and how the LEDs are aliened. Libraries will operate with sensors/hardware based on this description.
2. Make a list of all available Libraries
Next, browse all the libraries of your IDE and also search on Github or the Internet. Important sources are:
3. Evaluate the Library
The most obvious step is to browse the library, fetch an example program, and try it. If the example works out of the box, this library is a good candidate.
I strongly encourage you to take the effort of understand the library to a point in which you feel comfortable how it works. Be honest to yourself, copy & paste code examples will not work long-term.
When I consider the library as basically usable, I will apply two narrowing criteria: specificity and quality.
The first criteria is specificity. Prefer a library that matches your hardware/sensor specifically over general-purpose libraries that support multiple revisions or similar hardware. It will be easier to find help, and easier to understand.
The next criteria are the source code and documentation. Can you understand the source code in general? Is it concise and readable? If yes, remember how the Hardware works, and try to see these operations in the library. The clearer, the better. Finally, check the documentation (source code, wiki, web page etc.) and examples. The more you find, the better.
All libraries that score high in specificity and quality should be rated highly.
4. Try It
The final step is to use the library. With using I mean explicitly not to just copy & paste the source code! Set yourself a time frame, open an empty file, start coding from scratch. If you can get the library to work within the time frame, you have found your candidate.
Conclusion
When attaching a new sensor or other piece of hardware to your Arduino project, the lazy programmer in you might surface, grab the next best library, copy & paste an example and get it running. But this approach does not work long term. Make the effort to follow a selection process about the library you choose. My selection process has 4 steps: Understand the hardware, make a list of libraries, evaluate the libraries, and try them. This process helps to build knowledge, insights and skill: Knowledge how the hardware works, insights how a library operates with the hardware, and the skill to use libraries by writing code from scratch. Start now to become better at your Arduino Projects.