Through the combination of ESPHome and Home Assistant, a myriad of sensors can be added, managed, and their data visualized and stored. To extend the arsenal of sensor data, I wanted to detect sound and vibration data too.
Starting with an investigative research of the ESPHome supported sensors and other internet sources, I found the sound sensor KY-037 and the vibration sensor SW420. This article summarizes all required steps to get these sensors working with ESPHome and Home Assistant.
The technical context of this article is Home Assistant v2024.10.4 and ESPHome v2024.10.3, but it should work with newer versions as well.
Hardware Overview
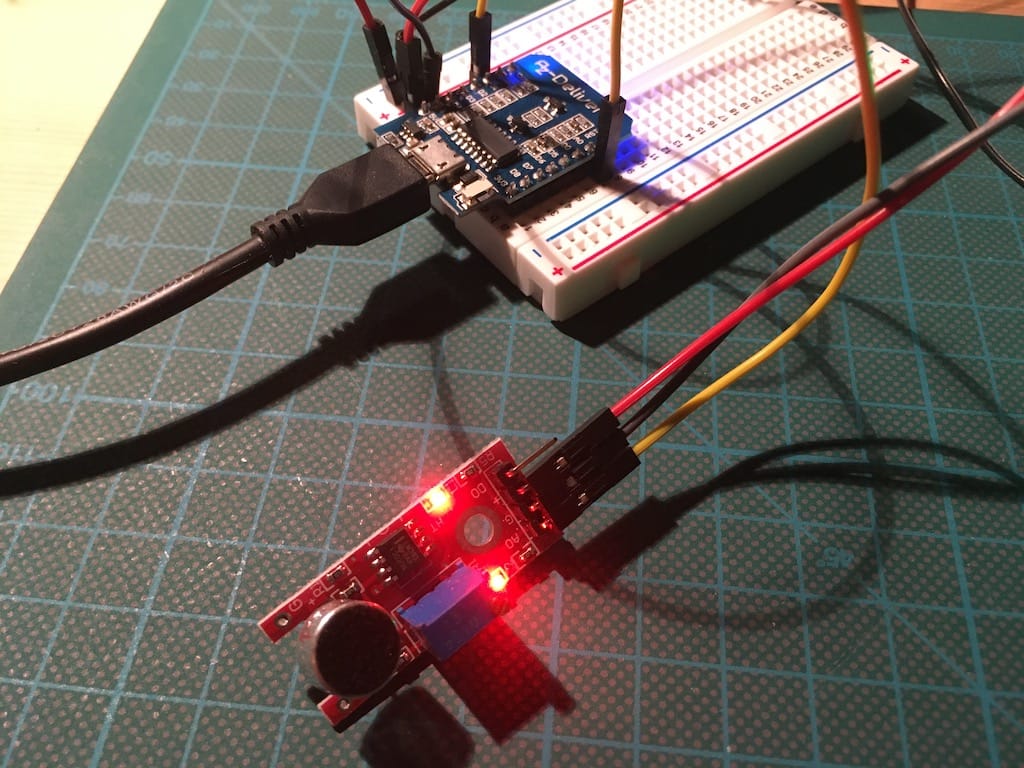
For this project, you need the following hardware:
- ESP8266 board
- KY-037 sensor
- SW420 sensor
- Dupont cables
I prefer the D1 Wemos mini board: It has a good form factor and works very reliable. For the sensors, I checked Amazon offers and bought brands that received good customer feedback.
Wiring
The KY-037 sensor produces an analog and a digital output signal. The analog signal is a voltage-inverted value of the absolute sound level, and the digital value reflects if the sensitivity threshold of the capacitor, mechanically adjustable with a rotatable potentiometer, is met.
The D1 mini is an esp8266 board. It measures analog data with 8-bit granularity. Internally, the KY-037 analog pin outputs a voltage value between 1V and 0V. This can be scaled by multiplying the valued with 5.0 * 1024, which gives a total codomain of 0 ... 5120. Calibrating this sensor will be interesting.
Considering the D1 mini pin layout …

Source: https://randomnerdtutorials.com
… the KY-037 is wired as follows:
- ESP8266 5V => KY-037 VCC
- ESP8266 Ground => KY-037 GND
- ESP8266 ADC0 => KY-037 Analog Output

The SW420 sensor just outputs a digital signal. It also has an adjustable potentiometer to scale the sensitivity, which reflects both a lower threshold level and the absolute value it reports. Its wiring is simple since any digital pin can be used:
The wiring is simple as well:
- ESP8266 5V => SW420 VCC
- ESP8266 Ground => SW420 GND
- ESP8266 GPIO-12/D6 => SW420 Digital Output

ESPHome Configuration & Flashing
Sound Sensor KY-037
There is no ESPHome native support for the KY-037 sensor. However, measuring the analog output values and convert this into a meaningful value while also having the potentiometer to optimize gives an interesting calibration space.
Needing to start somewhere, I found this ESPhome community thread. The configuration snippet contained in this source basically inserts a custom C routine that reads the analog values and converts them to a decibel number. I tried this configuration as-is (with minor adjustments to the names).
# Source: HomeAssistant, ESPHome Decibel Meter - HW-484/KY-037/KY-038, https://community.home-assistant.io/t/esphome-decibel-meter-hw-484-ky-037-ky-038/487071
globals:
  - id: esphome_sensitivity
    type: float
    initial_value: '36.5'
    restore_value: yes
  - id: esphome_volume
    type: int

sensor:
  - platform: adc
    pin: A0
    id: ky037_sound
    device_class: signal_strength
    icon: "mdi:volume-vibrate"
    unit_of_measurement: "db"
    update_interval: 2s
    raw: true
    filters:
      - lambda: |-
          unsigned int sample;
          unsigned long startMillis= millis();
          float peakToPeak = 0;
          unsigned int signalMax = 0;
          unsigned int signalMin = 1024;
          while (millis() - startMillis < 500) {
            sample = analogRead(A0);
            if (sample < 1024){
                if (sample > signalMax){
                    signalMax = sample;
                }
                else if (sample < signalMin){
                    signalMin = sample;
                }
              }
          }
          peakToPeak = map((signalMax - signalMin),1,1024,1.5,1024);
          id(esphome_volume) = peakToPeak;
          float state = id(esphome_sensitivity)*log10(peakToPeak)+15;
          return(state);

  - platform: template
    name: "Volume SoundEsp"
    icon: "mdi:volume-high"
    unit_of_measurement: "%"
    update_interval: 2s
    lambda: return(map((id(ky037_sound).state),15,150,0,100));

  - platform: template
    name: "RAW SoundEsp"
    icon: "mdi:volume-source"
    unit_of_measurement: "%"
    update_interval: 2s
    lambda: return(map(id(esphome_volume),1,1024,0,100));

number:
  - platform: template
    id: sensitivity_slider
    name: "Sensitivity SoundEsp"
    icon: "mdi:knob"
    update_interval: 2s
    initial_value: "36.5"
    step: 0.1
    min_value: 20
    max_value: 40
    mode: slider
    set_action:
      then:
        - lambda:  id(esphome_sensitivity) = x;
Thats a lot of code - here are its detailed meaning:
- In the
globalssection, variables are defined that will be used in the sketch - The sensor with the
id: ky037_soundis configured as platformadc, hence it will output a continuous value. Therefore, the sensors unit and update interval should be defined. To transform the output value into something meaningful, afilterfunction is defined. This C source code snippet is inserted by ESPHome into the compiled code to change the measured output signal. It performs a series of measurements in milliseconds, records the peak value, and then returns an average value. - The next two sensors with type
platform: templatedefine virtual sensors that will be shown in Home Assistant. Themapfunction is used to scale the values. - Finally, the
numbersection defines again aplatform: templatevirtual sensor that is made available in Home Assistant to change the sensitivity of the sensors volume. Thelambdafunction will be called to change the afore definedglobalsvalue - a very clever trick!
Vibration Sensor SW420
The SW420 vibration sensor is a lot simpler - it’s just a digital signal which needs to be measured. The following snippet measures the state of the SW420 output:
binary_sensor:
  - platform: gpio
    id: "sw420_vibration"
    pin:
      number: D6
      mode: INPUT
    device_class: vibration
    filters:
     - delayed_off: 5s
The delayed_off value is used to prevent a permanently flipping state. Once a vibration is registered, it will stay on until the time when no more vibrations are measured, and additional 5 seconds have passed.
Flashing
With all configuration values properly defined, we can flash the sensors. My tool of choice is the esphome-flasher, although I was sad to discover that its development is discontinued.
Using '/dev/cu.usbserial-1420' as serial port.
Connecting....Serial port closed!
.
Detecting chip type... ESP8266
Connecting....

Chip Info:
 - Chip Family: ESP8266
 - Chip Model: ESP8266EX
 - Chip ID: 00112279
 - MAC Address: 44:17:93:11:22:79
Uploading stub...
Running stub...
Stub running...
Changing baud rate to 460800
Changed.
 - Flash Size: 4MB
 - Flash Mode: dout
 - Flash Frequency: 40MHz
Erasing flash (this may take a while)...
Chip erase completed successfully in 1.7s
Flash params set to 0x0340
Compressed 430512 bytes to 295216...
Writing at 0x00048000... (100 %)Wrote 430512 bytes (295216 compressed) at 0x00000000 in 7.8 seconds (effective 443.1 kbit/s)...
Hash of data verified.

Leaving...
Hard Resetting...
Done! Flashing is complete!
The flashing worked flawlessly, and soon the first log messages appeared.
[20:37:20][V][adc:131]: 'ky037_sound': Got voltage=67.0000V
[20:37:20][V][sensor:076]: 'ky037_sound': Received new state 67.000000
...
[20:44:13][D][binary_sensor:036]: 'sw420_vibration': Sending state ON
[20:44:18][D][binary_sensor:036]: 'sw420_vibration': Sending state OFF
Now the sensors need to be calibrated.
Sound Sensor calibration
The sound sensor shows the following log message:
[18:29:20][V][sensor:076]: 'esp03_sound': Received new state 67.000000
[18:29:20][D][sensor:127]: 'esp03_sound': Sending state 36.97519 db with 2 decimals of accuracy
[18:29:20][V][component:200]: Component adc.sensor took a long time for an operation (0.50 s).
[18:29:20][V][component:201]: Components should block for at most 20-30ms.
This message is emitted by default since ESPHome 2023.7. This is just a recommendation; the sensor will still work. Moreover, when I tried to get rid of this message by changing the sampling size down to 0.2s, the esp8266 chip was too busy to even establish a connection to my network anymore!
All outputs of the sensor start with a default offset of 15db - just as indicated in the code state = id(esphome_sensitivity)*log10(peakToPeak)+15. According to the sound pressure table, 15db is an ambient volume for a calm room. Tapping with a finger increased the value to 36db, and playing a sound from my phone directly to the microphone resulted in 55db - these values are fine.
Vibration Sensor Calibration
This sensor’s sensitivity is controllable with its potentiometer. I could not find a suitable technical documentation explaining how it influences the measurements, so I tried its settings and reaction manually. My goals was to detect a foot stomp in about 2 meter distance. After several experiments, I found the position of “3 o’clock” with the comparator facing downwards the best sensitivity. The ESPHome configuration did not need to be changed.
Home Assistant Integration
For the KY037 sound sensor, the ESPHome config already included necessary settings for an easy Home Assistant integration. The template definitions are converted to concrete values, complete with an icon and unit of measurements. And as a bonus, the sensitivity of the measurement can be controlled via a slider too.
For the SW420 sensor, there is also nothing to do. All available home assistant device classes are documented on the page Binary Sensor. The device class vibration provides an adequate visualization as a mere state history.
Error Handling: Unavailable Sensor
Recording the state for 1 day, I noticed an unusual pattern: The sensor regularly reports as being not available. Even after re-checking the wiring and re-flashing the sensor, this pattern remained.

During another project, I encountered a similar error too which was being solved by using another D1 mini board. However, even after changing the board, the behavior stayed the same.
My next idea was to tweak the C code for the vibration sensor. Making readings every millisecond could stress the esp8266 too much so that it became unresponsive. So, reading the ESPhome community thread again, one person reported a similar issue that the board could not connect to Wi-Fi, and suggested to change the sampling rate. Therefore, I tweaked the code as follows:
- Inline C: Change the measurement interval to 750ms
sensor:
  - platform: adc
    id: esp01_sound
    # ...
    filters:
      - lambda: |-
          #...
          while (millis() - startMillis < 700) {
            sample = analogRead(A0);
          #...
- State Update: Change the update rate to 20s
- platform: template
    name: "Volume ESP01 Sound"
    icon: "mdi:volume-high"
    unit_of_measurement: "db"
    update_interval: 20s
    lambda: return(map((id(esp01_sound).state),15,150,0,100));
On the next day, I could see the sensor readings history to be complete:

Conclusion
This article included all necessary steps and code snippets to integrate a sound detection and vibration detection sensor with Home Assistant. Specifically, you learned that the KY-037 sound sensor outputs an analogue signal that is read and transformed with a custom lambda function to provide a frequent decibel measurement. Even better, the algorithmic sensitivity is controllable through Home Assistant thanks to some clever coding contained in this ESPhome community thread. The SW420 sensor outputs a digital sensor that is straightforward to add as a binary sensor. Combining the delayed_off properly and several test runs with different values of the sensors potentiometer, a fine-grained detection of vibration is possible.