In my IOT enabled home, I have several sensors that continuously provide environmental data such as the temperature, humidity, or air quality. In addition, I have experimented with movement sensors and light automation with the goal of activating light during the night when motion is detected. Another idea that sparked my curiosity is motion detection with a video camera or webcam. One camera that I used for permeant video streaming is the ESP32 Camera board: Very compact, very minimal, very low FPWS, and also very simply integrated with ESP Home. However, there is no motion detection feature available.
Can we forward the video stream of the camera to Home Assistant, and use a library or module for motion detection? Or can we perform motion detection with the video processing software and somehow generate motion events and forward them to Home Assistant? This article is the first step. You will learn how to setup an external webcam connected to a Raspberry Pi zero, and which software library can be used for generic video streaming and motion detection.
The technical context of this article is Raspberry Pi Zero with Raspberry Pi OS 2024-11-19, Home Assistant v2024.10.4 and ESPHome v2024.10.3, but it should work with newer versions as well.
Hardware Overview
The Raspberry Pi Zero is a small footprint board that runs a complete Linux operating system. It has these capabilities:
- Single Core CPU 1Gh ARMv6
- 512MB RAM
- 40 Pins
- Mini HDMI port
- Mini USB2.0 Port
- 2.4Ghz Wi-Fi Support (802.11n)
- CSI camera connector
For the camera, I decided to use an external USB2.0 web camera, generic brand that supports a resolution of 1920*1080 with 30FPS. This camera is connected with an USB-B to Micro-USB adapter. Together with a custom case it all looks like this:

Installing the Basic Operating System
The basic operating system of my choice is the default Raspberry Pi OS version 2024-11-19, based on Debian. I won’t detail the installation, check out the excellent guide from the Raspberry Pi foundation. Once complete, I updated the system packages, changed the password, and enabled SSH. Will the webcam work out of the box, or do I need to install additional software?
Connecting the Webcam
On all Linux system, the invaluable CLI tool dmesg shows how connected hardware is recognized and which Kernel modules are activated. Connecting the external USB webcam shows theses messages:
[  599.766370] usb 1-1.3: new high-speed USB device number 4 using dwc_otg
[  599.897563] usb 1-1.3: config 1 interface 0 altsetting 0 endpoint 0x83 has an invalid bInterval 32, changing to 9
[  599.898634] usb 1-1.3: New USB device found, idVendor=1b3f, idProduct=2247, bcdDevice= 1.00
[  599.898671] usb 1-1.3: New USB device strings: Mfr=1, Product=2, SerialNumber=5
[  599.898694] usb 1-1.3: Product: GENERAL WEBCAM
[  599.898716] usb 1-1.3: Manufacturer: GENERAL
[  599.898738] usb 1-1.3: SerialNumber: JH0319_20200710_v012
[  600.760113] uvcvideo: Found UVC 1.00 device GENERAL WEBCAM (1b3f:2247)
[  600.773569] uvcvideo: Failed to query (GET_INFO) UVC control 2 on unit 1: -32 (exp. 1).
[  600.780478] uvcvideo: UVC non compliance - GET_DEF(PROBE) not supported. Enabling workaround.
[  600.798310] input: GENERAL WEBCAM: GENERAL WEBCAM as /devices/platform/soc/20980000.usb/usb1/1-1/1-1.3/1-1.3:1.0/input/input3
[  600.818822] usbcore: registered new interface driver uvcvideo
[  600.818849] USB Video Class driver (1.1.1)
[  600.891988] usb 1-1.3: Warning! Unlikely big volume range (=5120), cval->res is probably wrong.
[  600.892027] usb 1-1.3: [5] FU [Mic Capture Volume] ch = 1, val = 7680/12800/1
These messages indicate the following:
- The Camera is connected to the Raspberry Pi internal USB Hub with ID 1
- The connection speed is USB2.0 (“high-speed USB device”)
- It details the camera name and serial number
- The
uvcvideokernel module is loaded, an acronym for USB Video Class, and a corresponding device file is created - The camera’s integrated microphone is registered as well (but I will not use it)
Determining Hardware Capabilities
In order to get the camera working, we need to get more information about its hardware capabilities and the Linux device files that are created to access the camera.
For both questions, we can use the tool v4l2-ctl. Install it as follows:
apt update
apt install v4l-utils
Now we can check the detailed characteristics of the connected camera by using the tool.
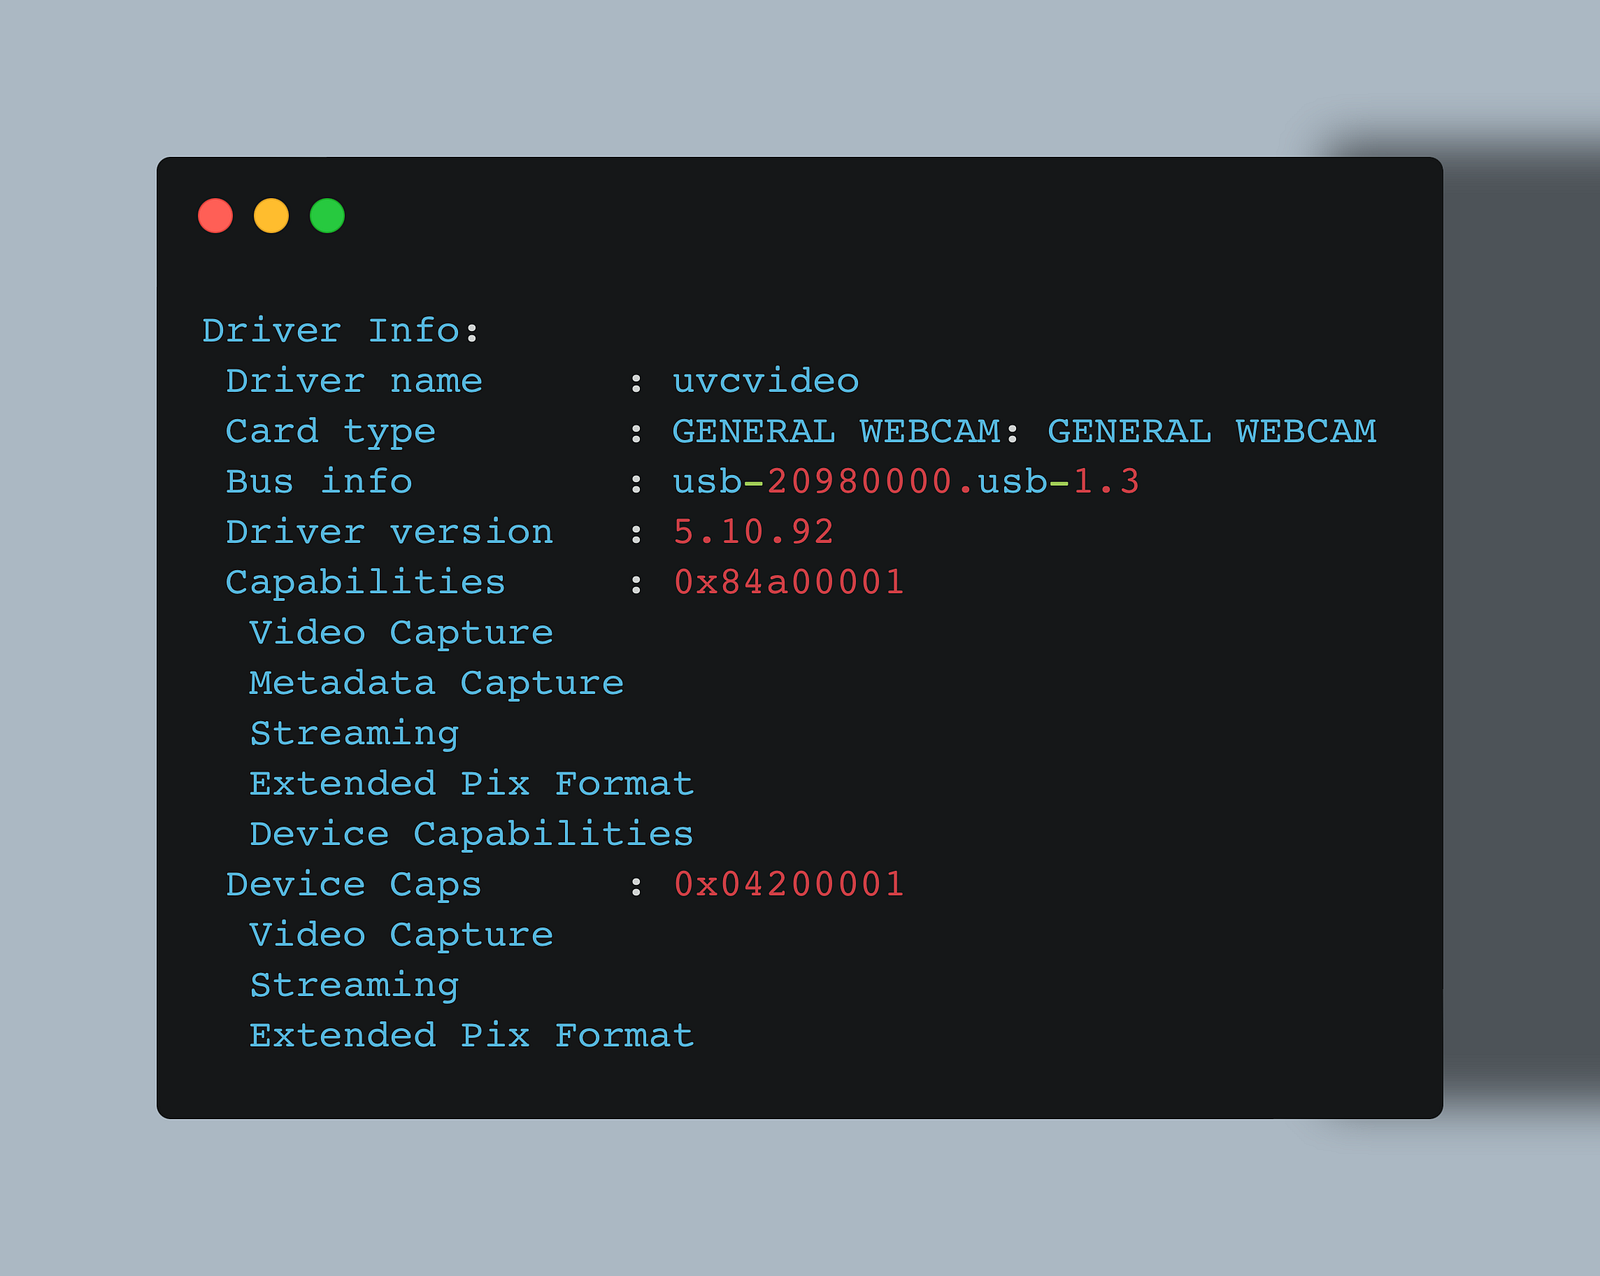
> v4l2-ctl --all

Driver Info:
 Driver name      : uvcvideo
 Card type        : GENERAL WEBCAM: GENERAL WEBCAM
 Bus info         : usb-20980000.usb-1.3
 Driver version   : 5.10.92
 Capabilities     : 0x84a00001
  Video Capture
  Metadata Capture
  Streaming
  Extended Pix Format
  Device Capabilities
 Device Caps      : 0x04200001
  Video Capture
  Streaming
  Extended Pix Format
Media Driver Info:
 Driver name      : uvcvideo
 Model            : GENERAL WEBCAM: GENERAL WEBCAM
 Serial           : JH0319_20200710_v012
 Bus info         : usb-20980000.usb-1.3
 Media version    : 5.10.92
 Hardware revision: 0x00000100 (256)
 Driver version   : 5.10.92
Interface Info:
 ID               : 0x03000002
 Type             : V4L Video
Entity Info:
 ID               : 0x00000001 (1)
 Name             : GENERAL WEBCAM: GENERAL WEBCAM
 Function         : V4L2 I/O
 Flags         : default
 Pad 0x01000007   : 0: Sink
   Link 0x02000013: from remote pad 0x100000a of entity 'Extension 7': Data, Enabled, Immutable
Priority: 2
Video input : 0 (Camera 1: ok)
Format Video Capture:
 Width/Height      : 1920/1080
 Pixel Format      : 'MJPG' (Motion-JPEG)
 Field             : None
 Bytes per Line    : 0
 Size Image        : 1843200
 Colorspace        : sRGB
 Transfer Function : Rec. 709
 YCbCr/HSV Encoding: ITU-R 601
 Quantization      : Default (maps to Full Range)
 Flags             :
Crop Capability Video Capture:
 Bounds      : Left 0, Top 0, Width 1920, Height 1080
 Default     : Left 0, Top 0, Width 1920, Height 1080
 Pixel Aspect: 1/1
Selection Video Capture: crop_default, Left 0, Top 0, Width 1920, Height 1080, Flags:
Selection Video Capture: crop_bounds, Left 0, Top 0, Width 1920, Height 1080, Flags:
Streaming Parameters Video Capture:
 Capabilities     : timeperframe
 Frames per second: 30.000 (30/1)
 Read buffers     : 0
                     brightness 0x00980900 (int)    : min=1 max=255 step=1 default=16 value=16
                       contrast 0x00980901 (int)    : min=1 max=255 step=1 default=16 value=16
                            hue 0x00980903 (int)    : min=-128 max=127 step=1 default=16 value=16
There are lots of details! Relevant are the following: The reported width/hight = 1920/1080 and Frames per second: 30.000 (30/1) confirm the hardware specs, and MJPG streaming is supported. Now let’s see how to use this information for the camera customization.
But with which device files can the camera stream be accessed?
> v4l2-ctl --list-devices
bcm2835-codec-decode (platform:bcm2835-codec):
 /dev/video10
 /dev/video11
 /dev/video12
 /dev/video18
 /dev/media2

bcm2835-isp (platform:bcm2835-isp):
 /dev/video13
 /dev/video14
 /dev/video15
 /dev/video16
 /dev/video20
 /dev/video21
 /dev/video22
 /dev/video23
 /dev/media0
 /dev/media1

GENERAL WEBCAM: GENERAL WEBCAM (usb-20980000.usb-1.3):
 /dev/video0
 /dev/video1
 /dev/media3
Seeing the last text block, the camera provides two video streams /dev/video0 and /dev/video1, as well as a stream for the microphone /dev/media3.
Access the Camera Stream
Now, with which library or tool can we actually see the video stream? We cannot use the built-in tool raspistill because it only works with cameras connected via the CSI port.
Instead, we will install ffmpeg.
apt install ffmpeg
Then, for each of the reported video streams, use the following command to produce a JPEG image from the camera:
ffmpeg -f v4l2 -video_size 1280x720 -i /dev/video0 -frames 1 out.jpg
Once you figured out which device file is the actual camera, we are ready to setup streaming.
Video Recording and Video Streaming Software
The Raspberry PI OS is a Debian distribution. Therefore, a huge selection of video software is available. For the goal of this article, the general idea is to start video recording on the Raspberry Pi, convert this video stream into a web-compatible streaming format, and then connect Home Assistant to this stream.
Before trying a concrete library or software, I researched what other hobbyists tried, and found the following articles:
- In Raspberry Pi Camera With Home Assistant (2018)), the author uses the official Raspberry Pi camera connected to the CSI ports. To access the camera, he uses the
4l2-ctlLinux utility with a very camera specific configuration. This video stream is then used by another Linux program,gst-launch-1.0, to start the HTTP camera streaming. - How to work with a generic USE webcam is explained in Instructables OMIV IP Camera (2015): The video stream is accessed with the Raspberry PI OS specific program
raspistill, and HTTP streaming withmjpg-streamer. - Finally, both articles How to make a Raspberry Pi Webcam Server (2020) and Raspberry Pi Security Camera (20217) use the
motionpackage that combines access to the video device, provides a live video stream, and also th option to detect the name-giving motions.
Based on this, I first tried the 4l2-ctl library but could not get any video stream from the camera - configuring camera settings requires specific knowledge. But then I tried the motion package and could get access to the camera stream via HTTP in mere minutes.
Camera Configuration with Motion
The motion package makes generate a HTTP stream of the camera video very simple. Install it with this command:
sudo apt install motion
To get the best results, you need to define camera settings and overall behavior of motion in the configuration file /etc/motion/motion.conf. While I was lacking knowledge beforehand, the complete and understandable official motion documentation helped me a lot, especially the part about video codecs and video params.
The final configuration for my camera includes the proper video settings, enables streaming, and includes the option to record a short video when motion is detected. The relevant parts of the configuration are shown in the following section:
# Level of log messages [1..9] (EMG, ALR, CRT, ERR, WRN, NTC, INF, DBG, ALL).
log_level 7

# Target directory for pictures, snapshots and movies
target_dir /home/pi/camera

# Video device (e.g. /dev/video0) to be used for capturing.
videodevice /dev/video0

# Image width in pixels.
width 1280

# Image height in pixels.
height 720

# Maximum number of frames to be captured per second.
framerate 30

# Output pictures when motion is detected
picture_output best

# File name(without extension) for pictures relative to target directory
picture_filename %Y%m%d%H%M%S-%q

# Create movies of motion events.
movie_output on

# Maximum length of movie in seconds.
movie_max_time 60

# The encoding quality of the movie. (0=use bitrate. 1=worst quality, 100=best)
movie_quality 45

# Container/Codec to used for the movie. See motion_guide.html
movie_codec mp4

# File name(without extension) for movies relative to target directory
movie_filename %Y%m%d%H%M%S-%v

# Type of video, 8=mjpg or 15=YUYV
v4l2_palette=8

# Restrict stream connections to the localhost.
stream_localhost off
stream_maxrate 30
stream_motion on
With this configuration, run the command sudo systemctl motion start, then check that no errors are reported by following the systemd unit log file journalctl -u motion.service. Finally, from your local network, visit the Raspberry Pi Zero on the configured motion port, e.g. http://rasperry-zero.local:8080 and you will see the live video stream.
Bonus: Integrate Camera Stream in Home Assistant
The camera provides an HTTP video stream. This stream can be used by Home Assistant and embedded as a live dashboard card.
In your Home Assistant configuration file, add the following information:
camera:
  - platform: mjpeg
    mjpeg_url: http://192.168.178.22/
    name: camera
Restart Home Assistant, then add a new dashboard card with his configuration:
show_state: true
show_name: true
camera_view: auto
type: picture-entity
hold_action:
  action: more-info
The new card shows the last image of the camera, and if you click on it, you can see a live video stream.
Conclusion
By combining a Raspberry Pi with an external web camera, you can create you’re a simple live video streaming system that also saves movies when motion is detected. This article showed you all the necessary steps. First, check that the camera is correctly recognized by following the kernel messages with dmesg. Second, see the details of your camera, its capabilities and device files with v4l2-ctl. Third, how to use the motion library to get access to the camera and create a HTTP stream so that you can see the camera recordings within your local network. With all this setup done, the final step is to integrate it into Home Assistant.