
Home Assistant is an open-source software providing a complete toolset for home automation. It offers by far the biggest interoperability with all kinds of boards, sensors, and external services. Getting started with Home Assistant can be tough because it offers so many features. Yet understanding them does not only make it easier for you to get started, but will also span several ideas about which powerful automations can be achieved with this amazing system.
This article is a complete introduction to the home assistant system. You will learn the core terminology and the essential concepts of devices, entities, integrations and automations. In a top-down fashion, this article explores the structure of the home assistant UI and goes right from dashboard to device configuration. With this knowledge, you should be able to follow any other tutorial and be more effective when integrating your own sensors.
The technical context of this article is Home Assistant 2022.11 and ESPHome 2022.11.3, but it should work with newer versions as well.
Home Assistant Dashboard: First Glance
When you start Home Assistant for the very first time, after logging in, you will see something similar to this:
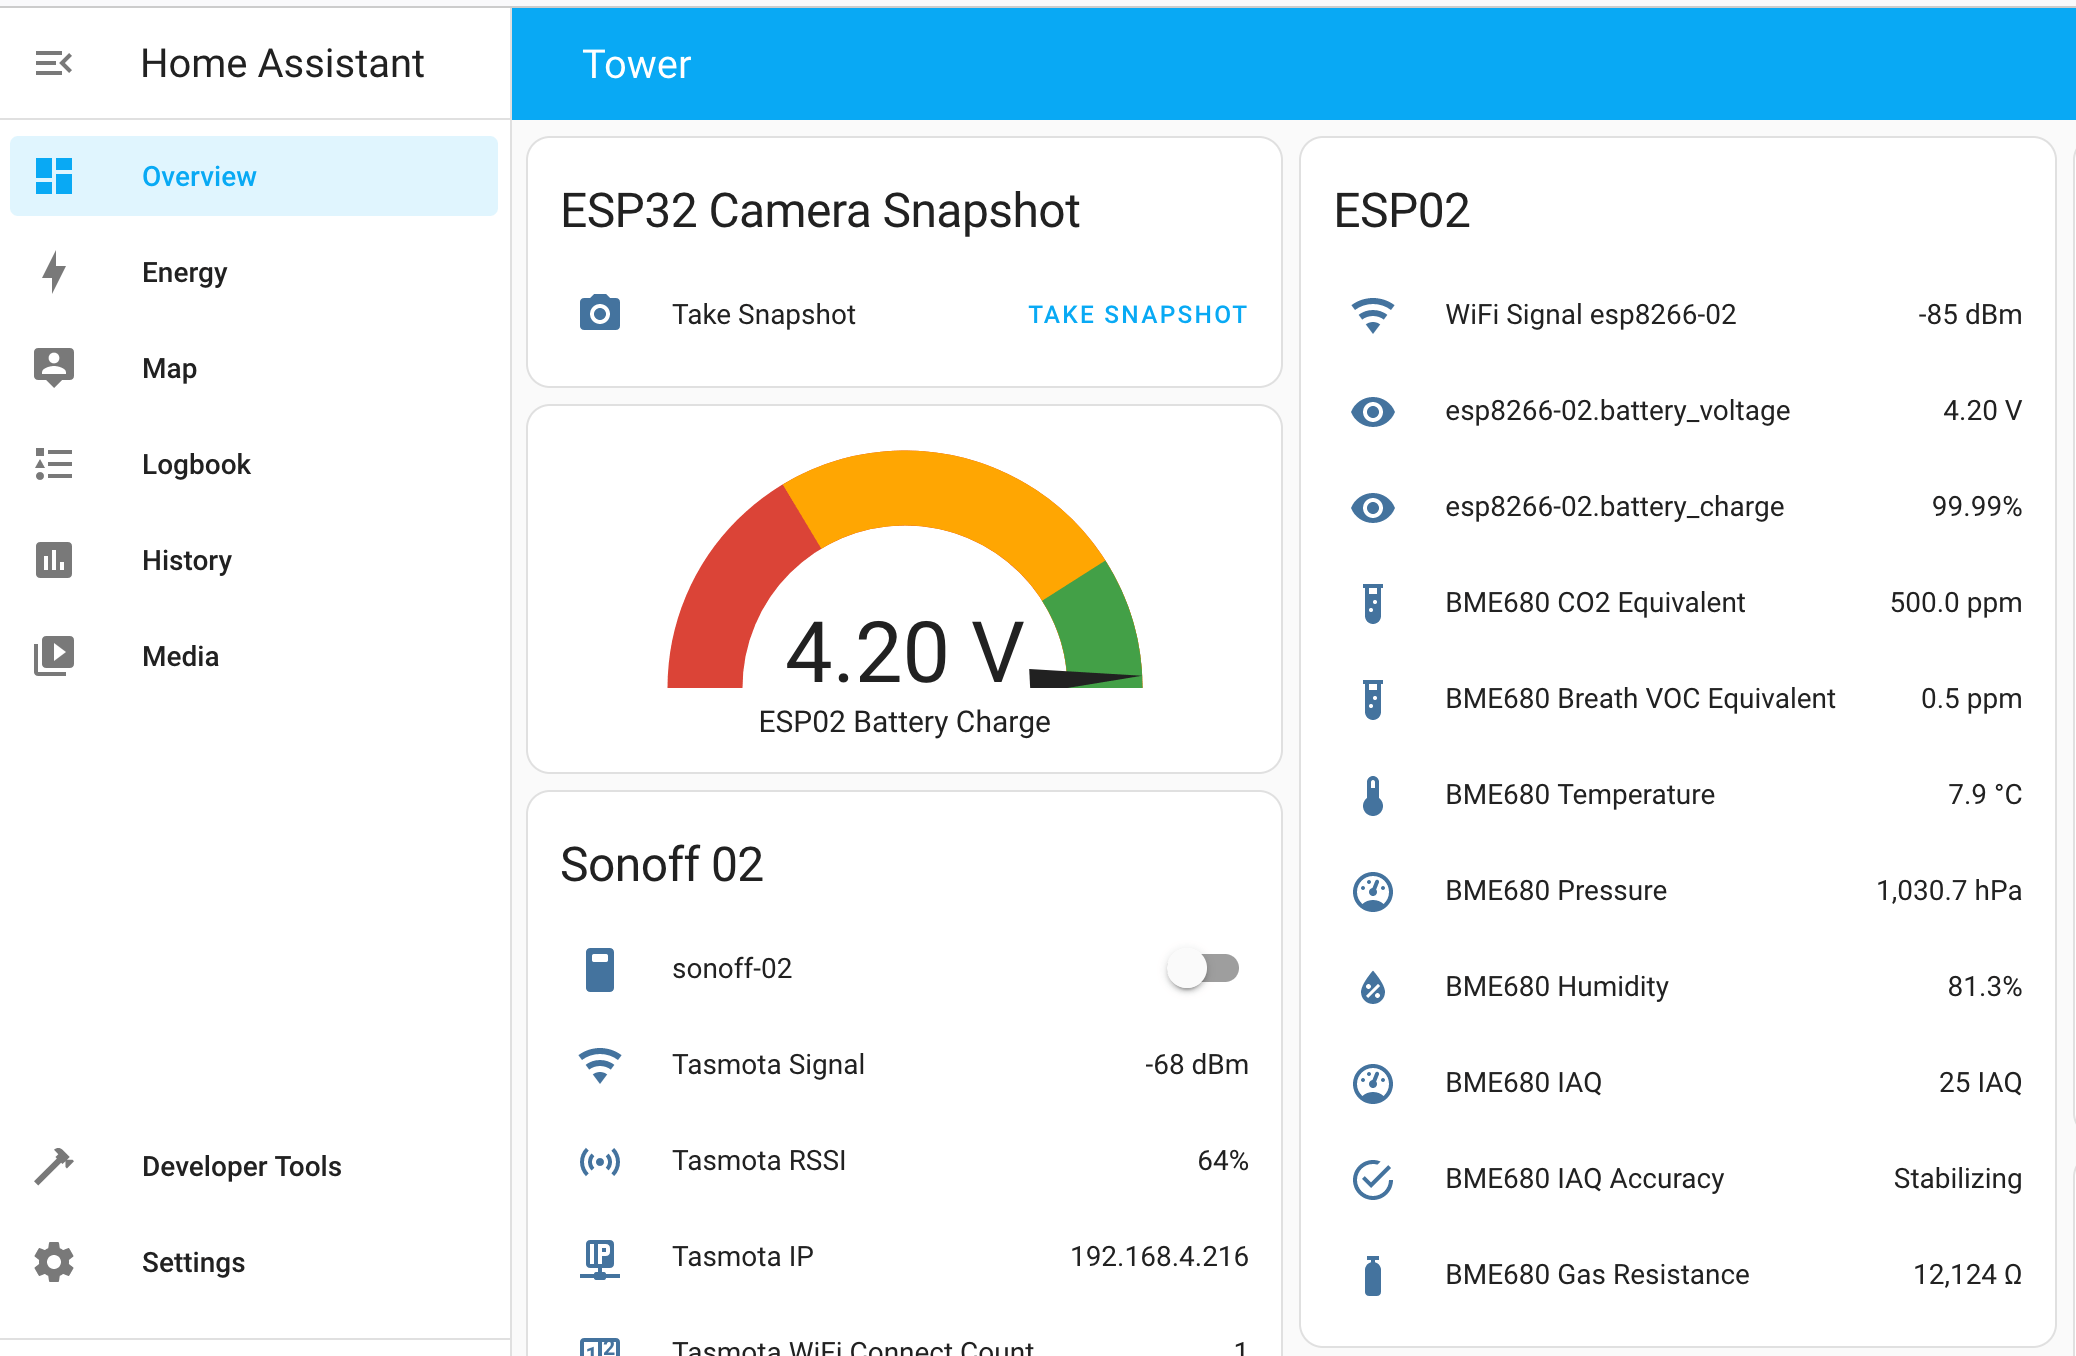
This view is the dashboard. It shows several widgets that represent configured and integrated devices. Widgets also allow you to read or set the state of the devices.
On the left-hand side, we see a long menu with several entries. However, this sections’ functionality will make a better sense once you understand the core concepts of Home Assistant. And to get this, we will head straight to the Configuration section
Home Assistant Entities
In the Configuration screen, you will see a long list of all Home Assistant entities.
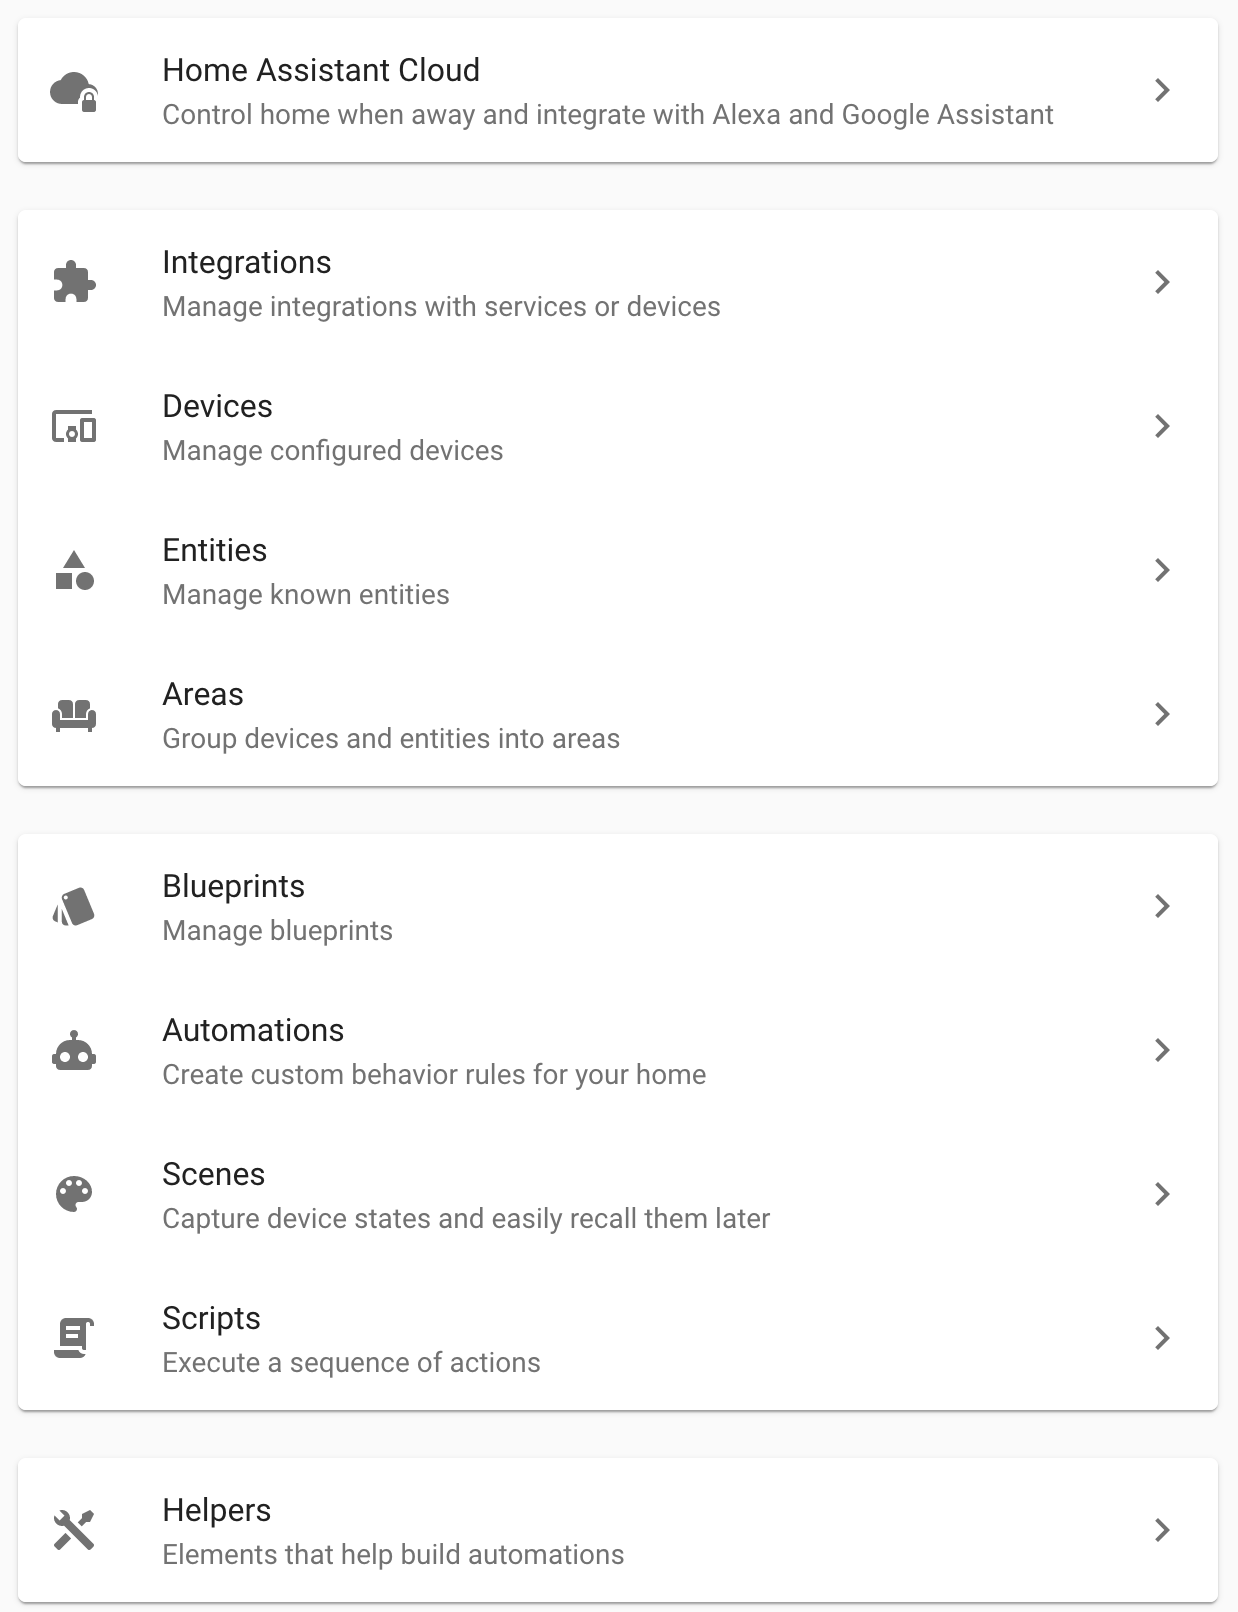
This view groups related items together. For discussing them in groups, the sections are divided into functional or logical connected entities.
Cloud Services
This section enables access to a cloud service that connects your Home Assistant instance and makes it available from anywhere in the world. By signing in, you will create a Home Assistant account on a sperate web application. Then, your local installation will connect to this cloud service. In addition, you can also add Amazon Alexa and Google Assistant to control your Home Assistant installation.
Device Configuration
This section comprises the essential Home Assistant concepts.
- Integrations: An integration is a device or service that offers an API with which Home Assistant can cooperate, such as
ESPHometo connect with ESP sensors, orHueto connect to light bulbs etc. - Devices: Concrete sensors, boards and other (micro-)computers that are connected via an integration
- Entities: The physical or electrical appliances and abstractions of an entity, such as the camera or temperatures sensor connected to an ESP board, or the cameras flashlight which is configurable as a light
- Areas: Logical separation and grouping of your sensors, enabling advanced customization and automation.
Automation Management
With devices and entities in place, this section helps you to create powerful behavioral connections between them. This is where a bunch of sensors become smart.
- Blueprints: Templates for simplifying automations, instead of manually editing an automation, a guided dialogue helps you with the setup. There is a handy list of all community-provided blueprints.
- Automations: An automation is essentially a script. It starts with a trigger, a state change of a device or a threshold value in a measurement reached, including optionally additional conditions. Then, an action is executed, such as accessing another device, sending data to a connected MQTT server and more.
- Scenes: A scene sets states for a number of grouped together devices. Picture this as a one-click, full configuration of devices such as “set all lights to bright-yellow and play some music”.
- Scripts: A script is a sequence of actions applied to the configured devices.
Action Helpers
Additional building blocks and triggers for your automations.
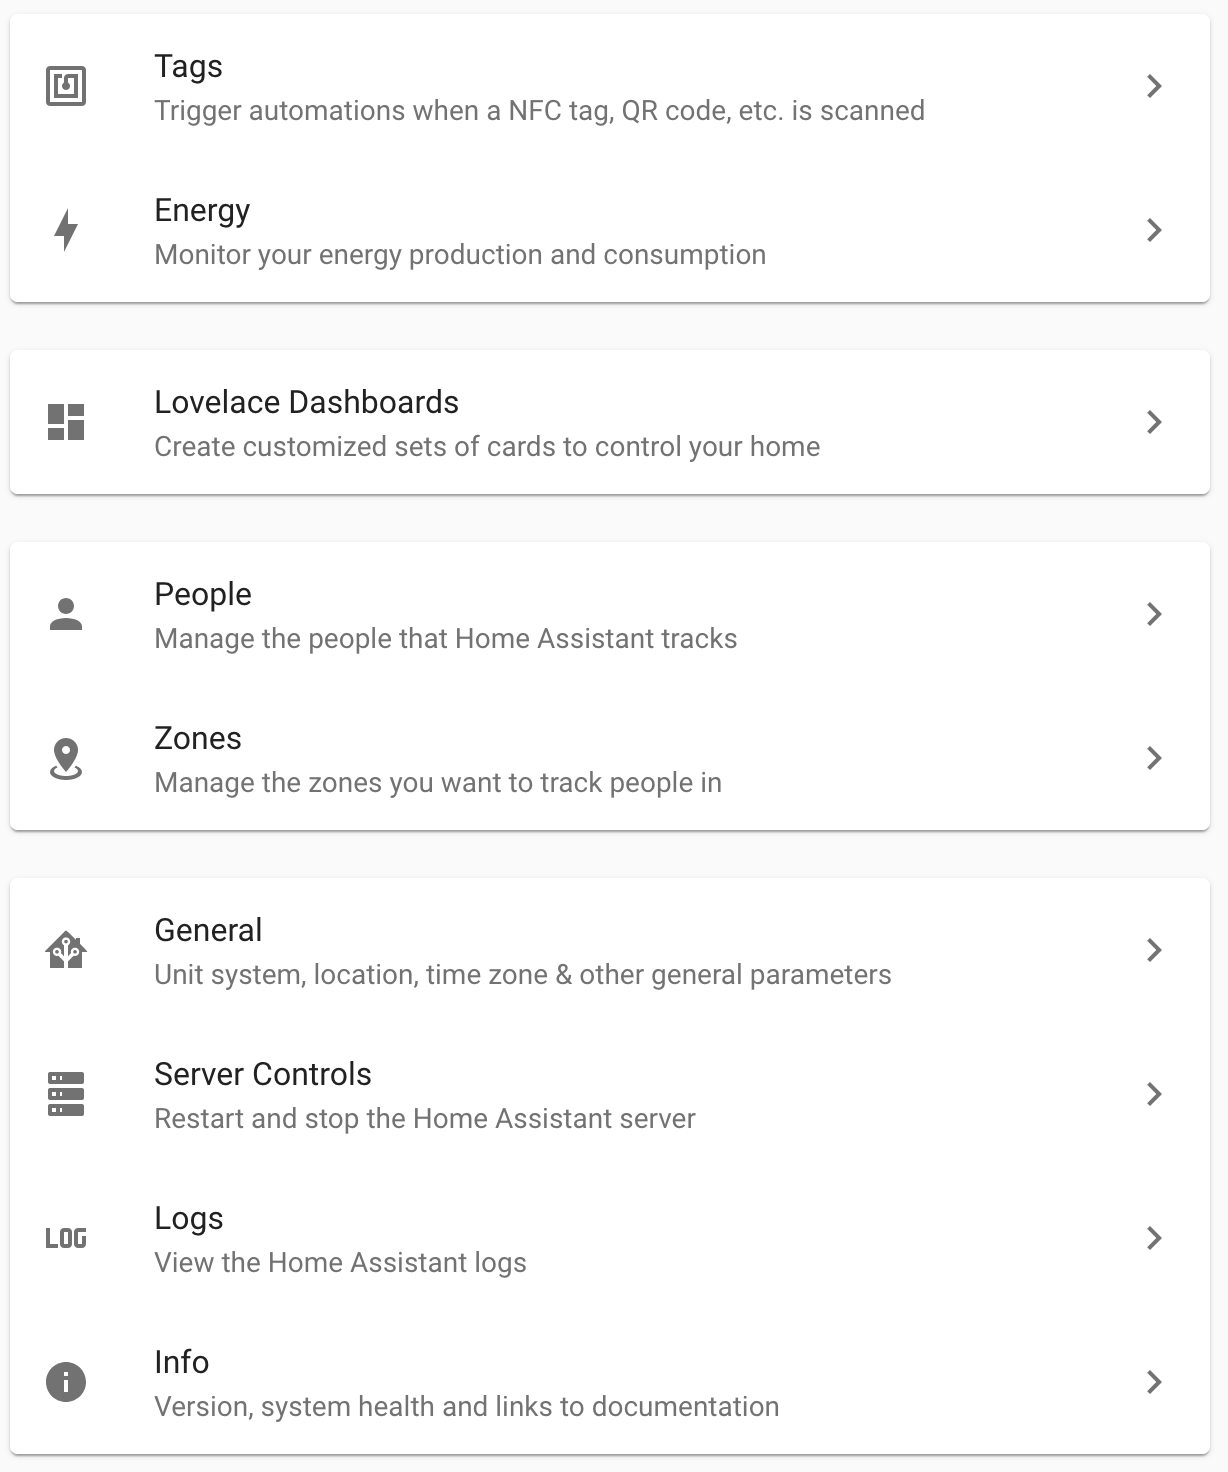
- Helpers: are UI elements that
somehowcan be access from your actions, they include toggles, text, number, date/time, dropdowns, counter or timer. - Tags: Associate NFC tags or QR codes with automations.
Energy Management
A separate section on its own. Given the correct sensor and devices, you can measure the overall power consumption of your home, access the production of energy from solar panels, read the status of batteries, and track the power consumption of individual devices as well.
Dashboards
With the Lovelace Dashboard section, you open a screen for adding and configuring additional dashboards. By grouping cards together, you can get a better and faster overview.
Building Configuration
All devices and automation are applied in general to your home. But, with two other entities, you can provide more flexible configurations as well.
- People: These are not users of the Home Assistant system, but identifies concrete persons that interact with your IOT home. Persons will have a stat of being presented or absent, and you can even provide concrete GPS coordinates to them.
- Zones: Areas in your home, which can be used to group devices and also provide spaces in which the presence of persons can be detected and acted upon.
Server Information
- General: Configure aspects such as the name and coordinates of your home, unit system and currency, and opting-into different types of analytics you want to provide.
- Server Controls: Restart the computer running your home assistant installation.
- Logs: See the logfile for Home Assistant.
- Info: Various data about your Home Assistant Installation, including its type, operating system, computer architecture and versions of several libraries.
Home Assistant Dashboard: Second Glance
Now that we have a complete understanding of Home Assistant entities, we go back to the main dashboard and check the other options
- Overview: Opens the main dashboard with all configured cards.
- Energy: A dedicated dashboard for integrations that measure consumed and produced energy of your house.
- Map: Open a map in which the configured entities, such as your home or persons, are shown.
- Logbook: The complete list of all events that happened within Home Assistant, such as sensors delivering data, user interactions and others.
- History: A graphical representation of the activities for all configured entities.
- Media Browser: Allows access to media devices that are directly connected to the computer running Home Assistant, such as CD/DVD drives and USB.
- Developer Tools: This section provides four different sections that help you with testing and debugging your Home Assistant software. You can manually set
statesandeventsor call aservice. And withtemplates, you can try Home Assistants` template language to build cards. - Configuration: Here you can control all entities of Home Assistant - this will be detailed in the next sections.
- Notifications: Shows any active, not accepted notification in your IOT stack.
- User: The final menu lets you see and configure the typical UI elements: language, time format, dashboard, theme. Also, security related aspects, like your user’s password, SSL certificates and tokens can be seen.
Conclusion
Home Assistant is powerful and helpful application. To start working with it, you need to understand the essential concepts: Devices, entities, integrations and automations. This article helped you to understand these aspects by looking into the Home Assistant dashboards many menu items. Its powerful configuration and customization option provide the tools for your individual home automation setup. Do you want to add temperature and humidity data and record it? Or do you want to define a behavior like set dim lights around 11pm? This, and much more, is possible with Home Assistant.