
Your IOT home network consist of different sensor that provide data about the environment related to different aspects, such as temperature and humidity in the air, the current level of your heater, or other binary data. And interesting and versatile extension are motion sensors. When properly calibrated, meaning that they do not send false positives, they can be helpful in many ways: Detect presence of persons (or animals!) to trigger other sensors, controlling the light, start to play music, or well raise an alert.
This article is a complete case study to add a motion sensor to your Home Assistant installation. You will learn about the correct wiring and calibration of the sensor, see how to configure the sensor as an ESPHome device and integrate it with Home Assistant, and finally how to create a simple automation that reads like “when movement is detected, turn on the lights.” The content of this article builds upon two great about setup and home assistant automation, plus my own experiments.
The technical context of this article is Raspberry Pi OS 2021-05-07, Home Assistant 2021.10 and ESPHome v2021.9.1. All instructions should work with newer OS and library versions as well.
Motion Sensor Hardware and Calibration
For home assistant usage, different types of motion sensors can be considered. The most often used type is Passive Infrared, also called PIR. This sensor emits infrared rays to create an image of the heat distribution in its environment. If the heat distribution changes, e.g. because you walk right through it, the sensor triggers a binary signal. The other type of sensor works with microwaves. It actively sends microwaves with a slight delay, and then measures the reflection to detect whether object moves. Another category that I will not further investigate are gyroscopes, precise sensors that detect motion (3DOF) and acceleration (6DOF) in three dimensions. However, this motion is detected when the sensor itself moves, not by detecting something that moves in its vicinity.
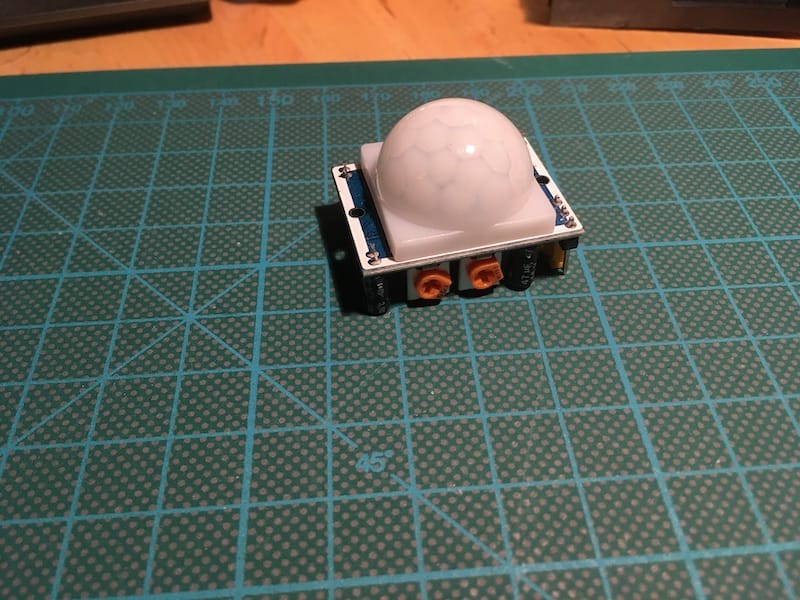
For this article, I choose a PIR sensor for simple and reliable indoor movement detection. The sensor comes as a small board with a white translucent globe and looks like this:
The sensor is configured as follows:
- Pins
- VIN: The PIR works with either 3.3V or 5V, I recommend using 5 volts
- GND: Connect to ground
- DATA: The data pin is binary, and therefore needs to be connected to any input digital pin of your board
- Potentiometers
- Time delay: determines how long the sensor sends an active high after detecting a movement, in its clockwise lowest settings, that’s about 1 second, and in the highest, about 4 minutes
- Movement sensitivity: Controls the measurement distance from about 1,5m - 6m
- Jumper
- Position H: In this position, the sensor will send an active high signal for the complete time delay setting, and in
- Position L: When movement is detected, the sensor will send an active high followed by active and remain low for the time delay
My recommendation is to start with this configuration:
- Measurement distance potentiometer to 1 o’clock (lowest distance of 1,5m)
- Movement duration to 3 o’clock (movements need to persist for 0,5-1 seconds)
- Set the jumper to H
Motion Sensor Working Wiring
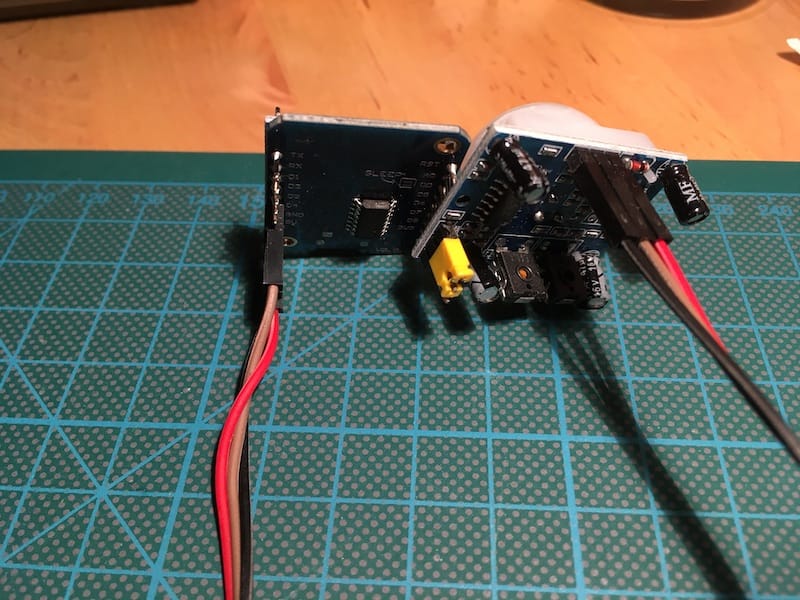
The first part is to correctly wire the motion sensor. A useful hint from the above mentioned articles is to remove the small plastic cap attached on top of the sensor - below you see which of the three pins is the data pin. Then, connect ground and power to an 5V pin. The data pin needs to be connected to any digital pin.
Here is the sensor connected to my D1 Mini board:
Adding to ESP Home
A PIR motion sensor sends logical high when its detecting movements. Therefore, there is no need for a specific sensor hardware, we just need to measure the current state of the output pin.
In ESPHome, a binary_sensor represents a sensor with two states: on and off. For detecting motion, use the following configuration and select the correct pin number:
binary_sensor:
  - platform: gpio
    pin: GPIO13
    name: "Living Room Motion"
    device_class: motion
This configuration is just a start - check the full documentation to learn about other options as well.
This installation process can be done either via a direct connection between the Raspberry Pi and the ESP32 Camera Board, or you can use the over-the-air feature - see my previous article.
Adding to Home Assistant
Adding the motion sensor to Home Assistant is also a pleasantly simple process. Assuming that the board you are using is already registered as a device, you will see a small notification about a new entity. From the start menu, go to “Configuration” => “Entities” to check that the motion sensor is correctly recognized. Otherwise, you need to add the new board firs as an ESPHome device via “Confutation” => “Integrations”, click on the button “Add Integration”, and enter the IP and board of your ESPHome board.
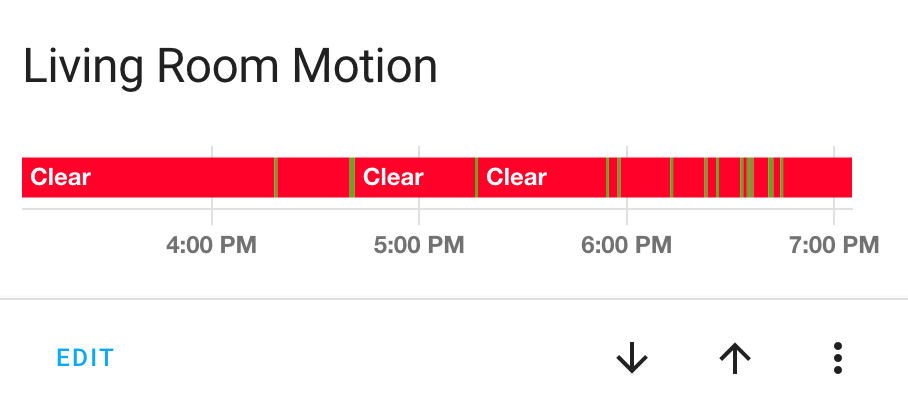
When the entity is correctly registered, we can add a new card to the graphical dashboard. In the main dashboard view, click on “Add Card” and select the entity. The new card will, at a first glance, seem not that helpful, because it shows only if a motion is being detected currently or not. But, if you click on it, you can see historic information about the sensor to check when movements were detected. It looks like this:
Ok, one more step to go.
Home Assistant Automation: Turn on Lights when Movement is Detected
An automation is a behavior that modifies a sensors state depended on the state of another sensor or overall condition. We will build an automation that uses the motion sensor as a trigger, and when it detects a movement, it will turn on the flashlight.
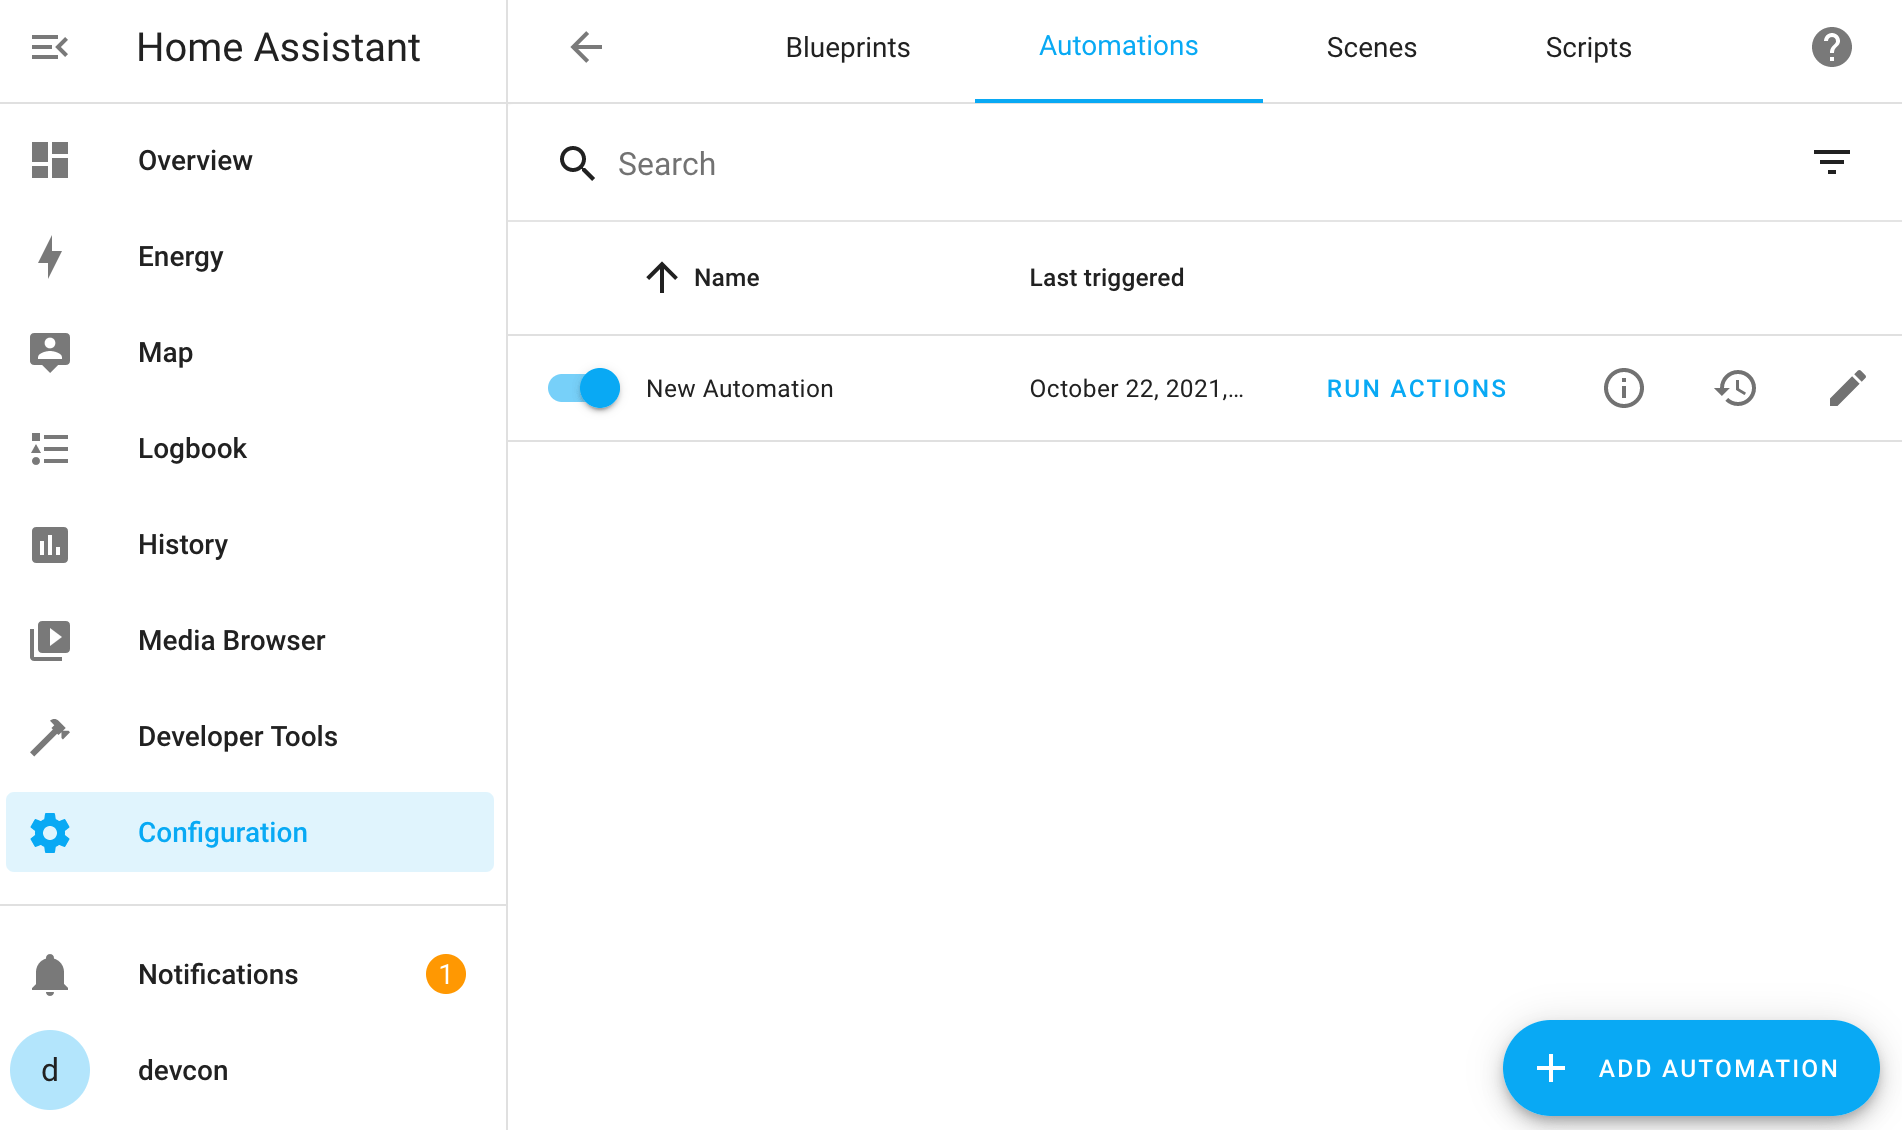
In the UI, go to “Configuration” => “Automations”, then click on the button “+ Add Automation”.
Here, you can select the blueprint “Turn on the lights”. This dialog will present you with the required choices: First, the sensor that serves as the trigger, Second, the light that you want to turn on.
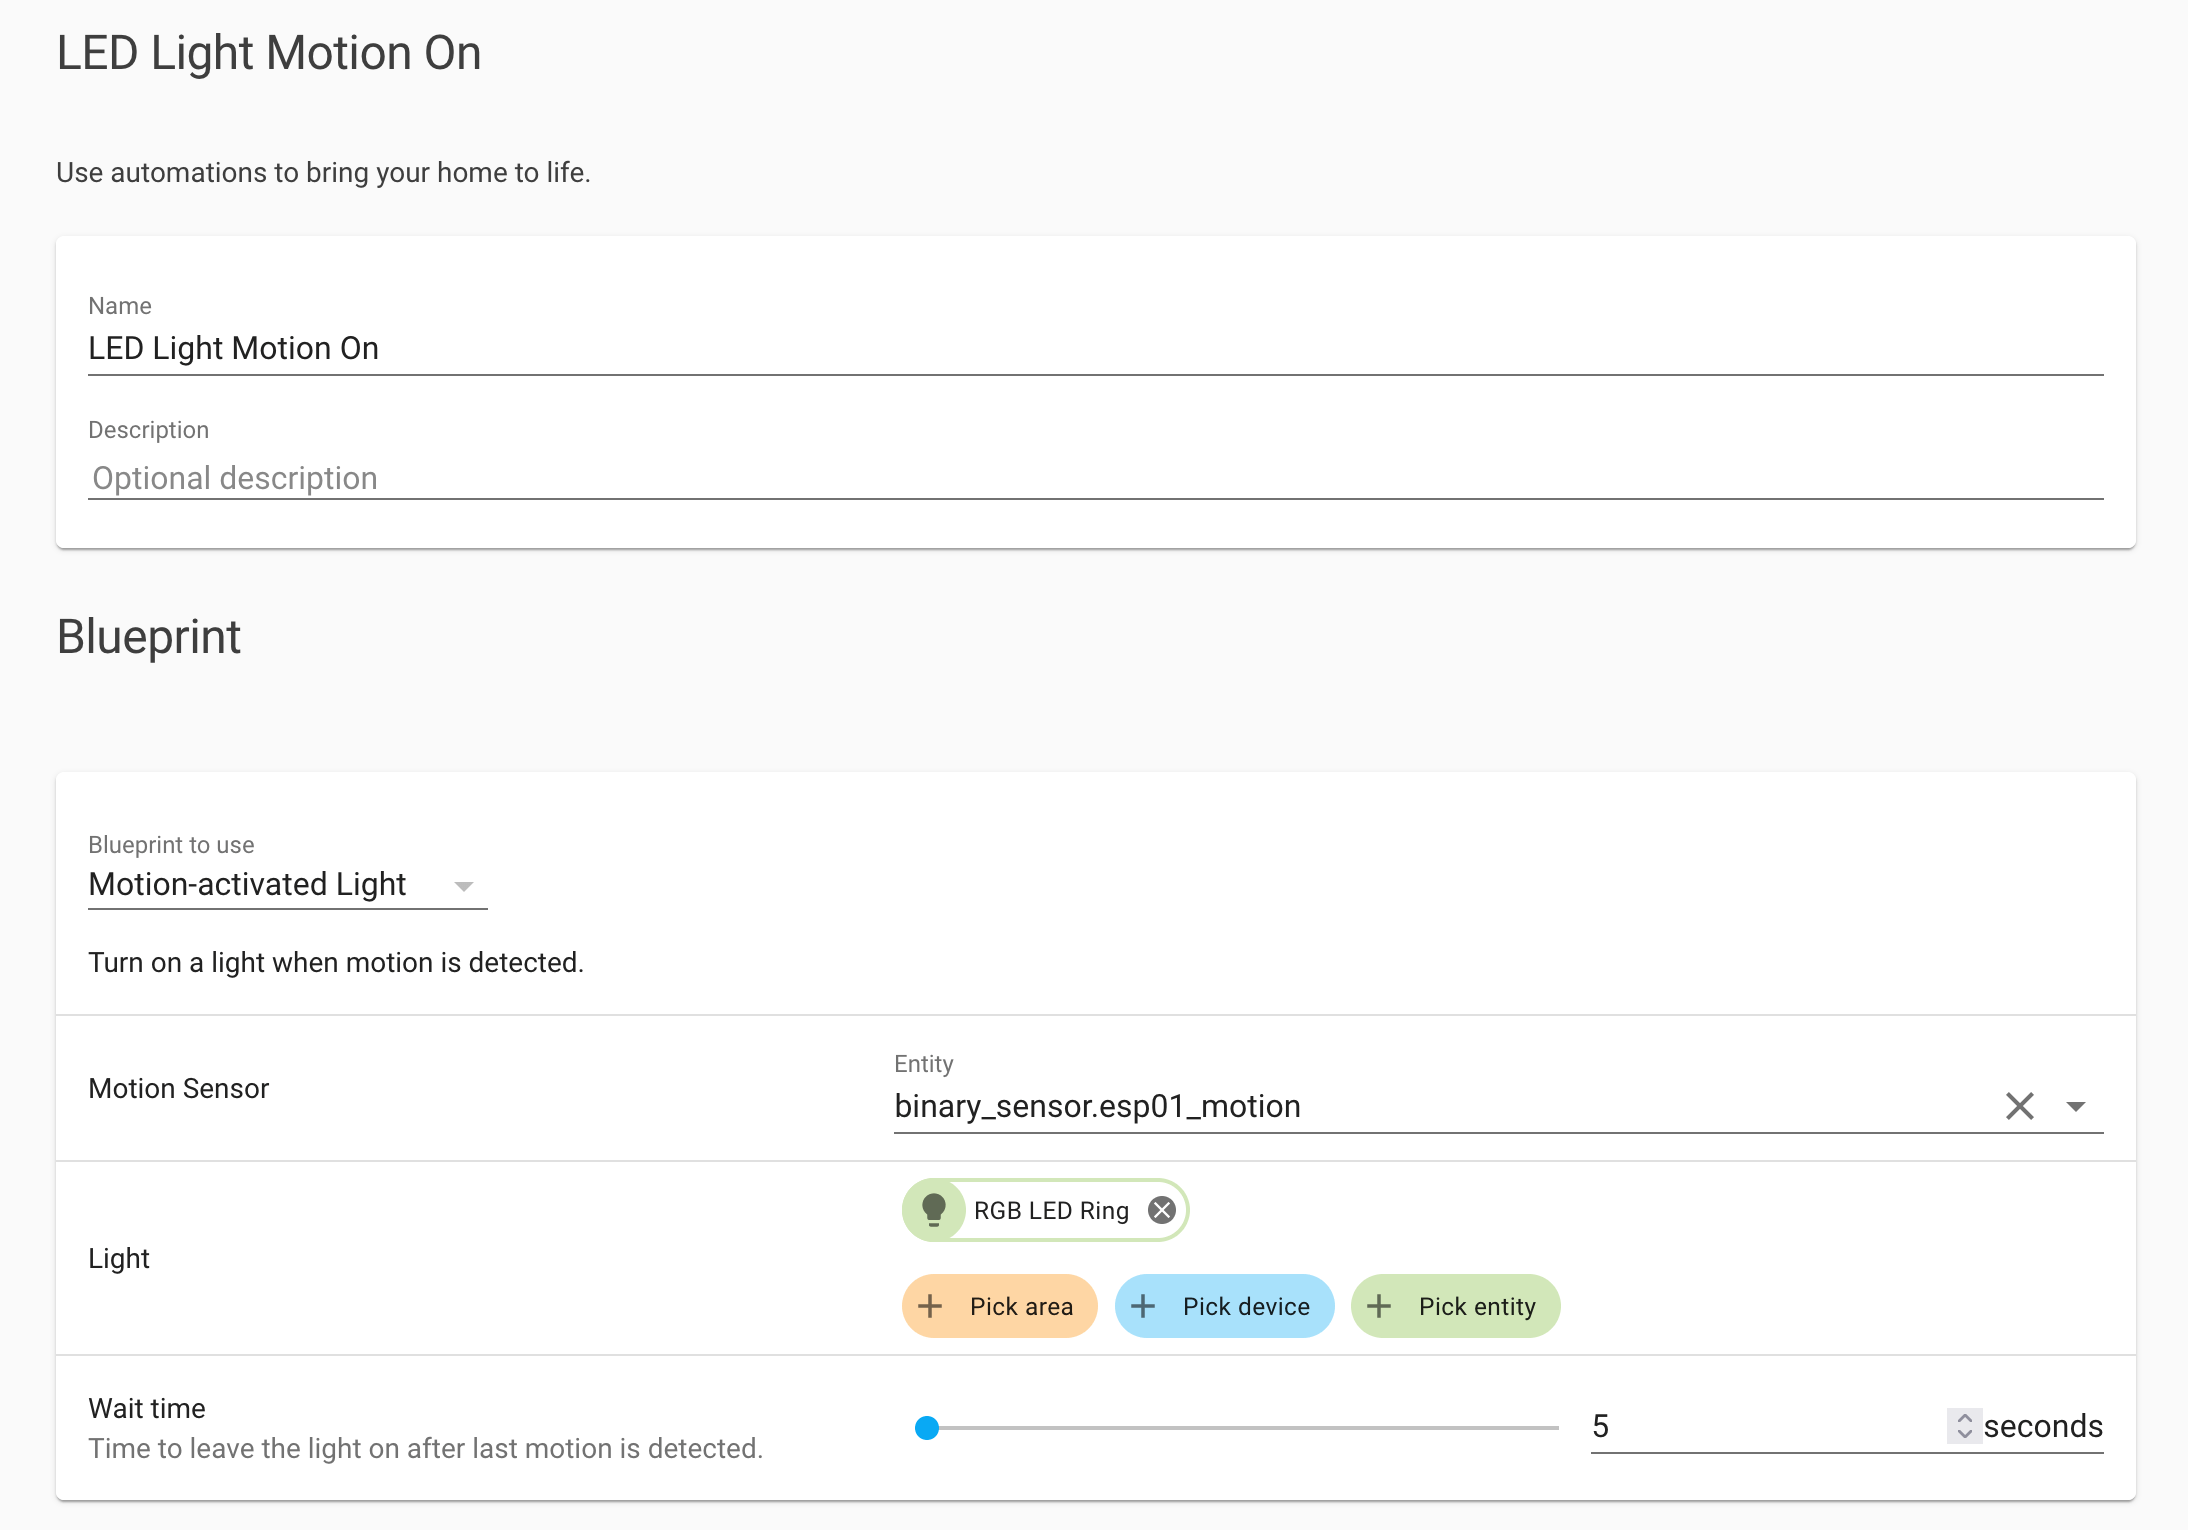
As all things in Home Assistant, these choices will ultimately create a small YAML configuration file. This captures the essential semantics:
alias: LED Light Motion On
description: 'Your IOT home network consist of different sensor that provide data about the environment related to different aspects, such as temperature and humidity in the air, the current level of your heater, or other binary data. And interesting and versatile extension are motion sensors. When properly calibrated, meaning that they do not send false positives, they can be helpful in many ways: Detect presence of persons (or animals!) to trigger other sensors, controlling the light, start to play music, or well raise an alert.'
use_blueprint:
  path: homeassistant/motion_light.yaml
  input:
    motion_entity: binary_sensor.espdht_motion
    light_target:
      entity_id: light.rgb_led_ring
    no_motion_wait: 5
You can also just copy it and fill in the details of your sensor for other automations. But I’m getting ahead - this topic will be covered in another article.
Conclusion
A motion sensor is a ubiquitous binary sensor that detects moving objects. In DIY home automation, PIR sensors are most often used. This article showed how to calibrate and connect a PIR sensor to an ESP8266 board, how to add it to ESPHome and Home Assistant, and finally how to use a simple automation for triggering a light.