TLS encryption of traffic is a security must have. In this article, I show how to create and install a self-signed certificate, and how to configure Nginx for providing encryption to all ingress and egress traffic.
My infrastructure at home is running: Docker as the execution environment for all applications, Nomad for scheduling Docker jobs, Consul for service discovery, and Traeffik as the edge router. In the next posts, I will evolve my infrastructure by securing the communications between the components and by adding new applications.
In the last article, I explained how to setup Nginx as a Reverse Proxy that uses Consul DNS entries to forward the requests. Now we need to encrypt all HTTP traffic. We will do this by generating TLS certificates with the openssl command line tool, and then configure Nginx to process HTTP requests.
With this, we will fulfill the following two requirements:
- Application Security
- APPSEC01: Secure all client to service communication with TLS
- APPSEC02: Secure inter service communication with TLS
Certificate Generation process
The normal way to generate certificates involves multiple steps:
- You create a certificate signing request on your severer
- You forwarded the request to a registration authority
- The registry authority checks the claim that you are the owner of the server, and sends an ok to a certificate authority
- The certificate authority generates the certificate and the private key
- The certificate is forwarded to a validation authority
- The certificate and the private key will be sent to you
- You install the certificate on your server
Do you need to follow all these steps? Well, it depends. If you want to provide a certificate for a service or web page which is public, then you need to involve a paid certificate authority or use the free, three months valid certificates from Lets Encrypt. If you need a certificate inside a local network, for a local domain, you can self-sign certificates.
Self-signed certificate will be our choice.
Creating Certificates with OpenSSL
The openssl command line utility is a versatile tool: It offers commands to create, sign and validate different types of certificates, t can be used to encrypt files or compute hash values from files, and you can test TSL connections from client to server 1.
To generate a certificate, we need to execute the following command:
openssl req -new -x509 -days 90 -newkey rsa:4096 -sha512 -nodes -out admantium.cert -keyout admantium.key
The flags look scary - lets understand them:
req: Make a new certificate requestx509: Create the certificate in X509 formatdays: Set the viability period of this certificatenewkey: Generate a new key using 4096bit RSAsha512: Use SHA-512 as the message digest algorithmnodes: Do not require a password for the key file (ONLY ok for self-signed certificates)out: Path and filename where the certificates should be savedkeyout: Path and filename where the certificate should be saved
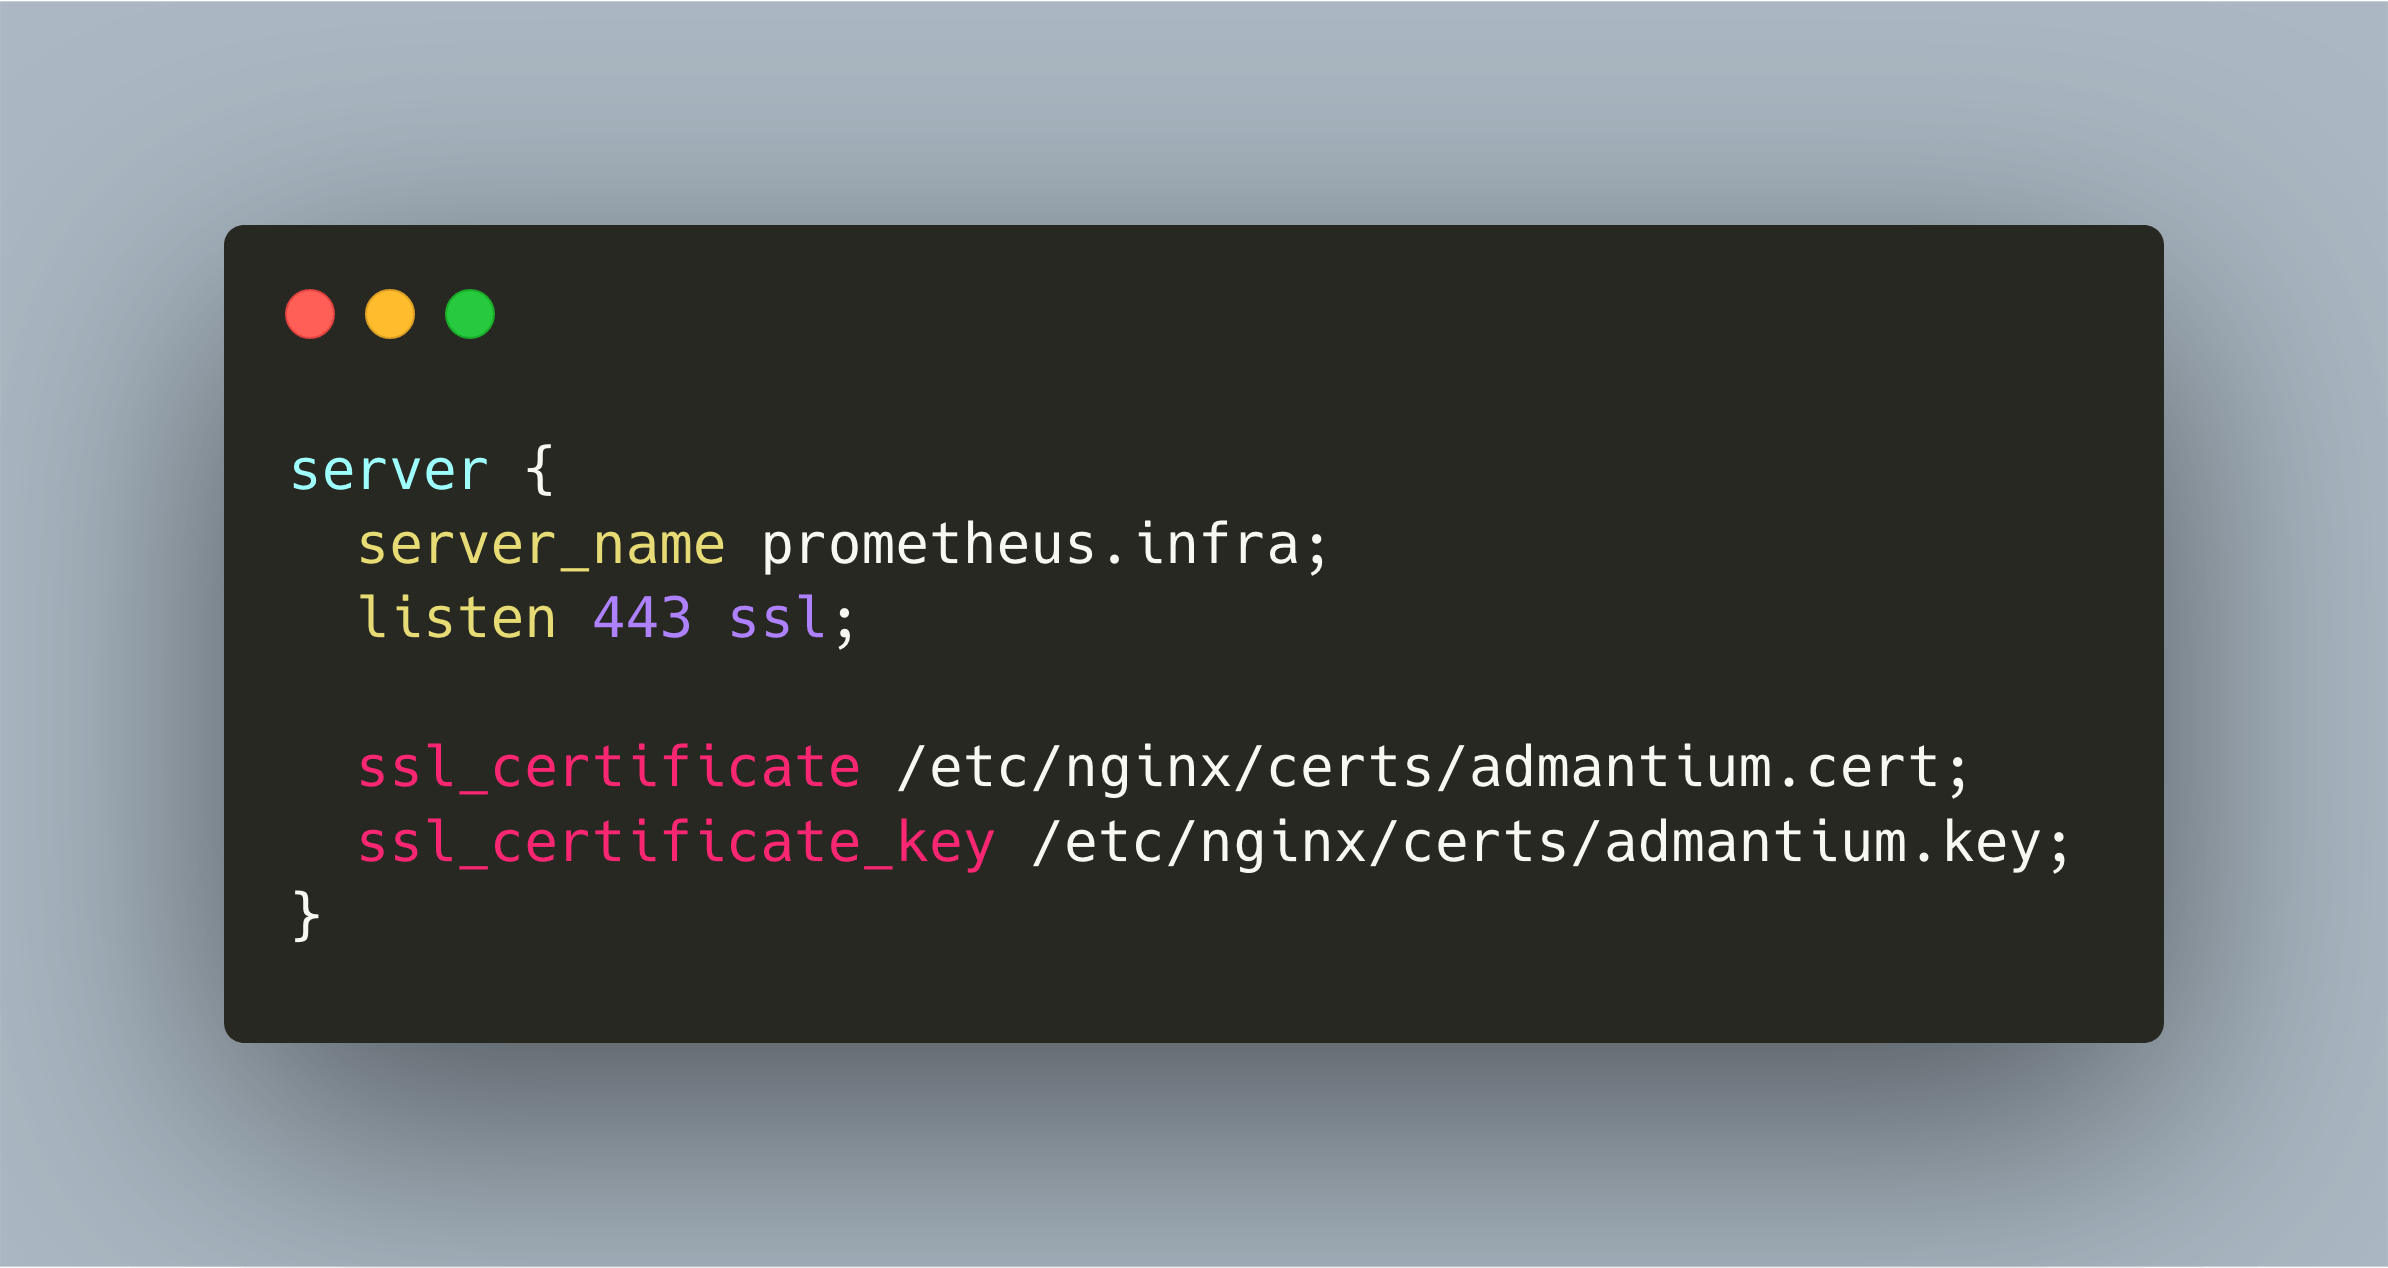
The next step is to use the required directives in Nginx, as shown in the next snippet:
server {
  server_name prometheus.infra;
  listen 443 ssl;

  ssl_certificate /etc/nginx/certs/admantium.cert;
  ssl_certificate_key /etc/nginx/certs/admantium.key;
}
listen 443 ssl: Listen on port 443 for incoming TLS connectionssl_certificate: Path and filename of the certificatessl_certificate_key: Path and filename of the certificate key
Finally, to increase the security, I also recommend to add the following directives to the http block:
http {
  ssl_protocols TLSv1.2 TLSv1.3;
  ssl_ciphers "ECDHE-ECDSA-AES256-GCM-SHA384:ECDHE-RSA-AES256-GCM-SHA384:ECDHE-ECDSA-CHACHA20-POLY1305:ECDHE-RSA-CHACHA20-POLY1305:ECDHE-ECDSA-AES128-GCM-SHA256:ECDHE-RSA-AES128-GCM-SHA256:DHE-RSA-AES256-GCM-SHA384:DHE-RSA-CHACHA20-POLY1305:DHE-RSA-AES128-GCM-SHA256";
  ssl_prefer_server_ciphers on;
}
ssl_protocols: The supported protocols - only use TLS1.2 and TLS1.3 since older versions have security weaknessesssl_ciphers: With this list you control the available encryption methods that Nginx and the client can use for exchanging data, select only strong ciphersssl_prefer_server_ciphers: A flag that specifies to use the offered ciphers, not those that the client offers.
Testing the Connection
Restart Nginx and browse to a page. Your browser will notify you that “the page is not secure” - a very misleading message! The message is about complaining that the certificate authority is not a well-known one - which is true, since we self-signed the certificates. But the connection is secured with TLS encryption. You need to accept the notification, and then browse normally.

Configure DNSmasq
The final piece is to set DNS resolution so that clients and services reach each other only via your TLS enabled proxy server. When you have followed my series, you know that I’m using DNSMasq. On each server, the DNSmasq configuration file needs to include an address setting that points to the server running Nginx.
address=/infra/192.168.2.201
Now you can resolve any https://*.infra addresses.
Critical Review
So, the goal is achieved, but it has two drawbacks:
- Static configuration: The configuration is determined when I configure Nginx by running an Ansible script. When a new service starts, I need to modify the Nginx configuration. If an existing service stops, Nginx will show an error. However, when the service comes back, which is the default behavior of the job scheduler Nomad, the Consul DNS resolution points to the new space.
- No dynamic ports: The open source version of Nginx cannot parse DNS SRV records to determine the dynamic ports of a service - this feature is available only on the paid version Nginx Plus. For now, I configure the all Services that are run with Nomad to use static ports. Then, in the Nginx configuration, I can refer to these static ports. This works for now. If the demand to oversee a high amount of services with dynamic ports arises, I could either use the Consul Template extension, a daemon with the task to watch variables and writes config files when they change, or I go back to a zero-conf router like Traeffik or Fabio.
Summary
This article explained how to provide TLS encryption to Nginx. We explored the OpenSSL command line utility to create a self-signed certificate. We showed how to configure Nginx to listen to TLS connection and provide the generated certificate. Finally, I showed how to configure DNSmasq to use Nginx for resolving all traffic inside the cluster.
Footnotes
-
See also this cookbook-style article for quickly to apply examples. ↩︎